
Learning how to create an online course takes some research. It’s not common for online course builders to offer free plans, and even then, you’ll often find that certain tools like email marketing and custom domains are removed from the free plans.
Yet, it’s important to have the option to run an online course for free; it allows you to test if a course has any potential before expanding and spending any money on it. In this tutorial, we’ll explain exactly how to create an online course for free, with the right tools and tips to get you on your way.
Keep in mind, however, that just about any online course platform will eventually charge you for features you’ll need as the business grows. So, you can run a free website to get started, but at some point, an upgrade to a premium plan is inevitable.
Keep reading our step-by-step guide to learn all about how to create an online course for free!
Tools Needed to Start an Online Course for Free
The tools you require depend on what you’re trying to achieve with the course. Online course building platforms already offer the essentials for making a website and listing courses online. They even provided the hosting and course moderation tools like forums and web notifications. Since we’re going with a free plan, however, you’ll most likely need to complement an online course creation platform with some other tools.
Luckily, our list is rather short to create an online course for free:
- Thinkific: This is the platform used to construct and list courses online. There’s a free plan with support for 1 course, 1 community, 2 spaces per community, 1 administrator, unlimited students, 0% transaction fees, and email support.
- Sendinblue: Free email marketing. Choose the Free plan for unlimited contacts, 300 emails per day, transactional emails, a drag and drop editor, SMS campaigns, and customizable email templates.
The reason we recommend Sendinblue for email marketing is that Thinkific lacks emailing functionality in its free plan. It has web notifications, but you’ll need a way to keep in touch with students through email, and to send out marketing messages.
So, get started by creating an account at Thinkific. Afterward, you can make a free account with Sendinblue. We suggest configuring most of Thinkific first, since you need to actually publish courses in order to make email marketing useful.
How to Create an Online Course for Free
The easiest way to create an online course with support for things like communities, unlimited students, and 0% transaction fees is through the Thinkific platform. It’s a one-stop shop for building an online course website, collecting payments, and generating essentials like quizzes and surveys.
Step 1: Make a Thinkific Account and Name Your School
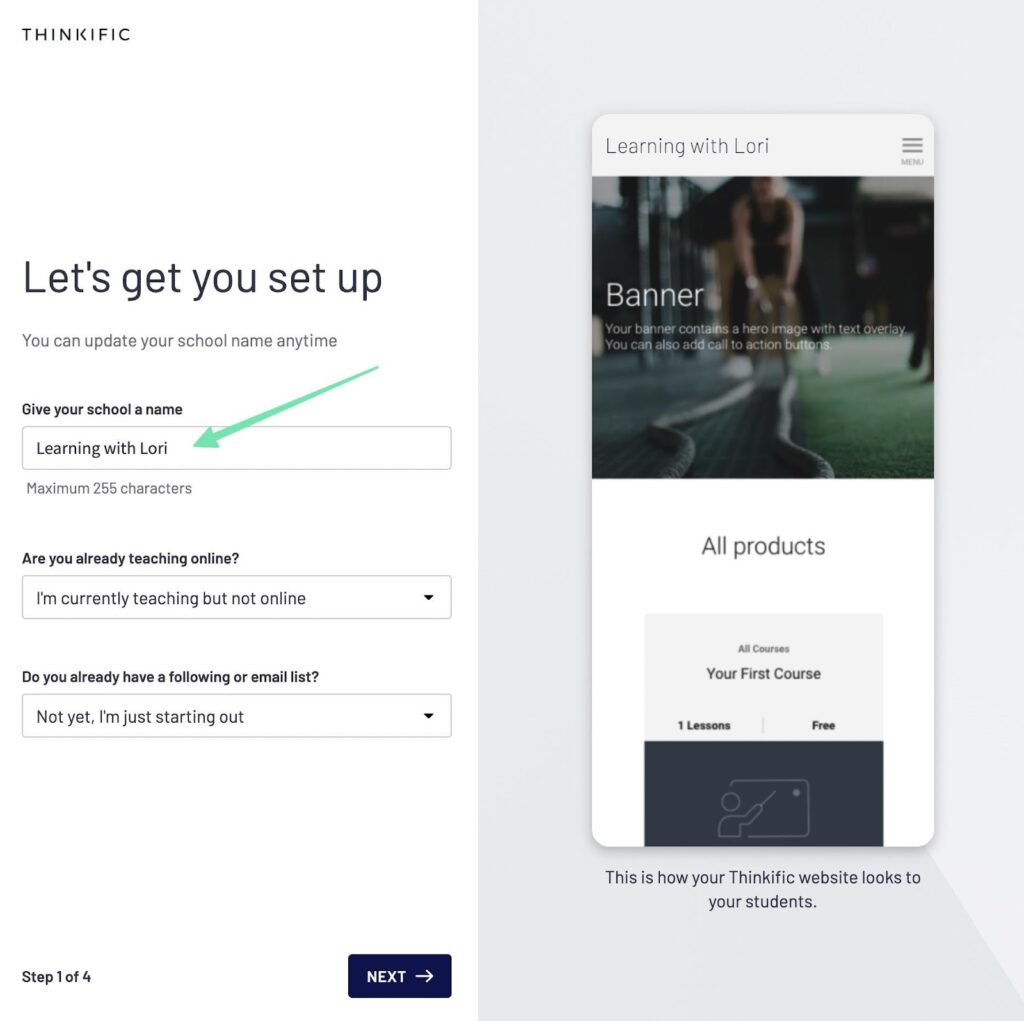
To get started, go to Thinkific.com and sign up for a free account. On the Account Creation page, fill in your email address and name, and create a password to log into your account.
Give the school a name, then click on the Next button to proceed.
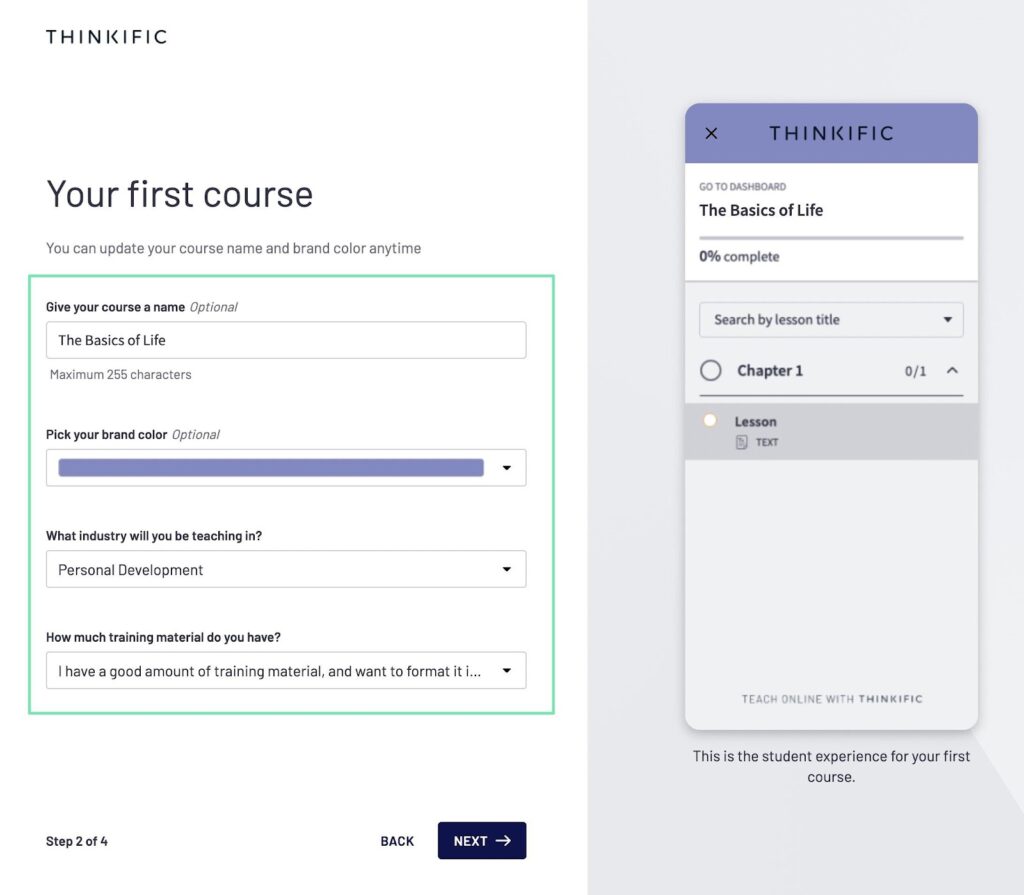
Thinkific asks you to create your first course. You can always change this in the future, but it’s a good idea to fill in something to see what the courses look like on your website.
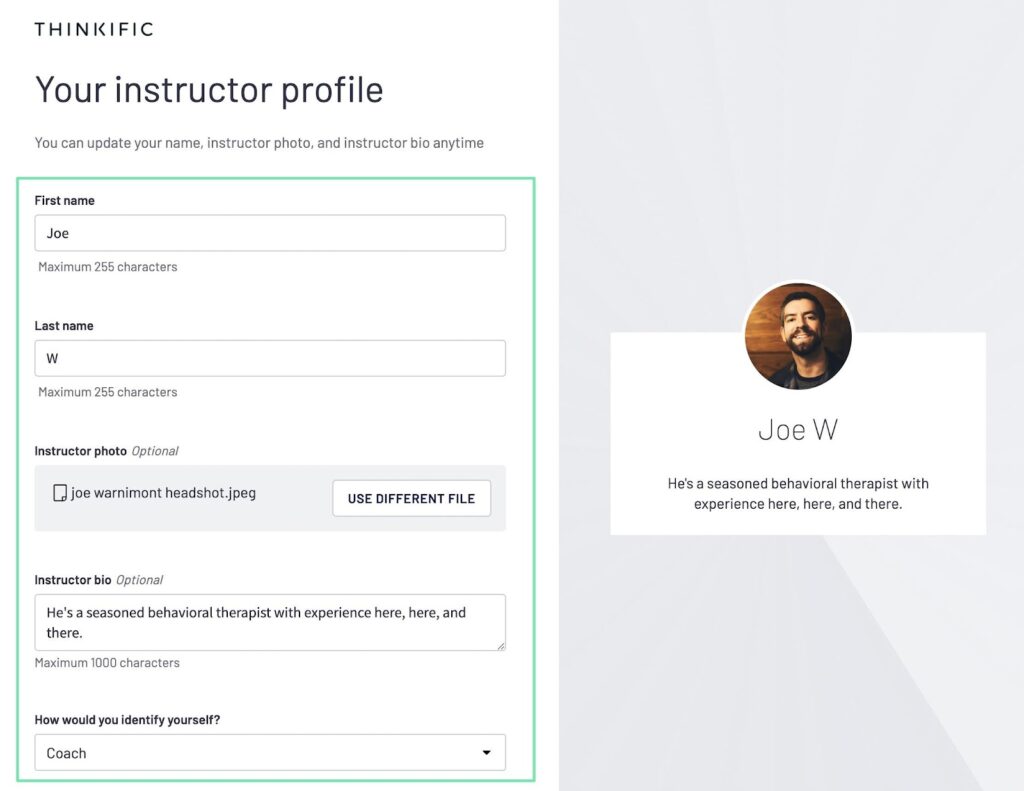
Fill in your:
- First name
- Last name
- Instructor bio
- Title
Also, upload an instructor photo to put a face to your courses.
Thinkific asks you some questions about your business. Tell them how many people currently work in the organization and if you’ve made any money before with online courses. You can also just skip these questions.

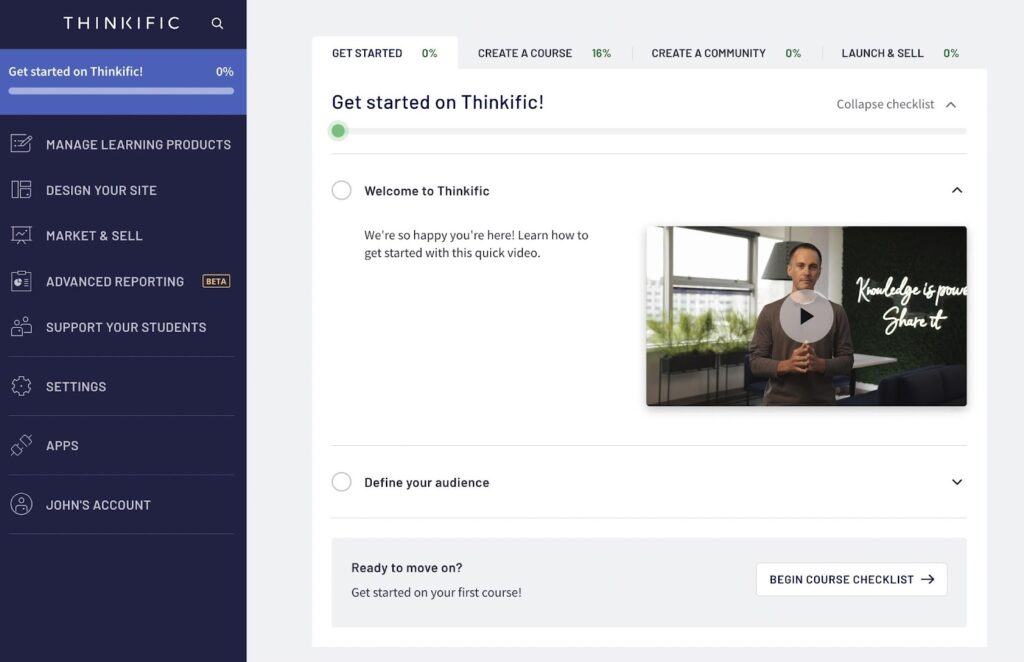
Thinkific now sends you to the admin dashboard, where you’ll find a Get Started guide, along with quick buttons to create courses, make communities, and sell your courses.
The main menu is the hub for everything within your online course:
- Manage Learning Products
- Design Your Site
- Market and Sell
- Advanced Reporting
- Support Your Students
- Settings
- Apps
- Account
Click on each of the tabs to gain some comfort with your main control panel. This is where you’ll do everything from marketing to course building, so it’s important to feel at home.
Step 2: Create Your First Course
Now it’s time to make your first course. With the free plan from Thinkific, you can only create one course; that’s a wonderful way to start selling and learning if the content you create is of value to students. You can always upgrade to unlock more courses in the future.
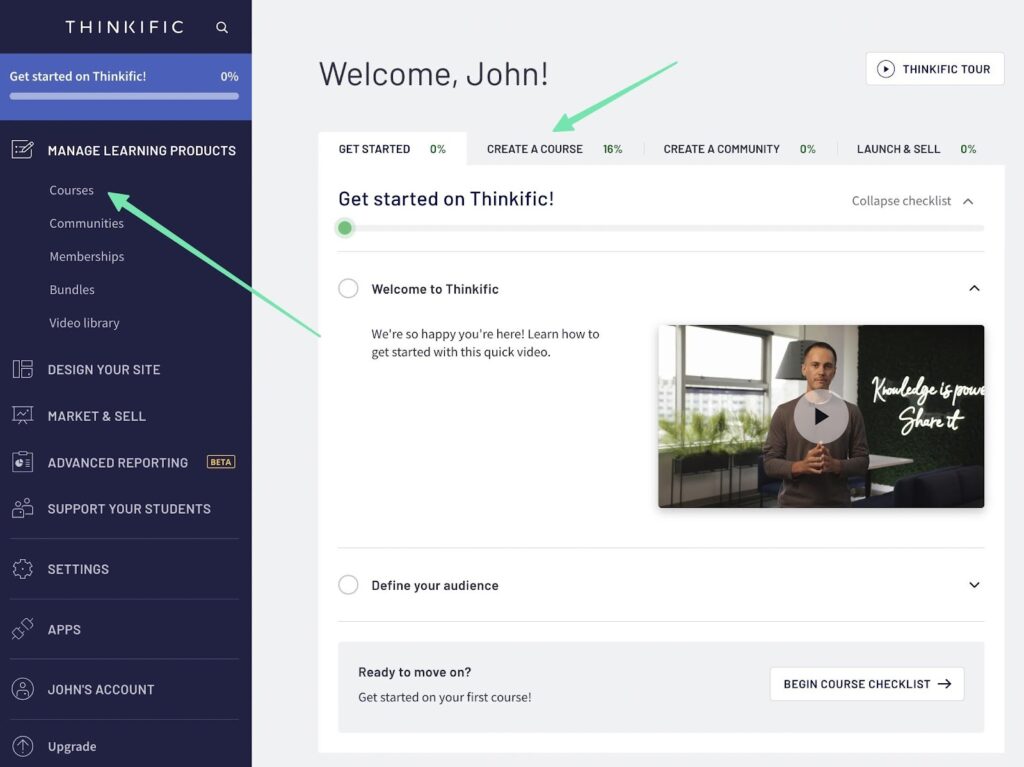
Within the Thinkific dashboard, click on Manage Learning Courses. This opens up several tabs for:
- Courses
- Communities
- Memberships
- Video Libraries
Click on Courses to proceed with making your first course. As an alternative, you can follow along the getting started guide and select the Create a Course step inside Thinkific.
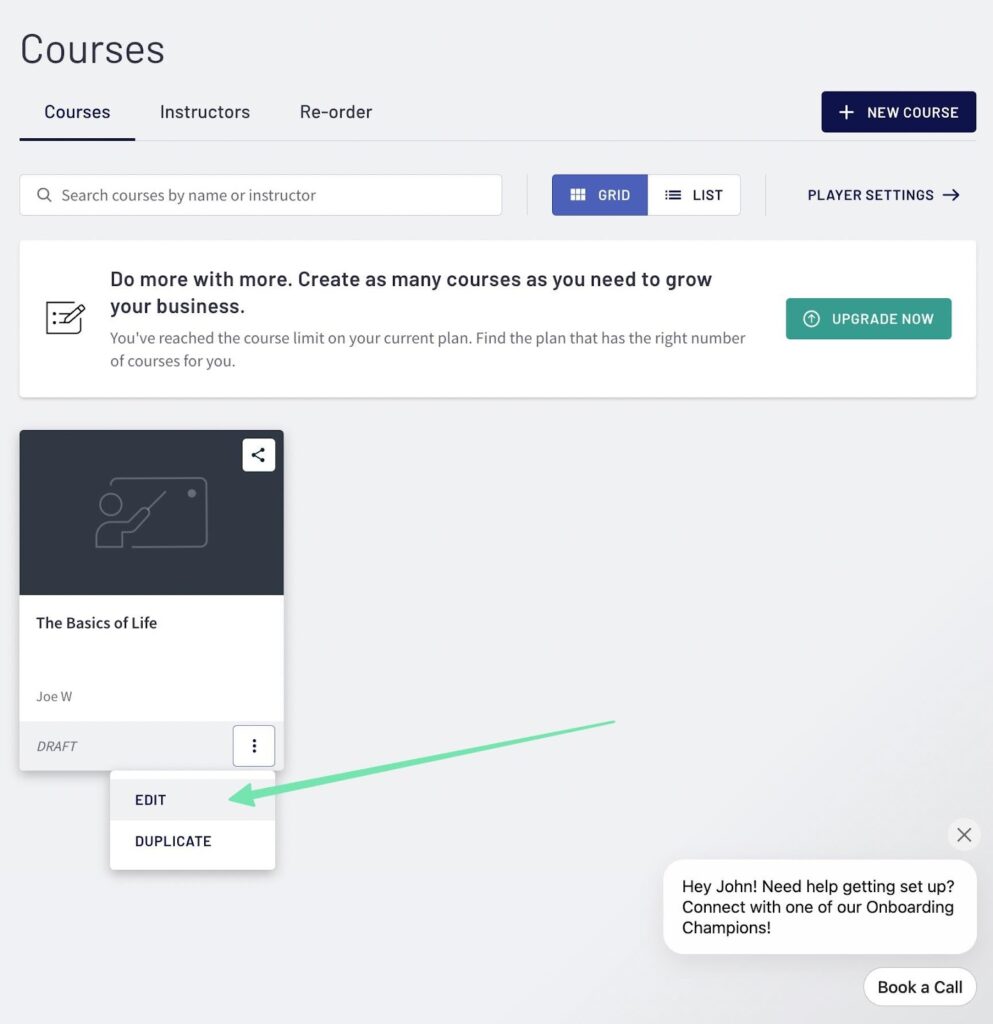
If you didn’t add a course in the sign-up process, click the New Course button. Otherwise, click on the dropdown menu for your current course and choose Edit.
Note: This Courses page is where you’ll come back to moderate all courses within your school. You can duplicate courses, add new ones, and edit the previously created ones.
Most of the course content is created outside of Thinkific. However, Thinkific helps you organize content like videos, text, and PDFs into an easily digestible format. In addition, it has tools for building content like text blocks, live lessons through a Zoom integration, quizzes, surveys, and assignments.
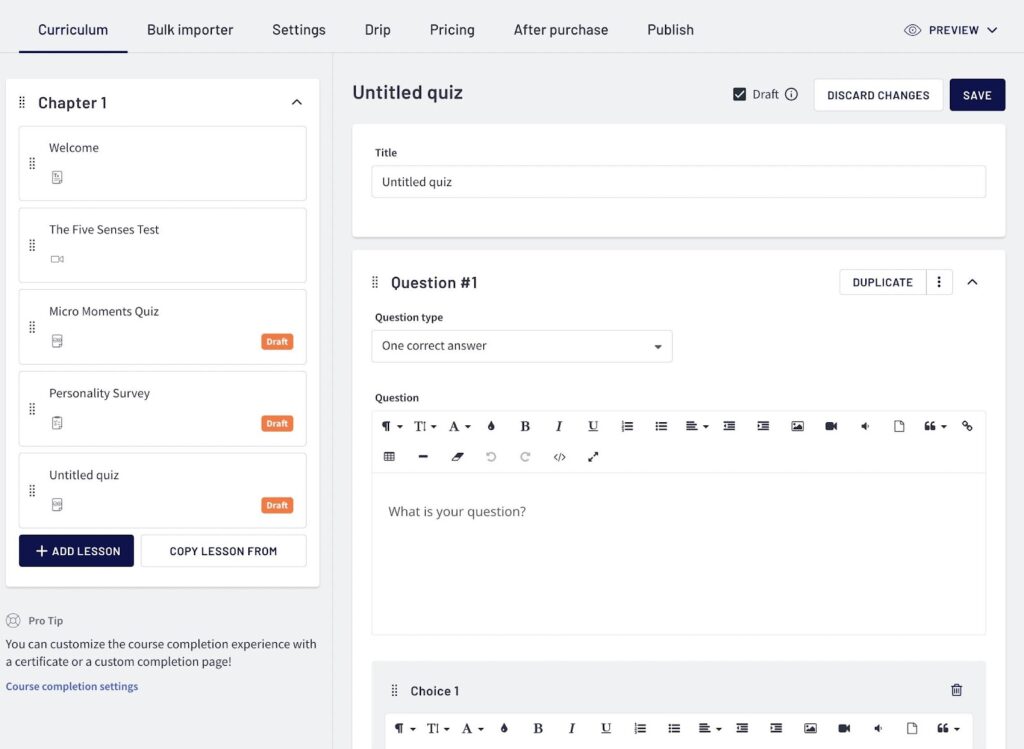
Under the Curriculum tab, click the Add Lesson button. Each click of the Add Lesson button makes a new section of the course for you to attach content.
The right side shows all content options. For each lesson, you might attach these types of course material:
- Videos
- Text
- Download file
- Audio clip
- Presentation
- Live video
- Multimedia (any type of media that’s not hosted on Thinkific)
- Quiz
- Survey
- Assignment
- Exam

Pick a type of content for that lesson. Thinkific displays a New Lesson page catered to the type of content you intend to add. Type in a Title for the course topic, then move to the fields specific to content types. As an example, a video lesson offers a button to upload a video file from your computer. PDF and audio lessons are similar.

Quizzes, surveys, exams, and assignments are different from the learning content. They are assessments that you build right from Thinkific. A quiz, for example, asks you to:
- Name the quiz
- Type in a question
- Fill in an answer to that question (or multiple choice answers)
You then save the quiz, survey, or exam, and add it directly to the course outline.
When you’re done uploading e-learning content—and assessments—move onto other settings to present your course in the right way.
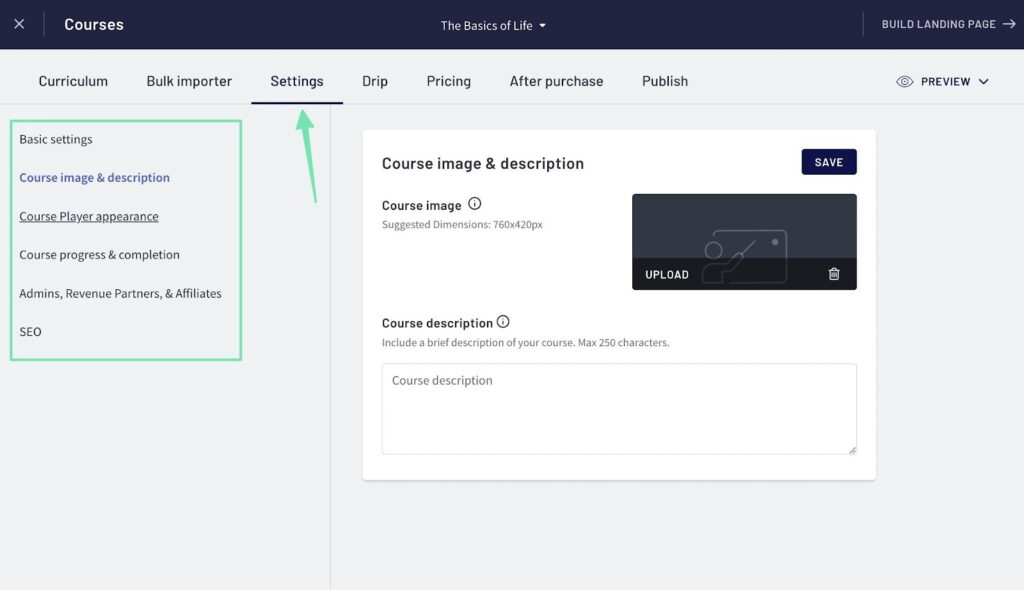
Click the Settings button. Here, you’ll discover several tabs:
- Basic Settings
- Course image and description
- Course player appearance
- Admins, Revenue partners, and affiliates
- SEO
We highly encourage you to configure the SEO (search engine optimization) to get discovered by potential students seeking out course content similar to yours online. The Basic Settings are useful as well, offering fields to change the course name, set its URL, and make it private or hidden. It’s also important to dive into the Course Image and Description section. Fill out a detailed description of the course (to explain what it’s about and convince people to pay for it), and upload an image that reflects the content of that course.
There are several other menu items to consider when creating a course in Thinkific:
- Bulk Importer: To automatically upload multiple content files to your site. This is particularly helpful when you’ve already made several audio clips, videos, or PDFS.
- Drip: A way to drip content to students as they progress through the course. This is a premium feature.
- Pricing: Where you set up a payment processor and mark pricing for each course. It’s possible to give away courses for free, too.
- After Purchase: Upsells and promotions that are useful while customers move through the checkout area. This is a premium feature.
- Publish: How you make the course live for everyone to see.
Navigate to the Publish tab when you’re done configuring every aspect of the course.
Pick one of the publication statuses:
- Draft: Pick this option if you’re still building the course. Students can’t see the course content or choose to sign up.
- Pre-order: A useful option for accumulating pre-sales while planning for your next course. Collect payments through Thinkific with a simple course description and preview content.
- Published: This means the course is completely ready to go and shown on your website. Students can view the course content, sign up, make payment, and access the content once enrolled.
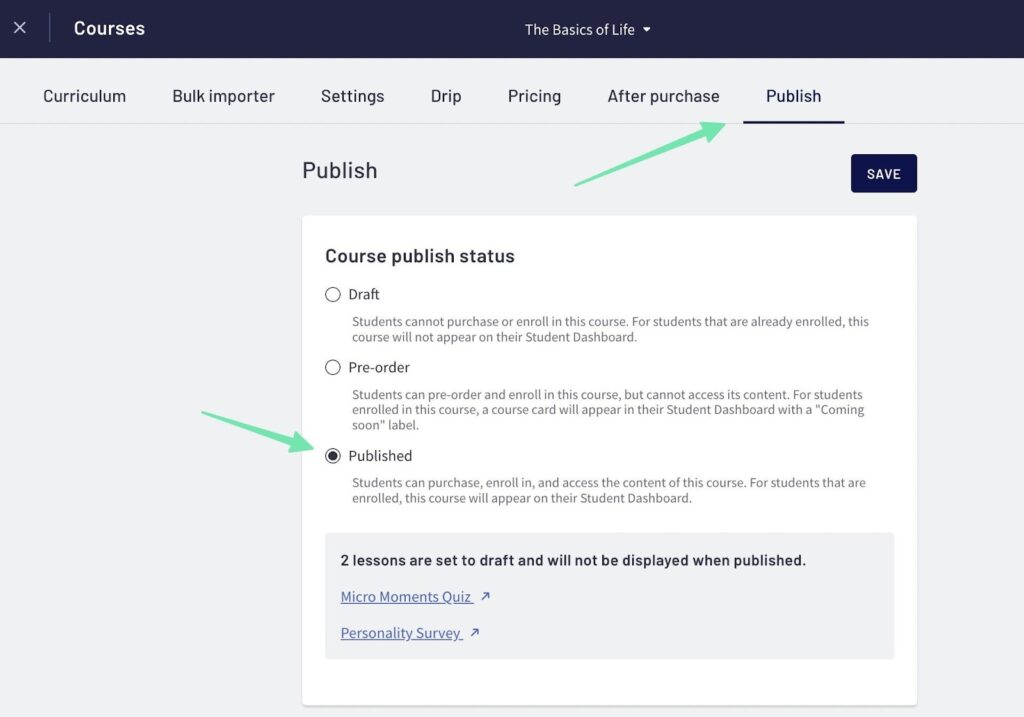
Pick which status you want, then click on the Save button to complete the process.
Step 3: Configure Payment Processing and Set Course Pricing
Not only does Thinkific include payment processing with its free plan, but that comes with a 0% transaction fee, making it one of the few online course creators without a fee to use its free plan.
Unless you’re giving away courses for free, you’ll want a payment processor configured. Thinkific Payments is the built-in gateway, and you can turn it on by going to Settings > Payments in the Thinkific dashboard.
Choose your country, and click on the Set Up Thinkific Payments button to sell online courses.
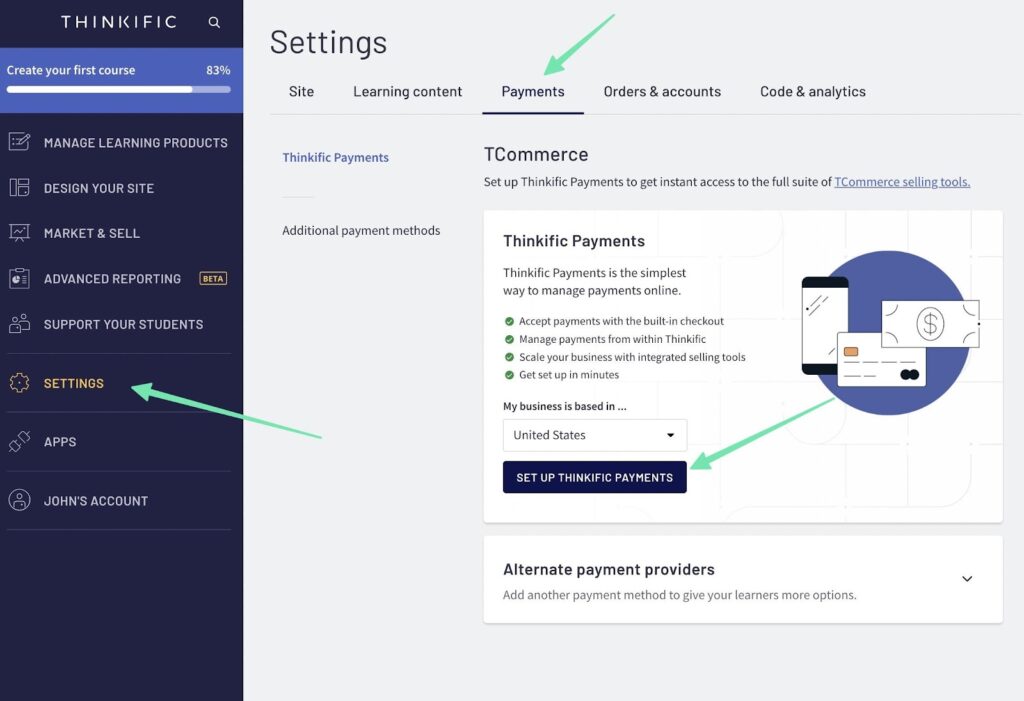
Thinkific Payments is powered by Stripe, so it prompts you to either configure a new Stripe account or sign into a previously owned account. Either way, make sure you add elements like payout details and pricing currency.
You might also explore an alternative payment option like PayPal. This allows customers to pay via PayPal, which for some may come in handy if they’re already logged into their PayPal account.
Only after setting the payment processor can you move onto pricing a course. Therefore, jump back to the Pricing page to set primary pricing for your online class. Thinkific offers monthly payments and subscriptions in its premium plans. For the free plan, you can opt for the Free or One-time Payment options.
Go with a Free course when you want to provide some sort of preview content to students. Giving away an entire online course for free makes little sense (unless of course you intend to use it to feed into your premium courses).
The one-time payment pricing method works well for the vast majority of online courses. It means that someone comes to your website, makes a payment, then has access to your course for an unlimited amount of time, or for a set enrollment period.
Select the One-time Payment box, and type in a price for the course. Mark a certain number of days for the Enrollment Duration. You can leave it black to set each enrollment as unlimited.
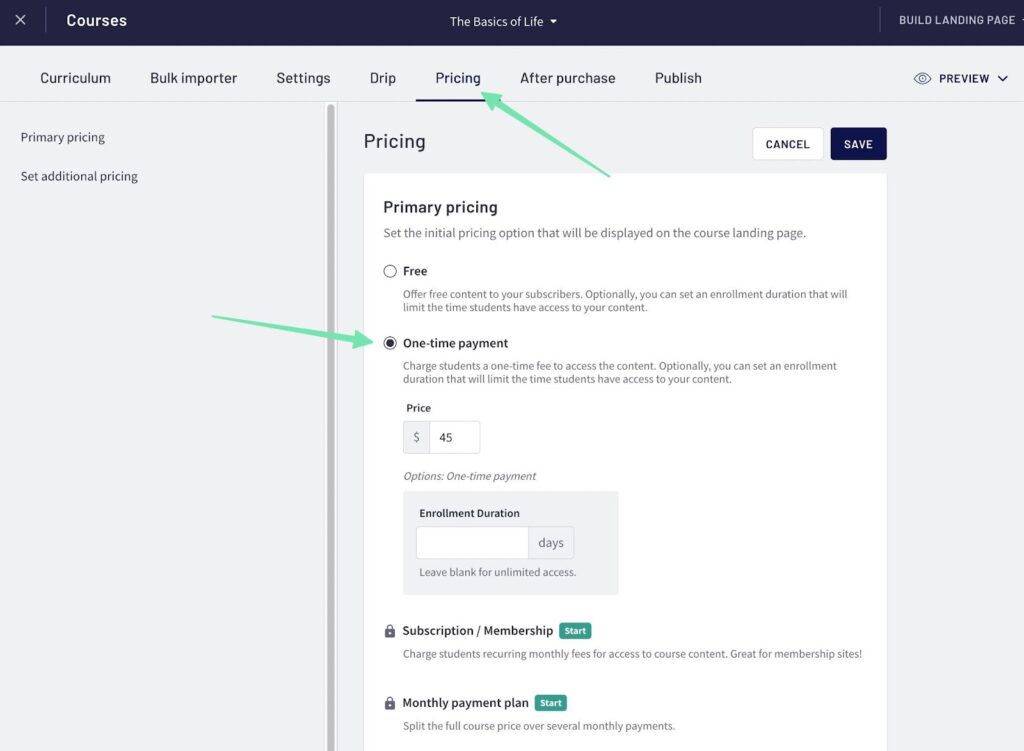
Be sure to click Save when you’re done setting the price and all settings for the course.

Step 4: Make a Landing Page for Each Course
The presentation of your school and online courses makes all the difference in selling it to potential students. When you have multiple courses (which requires a premium plan through Thinkific), you’ll design a primary homepage for the school, along with several landing pages dedicated to each course. For a one-course school, it makes sense to put all focus on the individual course.
To build a landing page for each course, go to Manage Learning Products > Courses in Thinkific. Click on the course you’d like to control. While looking at the curriculum page, you’ll notice a button to Build Landing Page. Click that.
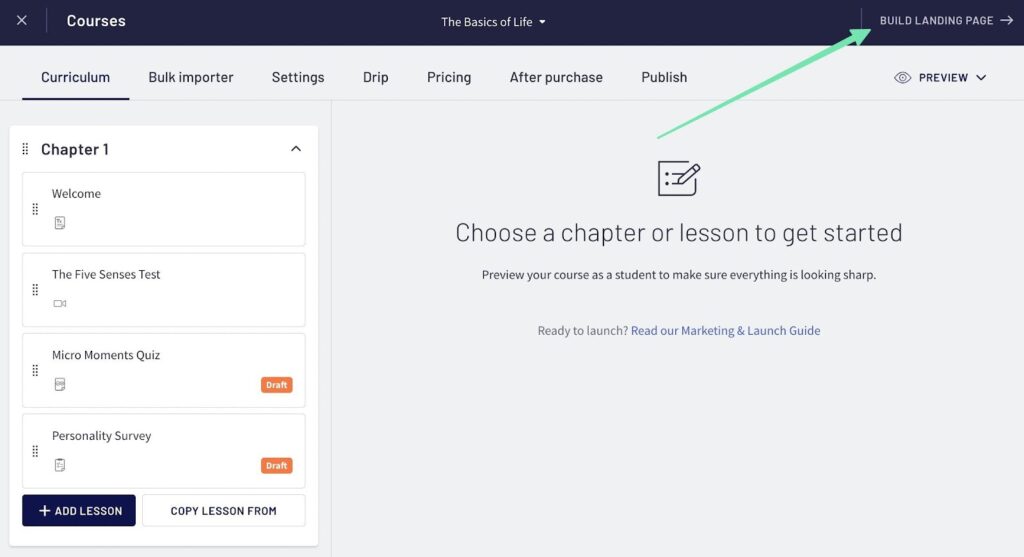
The landing page builder is like any visual, drag-and-drop website designer, where you click on modules to edit their settings and add new blocks to construct the entire page.
We recommend starting on the Page tab to set things like the banner, curriculum, call to action, and footer. Luckily, Thinkific already formats each landing page for you; this way, you never have to start from scratch when designing a landing page.
Scroll over each section of the landing page to edit the section settings.

Click on the Theme Settings tab to edit:
- Styles
- Site preview refresh
- Colors
- Desktop typography
- Mobile typography
- Favicon
When learning how to create an online course for free, you’ll discover that the styles and colors are how you make the site stand out. This is where you devise the overall look of your brand, with memorable fonts, logos, and colors.

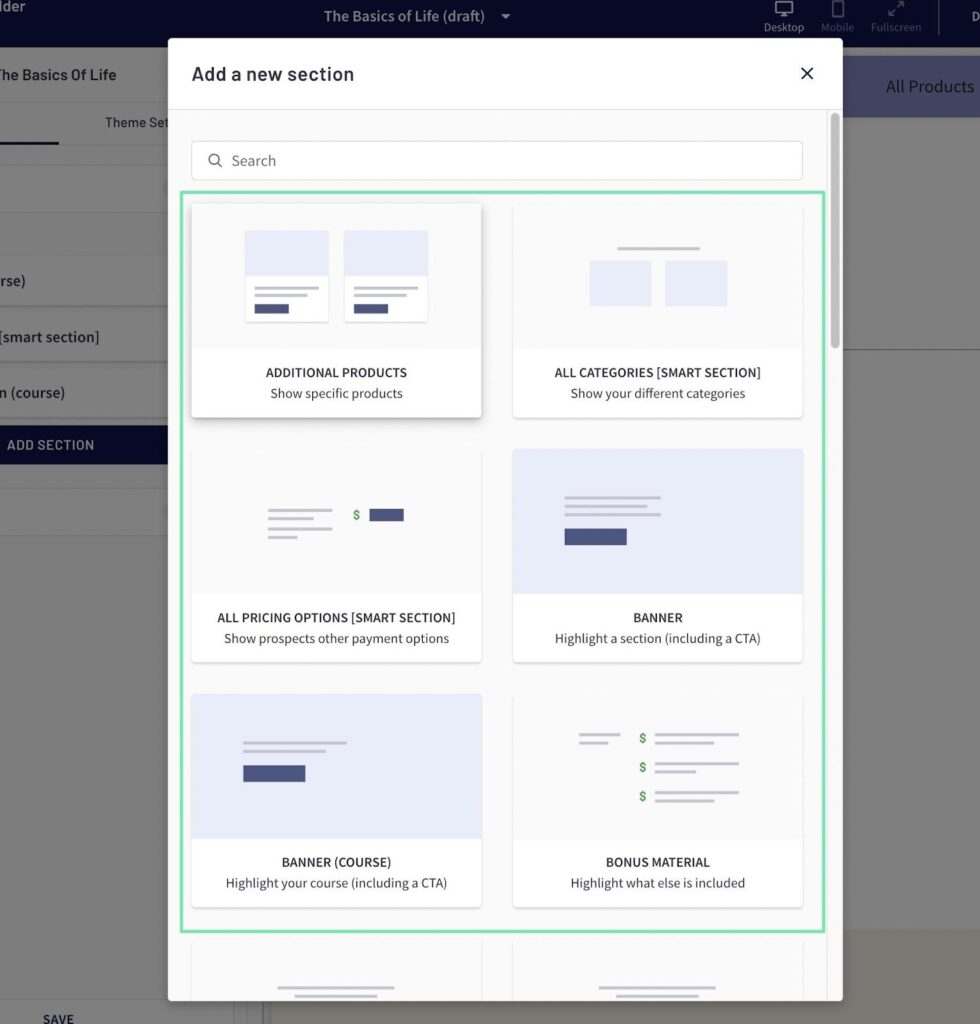
If you’d like to incorporate additional sections to the landing page, click on the Add Section button. This places a new section below the lowest one on the page.
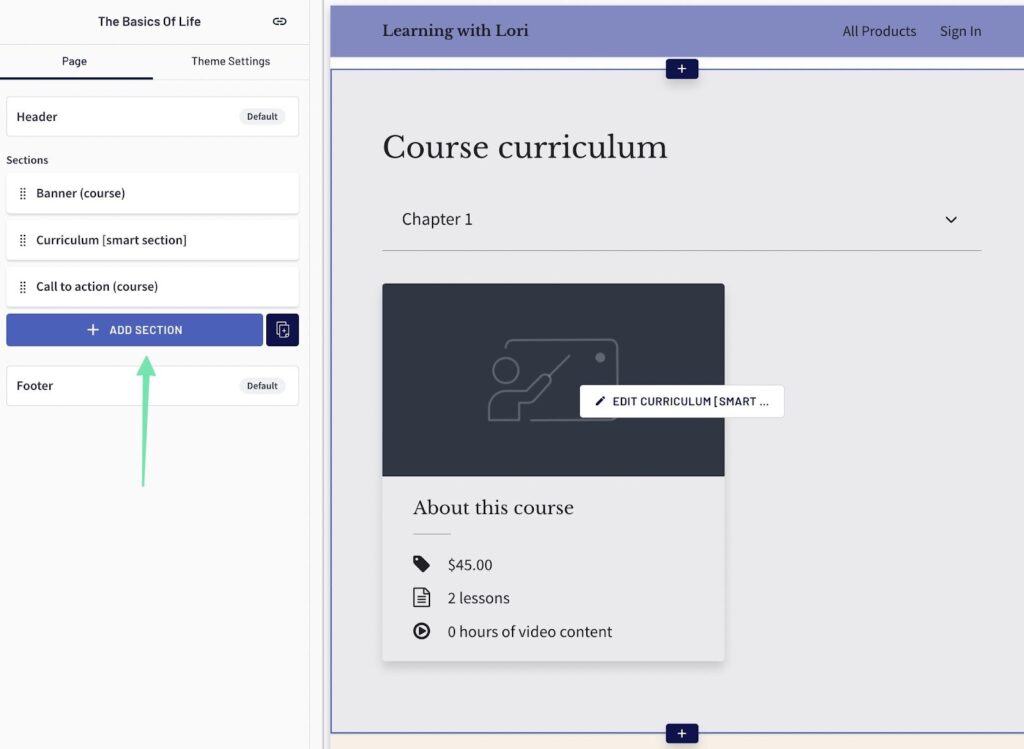
Thinkific offers a large collection of prebuilt sections, ranging from additional product modules to bonus material. There are even sections for pricing options, banner content, and categories. Scroll through the long list of sections to customize your landing pages however you see fit. What’s more is that each section has its own settings panel for further designing.
Step 5: Design Your School Website
The school website is where students log in to access their courses. It also serves as a general landing page to highlight the entire gallery of courses available on your site. As mentioned before, you may only focus on one course if that’s all you have with a free site. However, it’s possible to expand upon those individual landing pages if you intend to make the site more creative, or you want to add courses to the collection.
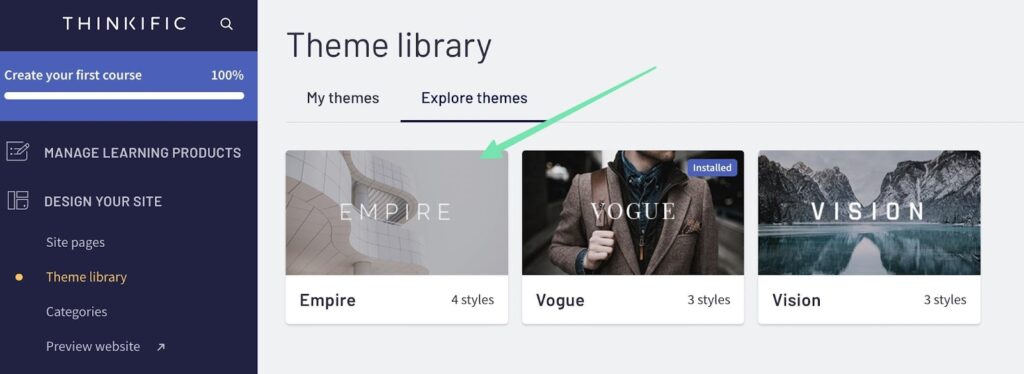
The best way to go about designing your course website is to find the Design Your Site button in the Thinkific dashboard. Open that to reveal options like Site Pages, Theme Library, Categories, and a button to Preview Website.
Begin with the Theme Library item.
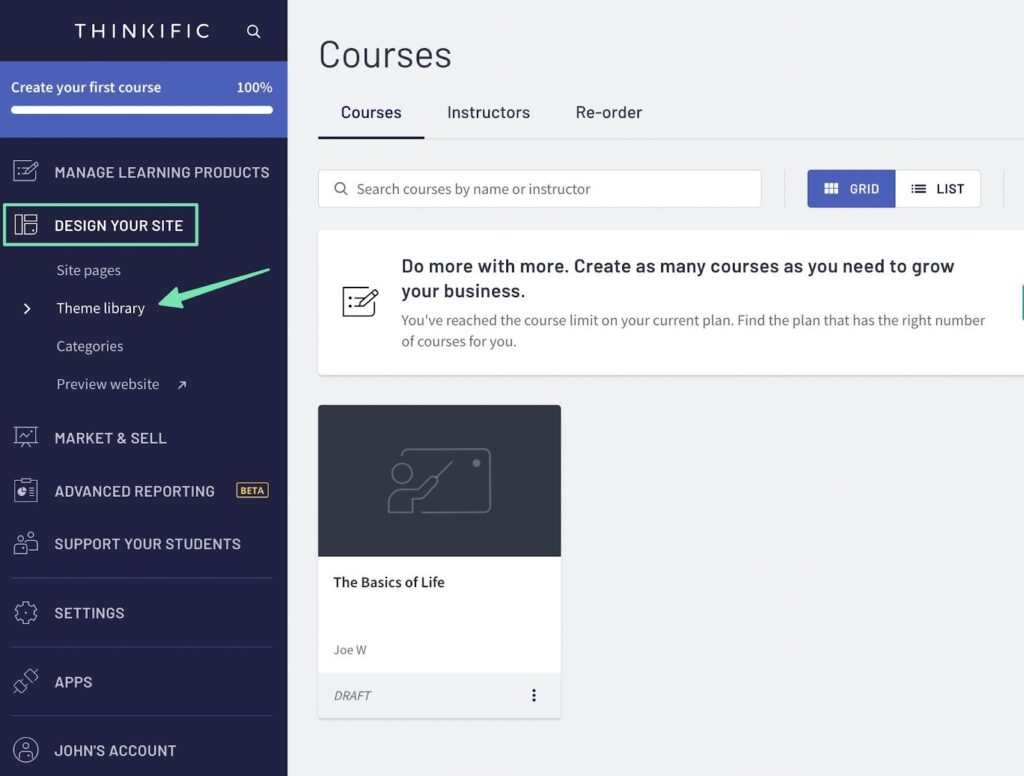
This reveals all of the themes available through Thinkific. The library isn’t a large one, but each theme provides plenty of customization and branding options to make your site look unique. In addition, all themes have multiple styles that vary significantly from one another.
To add a theme that’s different from the default option, click to preview the one you like.
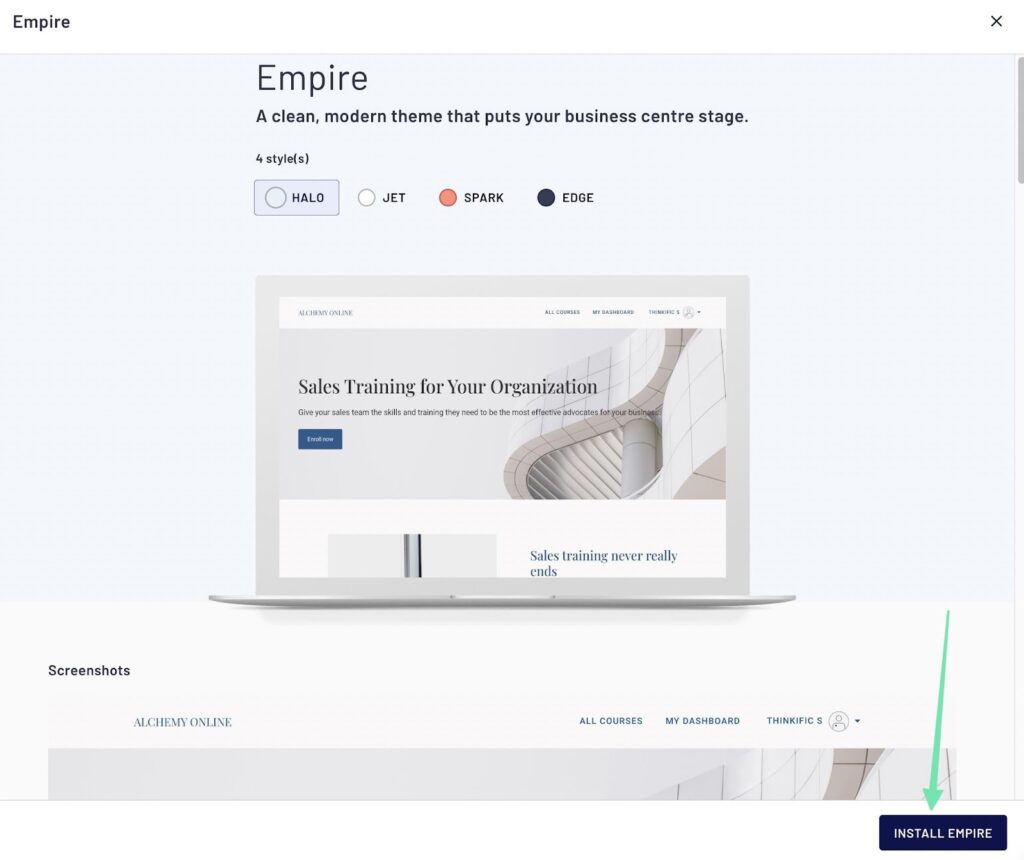
The preview presents all styles available, which you can click to change. Scroll down on the page to get a feel for its features, design, and overall style. There’s a list of its main sections, along with examples of the types of pages you can make with the theme.
Click on the Install button when you’re ready to activate it on your website. If you’ve already added online course content to the site, make sure you select the option to transfer all content to the new theme. There’s another theme import setting that deletes everything, to start from scratch.
With the new theme installed, feel free to click the Preview Website button underneath Design Your Website. This is an excellent way to understand how the design is turning out, and what you must do to make it a finished product.
To continue designing the theme, click the Site Pages button in the main menu.

Click on the New Custom Page button to generate a:
- Homepage
- Contact page
- Resources page
- FAQs
- Or anything students might find useful
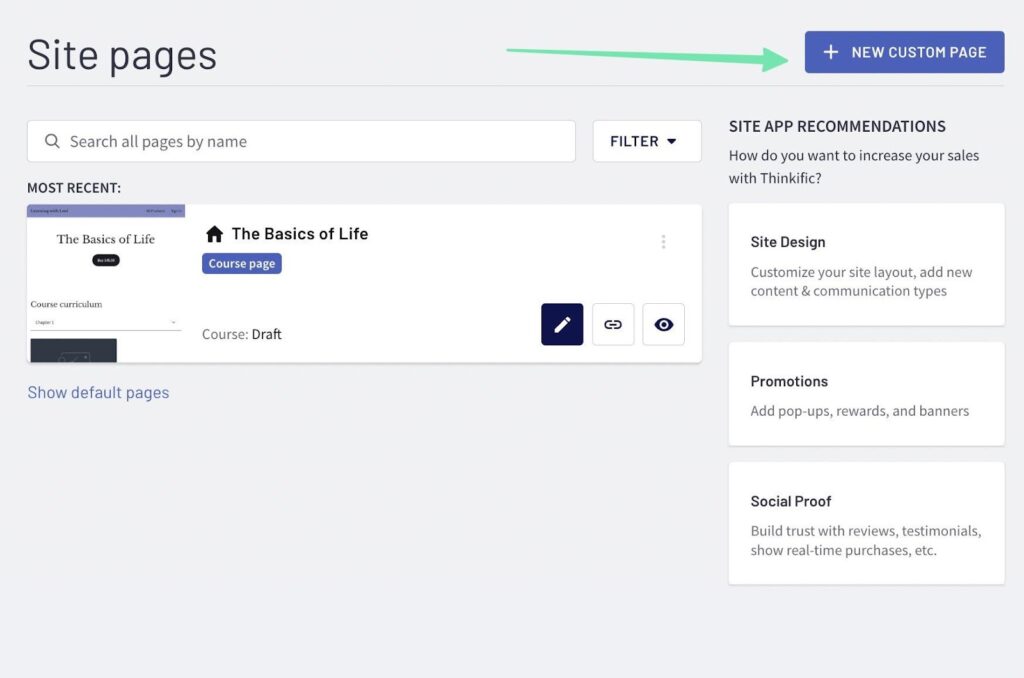
There’s also a list of site app recommendations for customizing the site layout, adding new content, and even incorporating new communication types. We recommend looking into the entire Thinkific App Store to explore everything from social media elements to promotions.

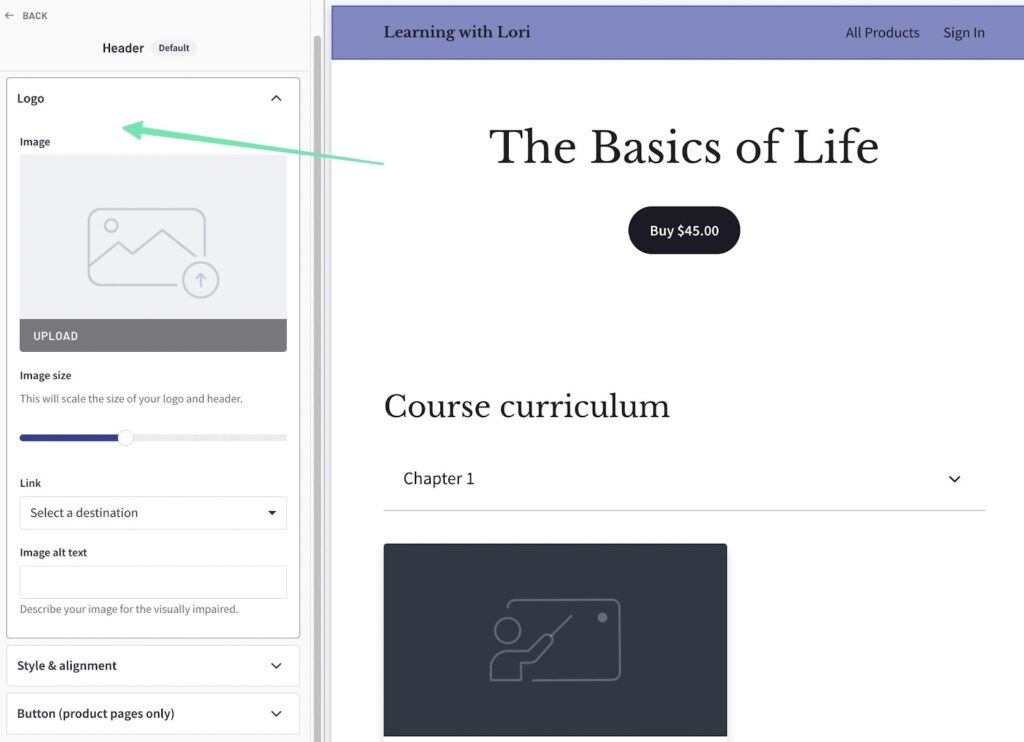
When in the site designer, you can work on your homepage, course landing pages, or any page you add to the website. Begin by adding visuals. We recommend clicking on the Header section and uploading a logo that reflects the overall feel of your online school. Edit settings for the logo, like the image size, link, and alignment.
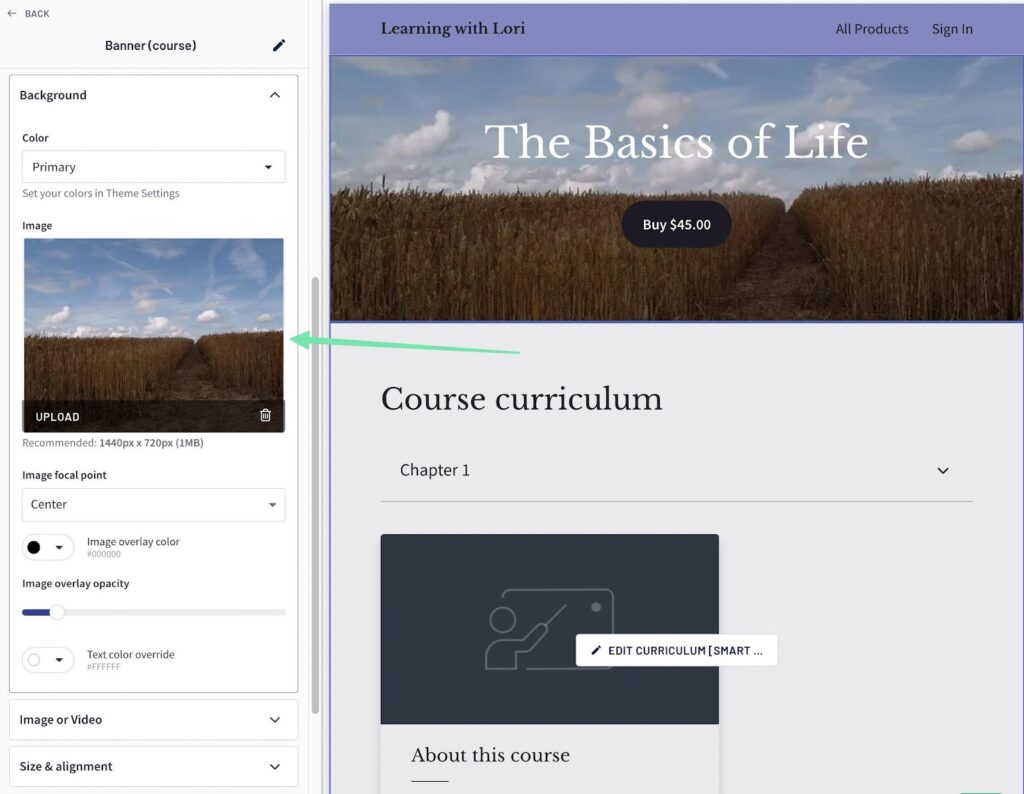
Select the Banner section on any landing page (or the homepage of your website) to upload a banner image. Select a primary color for the banner, and change around settings like the image overlay opacity, overlay color, and the image focal point. You might even look into adding a video banner instead of an image. Remember, every section you edit has an onslaught of settings for you to customize. Whenever you click on a section, scroll down to see everything that’s available. As an example, you’ll see that the Banner section offers tabs for size, alignment, video, and background.
Step 6: Market Your Course to Potential Students
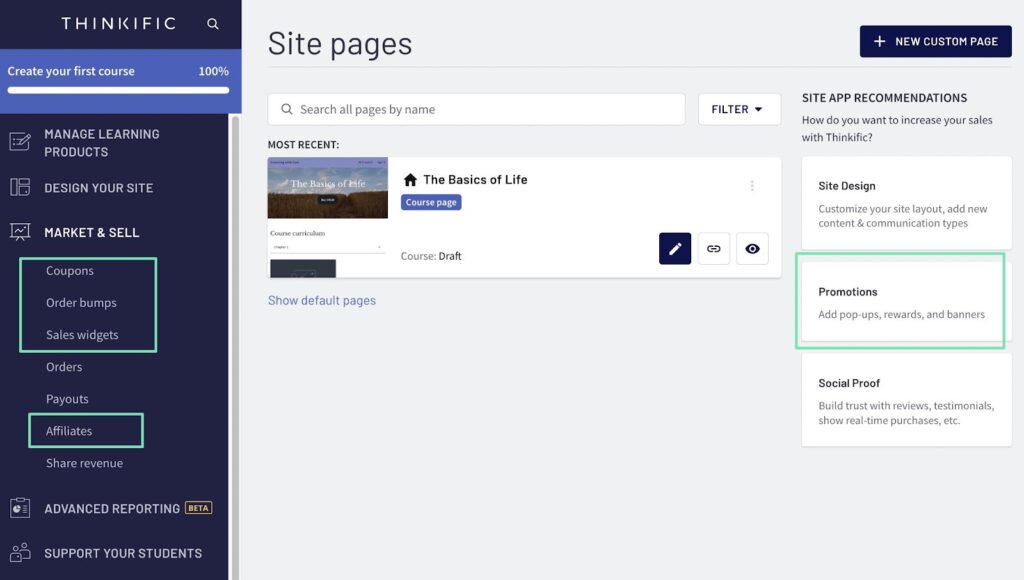
To bring students to your website, and make them stick around to sign up, you must market the website using tools inside and outside Thinkific. Some of the Thinkific marketing features are free, but most of them require a premium subscription. You can create coupons, an affiliate program, and pop-up promotions when you upgrade to a paid Thinkific plan. The free options include order bumps and sales widgets. Consider exploring the App Store as well, considering there are a few marketing tools you can get for free.
Since Thinkific lacks some essential marketing features in its free plan, you must turn to external apps and platforms for getting the word out about your school. That’s why we recommend signing up for the Sendinblue free plan, which provides up to 300 emails per day for free.
Although you’ll still rely on Thinkific for transactional messages, Sendinblue is your place for promotional emails. Use it to create a sign-up form (to build your email list), and design beautiful email marketing messages from the convenience of the Sendinblue dashboard. What’s great about Sendinblue is that you mustn’t rely on your server’s own abilities to deliver messages; deliverability is controlled by Sendinblue.
After you create a free Sendinblue account, go to the main dashboard. Click the Create a Campaign button.
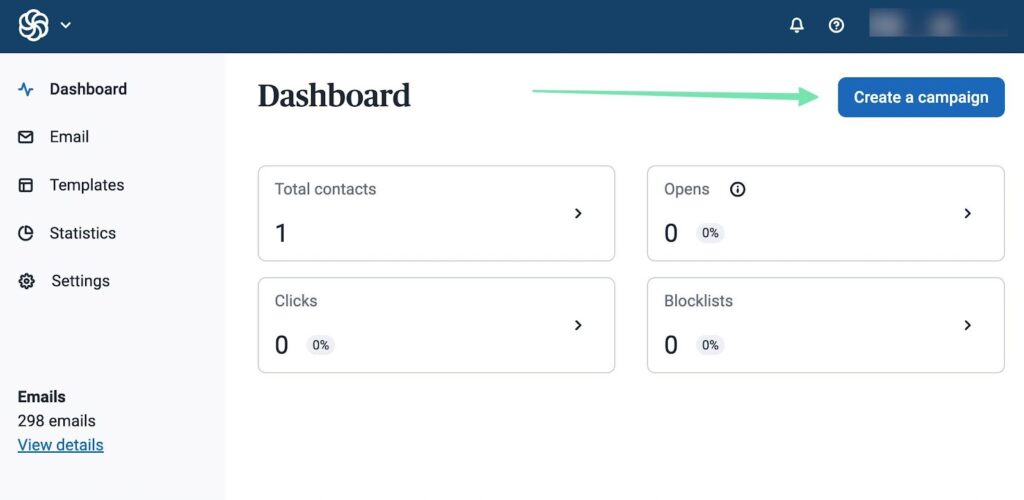
Make a Subject Line for the email, and utilize the wide range of content modules provided. Consider elements like buttons, titles, and text to convey a strong message about your courses, and to prompt people to click through. Sendinblue offers beautiful templates to get started, so we recommend beginning with those. There’s no reason to start an email design from scratch. When you’re done designing the email, simply choose which list you’d like to send it to, then schedule the email!

Similar to Thinkific, Sendinblue also offers premium plans for more advanced features like transactional ecommerce messaging and automations.
Further reading 📚
Are You Ready to Create an Online Course for Free?
Thinkific is the place to start when learning how to create an online course for free. It’s one of the best online course makers for entrepreneurs who make webinars, courses, and high-quality content for students. It also supports unlimited students and one course, making it ideal to create your first online course. Not to mention, they don’t take any transaction fees, keeping more money in your pocket.
Most other online course building platforms either charge a transaction fee or lack a free plan. The other main option you might consider is a free WordPress website with the Elementor page builder. You’ll still most likely need to upgrade at some point (as your online courses grow in popularity), but WordPress provides a wonderful solution for selling online courses without any upfront fees. Another platform to consider is called Teachable, which has a free plan with transaction fees.
We hope your first time making an online course goes well for you! With a little hard work, and the right learning management system (LMS), you're bound to create a great course with everything from podcasts to PowerPoints, and online learning quizzes to real-time stats. Please let us know in the comments below if you need any clarification about how to create an online course for free.


Comments 0 Responses