
Are you ready to learn how to create your own Shopify store?
Maybe you just came up with a wonderful product idea and now you'd like to see if people are willing to buy it.
Well, you're in luck, because you no longer have to be an experienced web developer to build a Shopify Store in less than 15 minutes.
In this article
What is Shopify and How Does it Work?
Shopify might be one of the best-known brands in the ecommerce world, but not everyone knows what this tool is, or how it works.
In simple terms, Shopify is a software that you pay for using the SaaS model – in other words, you subscribe for the service.
Usually, if you pay for a year’s worth of support at once, you’ll benefit from a slightly reduced cost.
With Shopify, ecommerce business owners and merchants can create a website and use an in-built shopping cart solution to sell both digital and physical products to customers around the world.
Shopify even offers a system that allows customers to quickly and easily manage things like shipping requirements, and inventory tracking.
Using Shopify, you can get access to a state-of-the-art admin panel, where you can see the products you have for sale, write descriptions, process orders and so much more.
Btw, here's a video created by my colleague Joe. 🙂

If you're more into reading, here's a detailed tutorial for you to walk through:
How to Use Shopify – Step by Step Guide
Before anything, we recommend exploring the pricing plans from Shopify.
This way, you understand the eventual investment, and you’ll know exactly which types of features you can expect. If the plans, or features, appear lacking for your operation, consider looking at Shopify alternatives that may better suit you.
Otherwise, continue reading our step-by-step guide on how to create a site with the Shopify website builder.
1. Create a Shopify Account
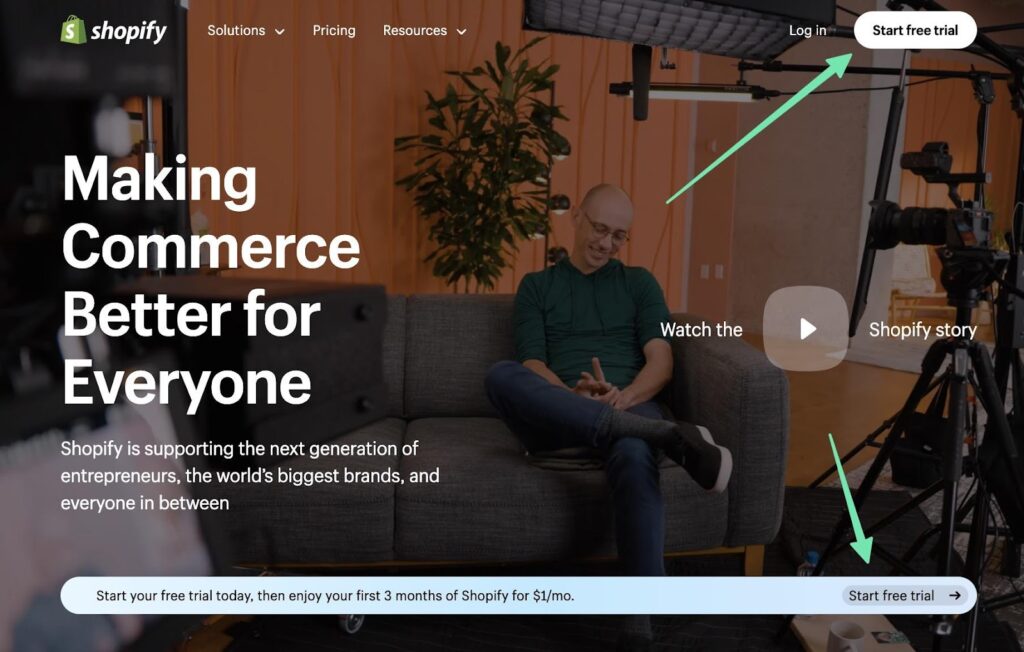
To get started, visit the Shopify website and sign up for an account. Do this by clicking on one of the Start Free Trial buttons.
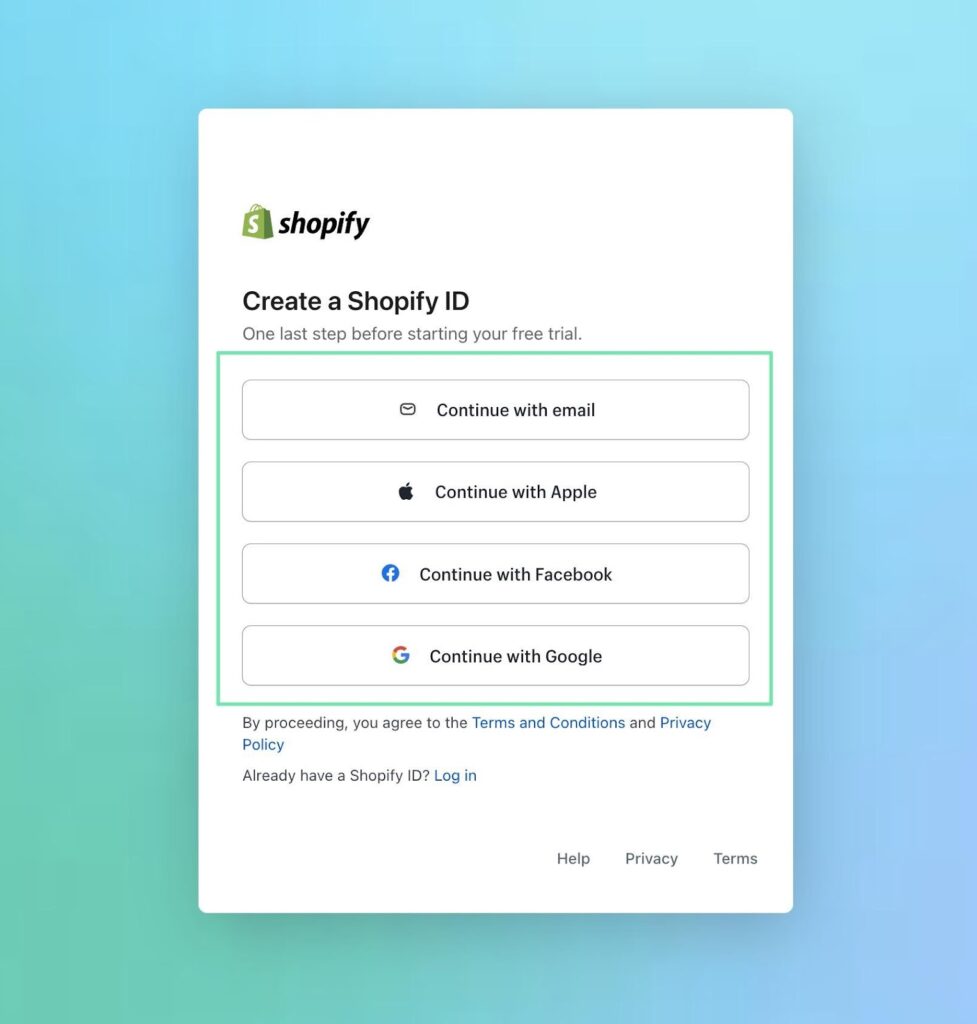
You'll need to provide some basic information about your business, such as the business location and contact information. Create a Shopify ID with your email, or one of the social login buttons.
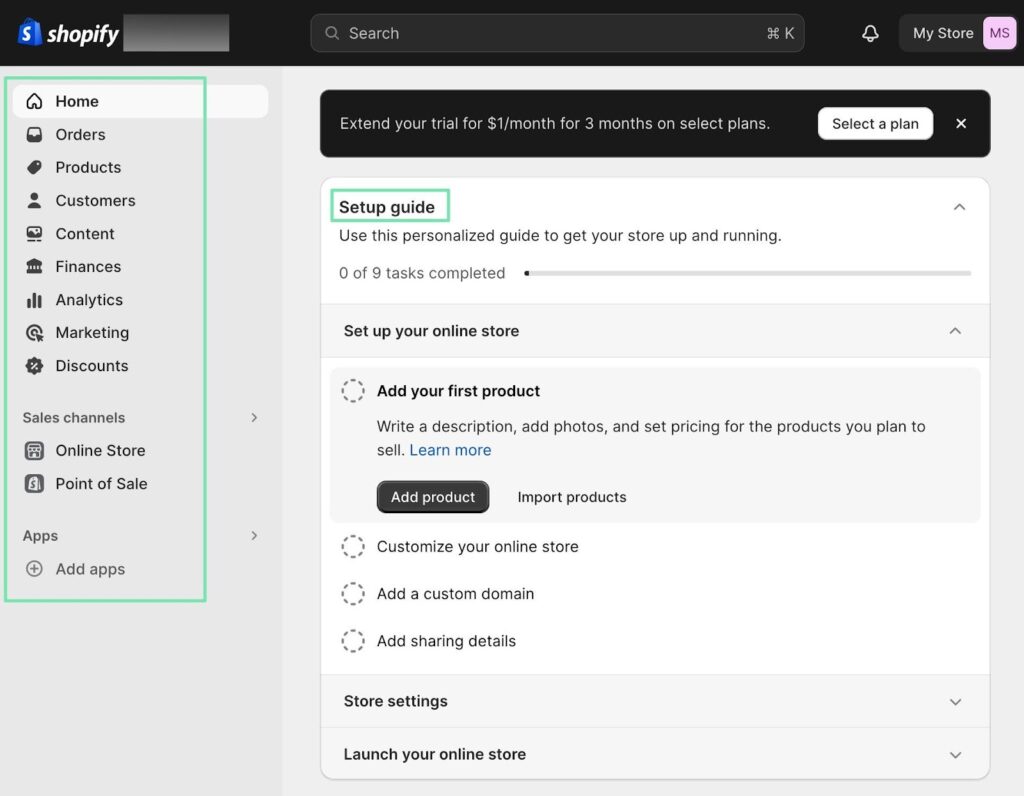
After that, you’re brought to the main Shopify dashboard. Here, you can configure every aspect of your store, with tools to handle marketing, sales channels, finances, products, content, and more.
There’s even a setup guide and a mention about how much longer you have on your free trial.
How to get Shopify for $1 per month for the first 3 months?
Shopify has begun offering a special deal for sellers who sign up for a new Shopify plan. That deal?
Pay Shopify $1/month for the first 3 months of full access to the platform!
This offer is is now available on all standard plans: Starter, Basic, Shopify, and Advanced.
2. Configure the Shopify Store
Once you've created your account, it’s important to handle a few store configuration steps before moving forward with the overall design and product creation.
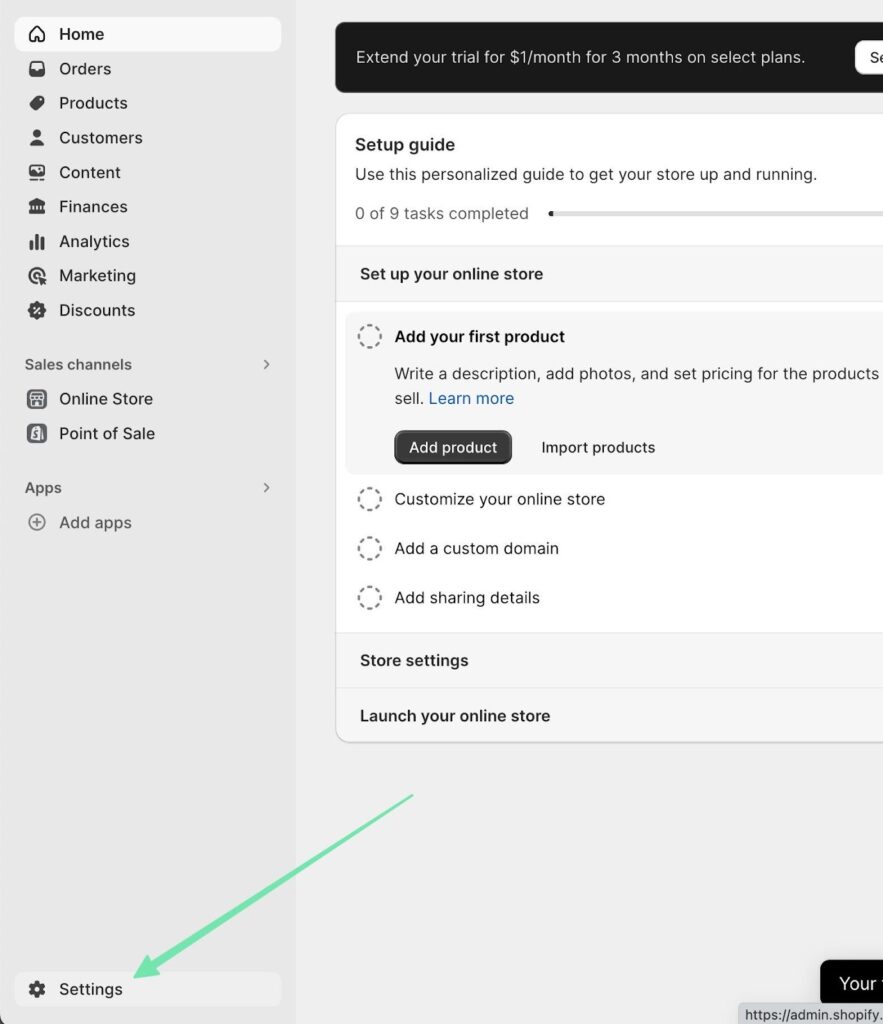
This includes entering your store's name, adding a logo, and setting up your shipping options. You can manage all of these elements by clicking on the Settings button, located in the left bottom corner of the dashboard.
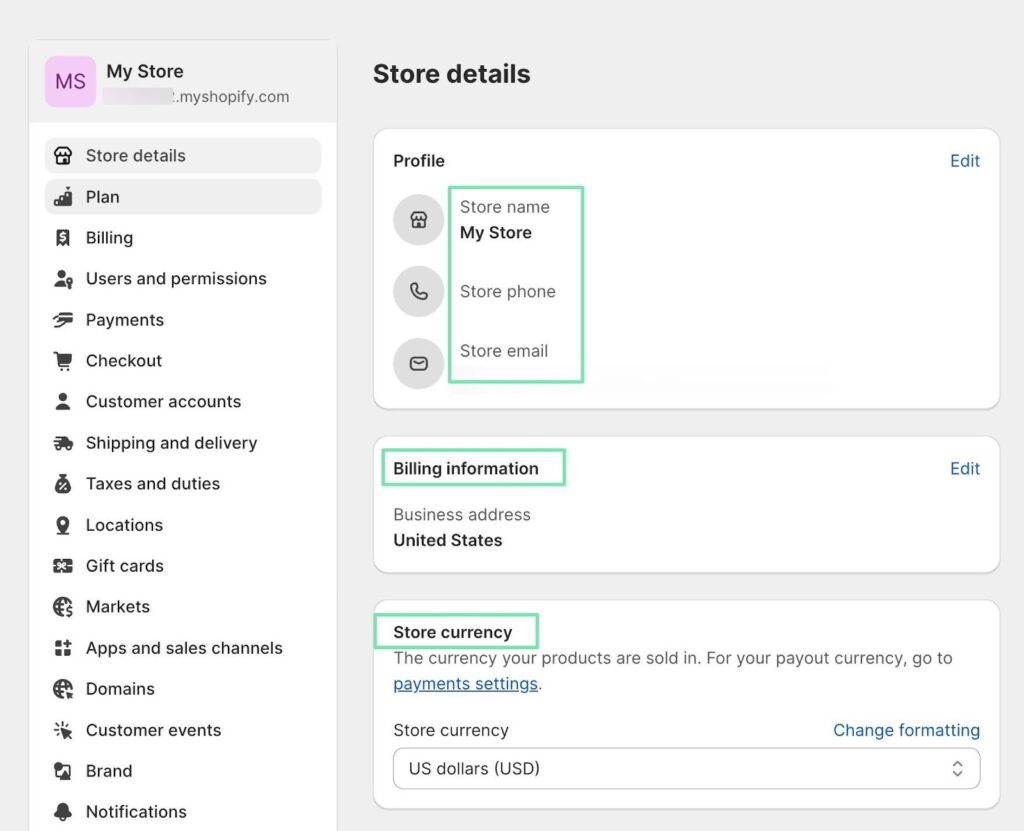
The first tab is called Store Details. Use this page to fill in any missing information, such as:
- Store name
- Store phone
- Store email
- Billing information
- Store currency
- Time zone
Go through the entire menu on the left side. Fill out the appropriate information for your business. You don’t have to pick a plan or establish billing right now, but it’s important to look at these sections:
- Shipping and delivery
- Locations
- Taxes and duties
- Markets
- Apps and sales channels
- Brand
- Notifications
- Languages
- Policies
- Custom Domains
In particular, navigate to the Shipping and Delivery section. Here, you can set general shipping rates, custom shipping rates, and even configurations for local delivery and pickup.
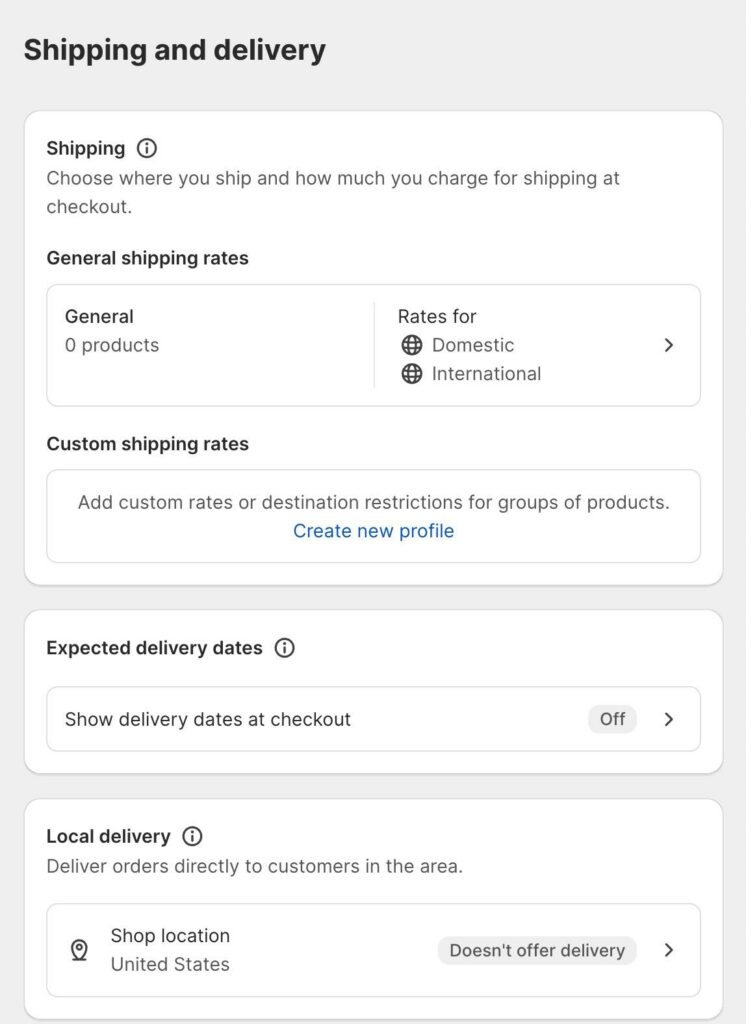
Consider activating the Shopify Shipping tool to buy and print discounted shipping labels from carriers like USPS, UPS, and DHL Express. You may also enable third-party calculated shipping rates at checkout.

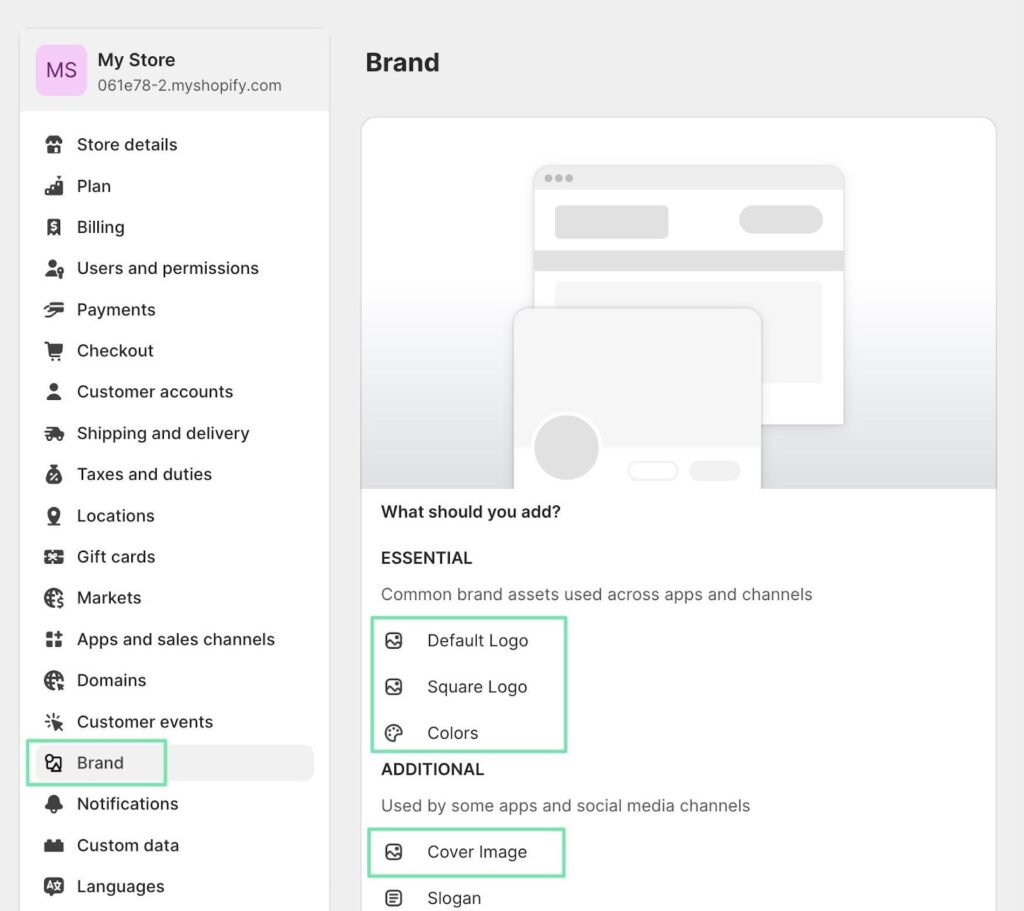
We encourage you to spend time on the Brand Settings page as well. This allows you to upload different versions of your logo, which are used in certain areas of your ecommerce site and marketing messaging.
For instance, you should upload a default logo, a square logo, and even a cover image. There are areas to set brand colors and a slogan, too.
3. Pick a Theme to Customize in the Shopify Website Builder
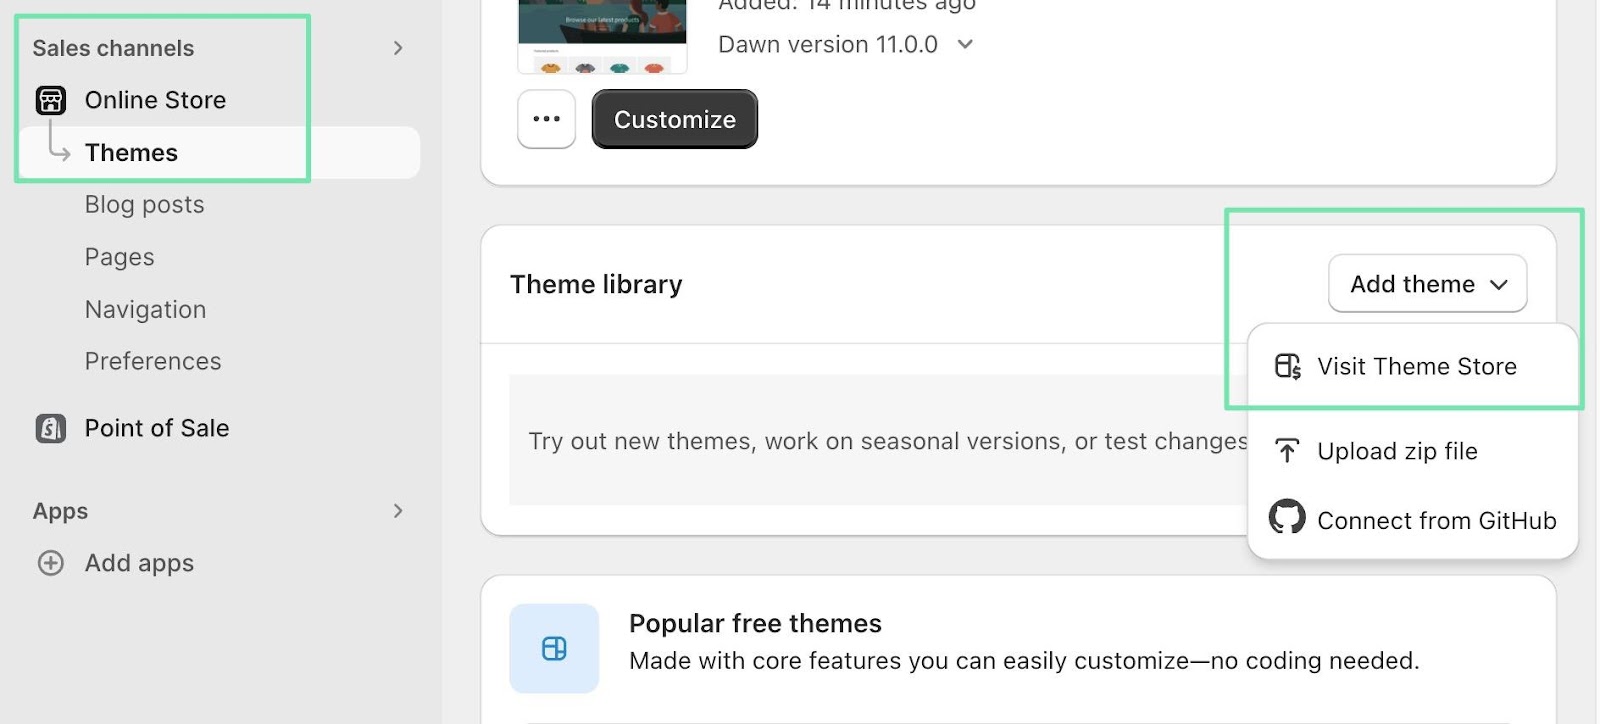
Shopify offers various themes to choose from—more than 100 of them, in fact. To view the themes, go to Sales Channels > Online Store > Themes in the dashboard. Under Theme Library, click Add Theme > Visit Theme Store.
Browse through the collection, and look for a theme that aligns with your brand and product offerings.
We recommend using the All Themes tab to reveal every theme available from Shopify.
You can filter to only view the free or paid themes, while also using industry tabs to filter for any category from arts and crafts to toys and games.
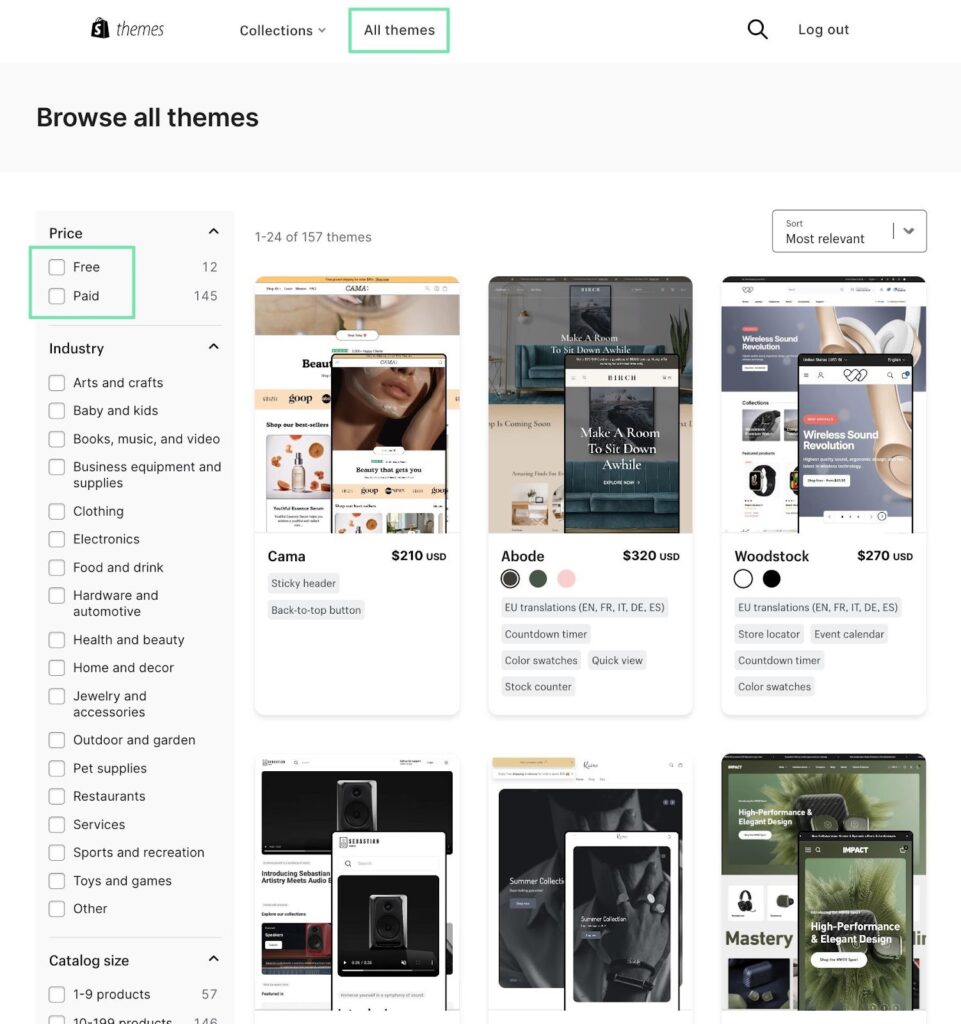
Click to open a product page for any theme. Scroll to figure out if the theme provides the right features needed for your store.
Some themes offer example presets, which adjust the visual nature of the theme—almost making it an entirely new theme altogether.
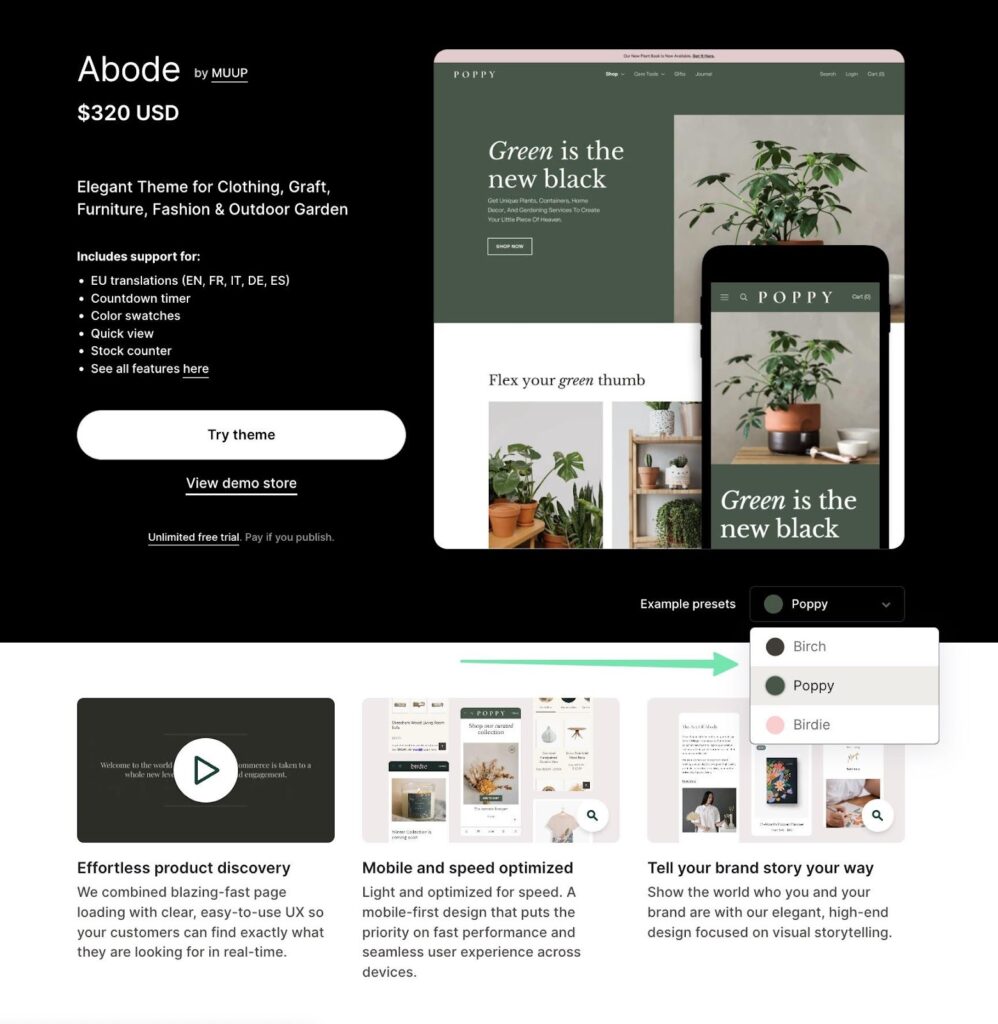
After checking out its features, viewing the demo, and deciding a theme is right for your business, click on the Try Theme button. This adds it directly to your store.
Make sure you click the Publish button in the Themes section of the dashboard to ensure it’s ready for customization.
Note: You’re able to add premium themes to your store for customization; you only get charged for the theme once you want to publish the website.
4. Customize the Look of Your Theme
After selecting a theme, you can customize its appearance to match your brand identity. The Shopify Website Builder allows you to modify colors, fonts, media, sections, and layouts without any coding knowledge.
To open the editor, go to Themes, and click on the Customize button for your currently installed template.

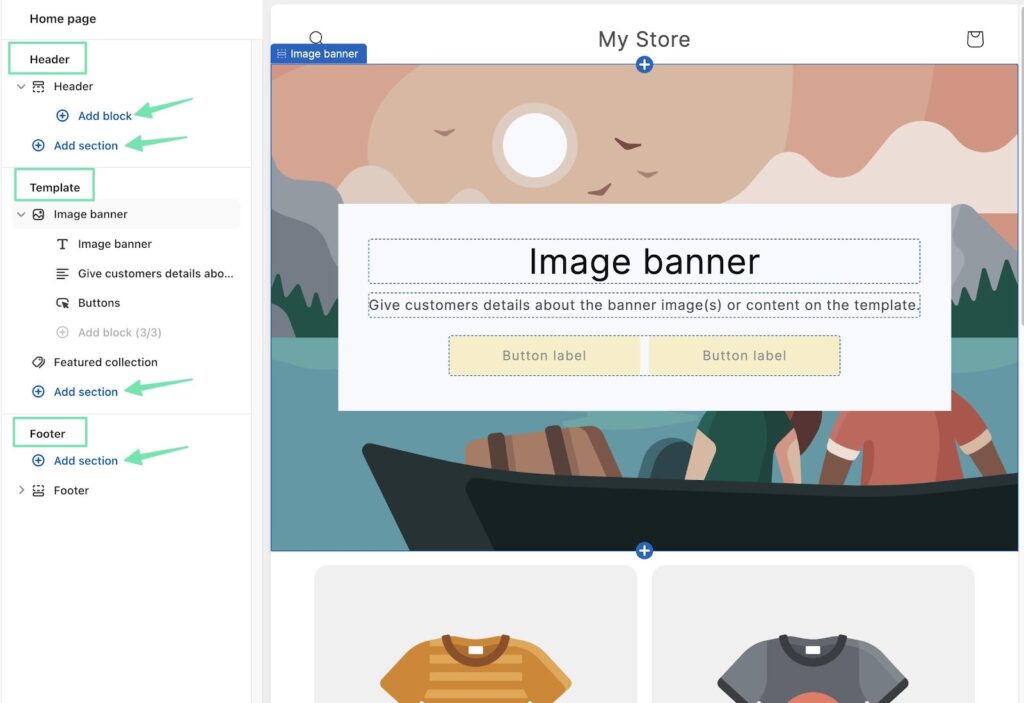
The left panel is divided into three areas:
- Header
- Template
- Footer
Each area accepts sections and blocks, the elements that come together to make a website. For instance, you can click the Add Section or Add Block button in the Template area to reveal the sections available for insertion.
Each template provides its unique blocks and sections. Shopify, however, has many default sections ready to go, regardless of the theme you chose.
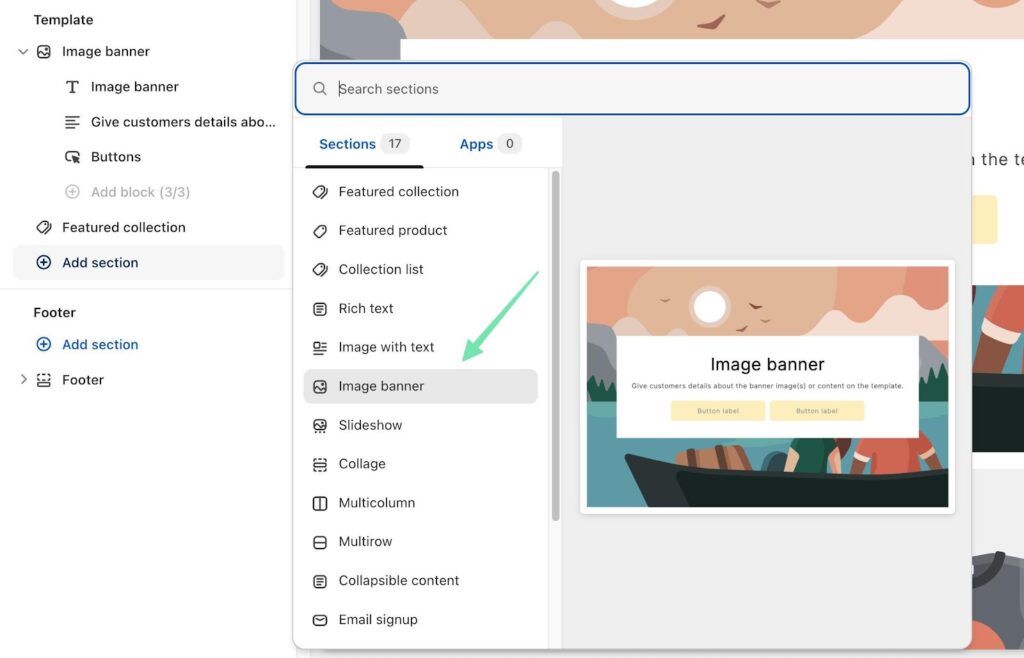
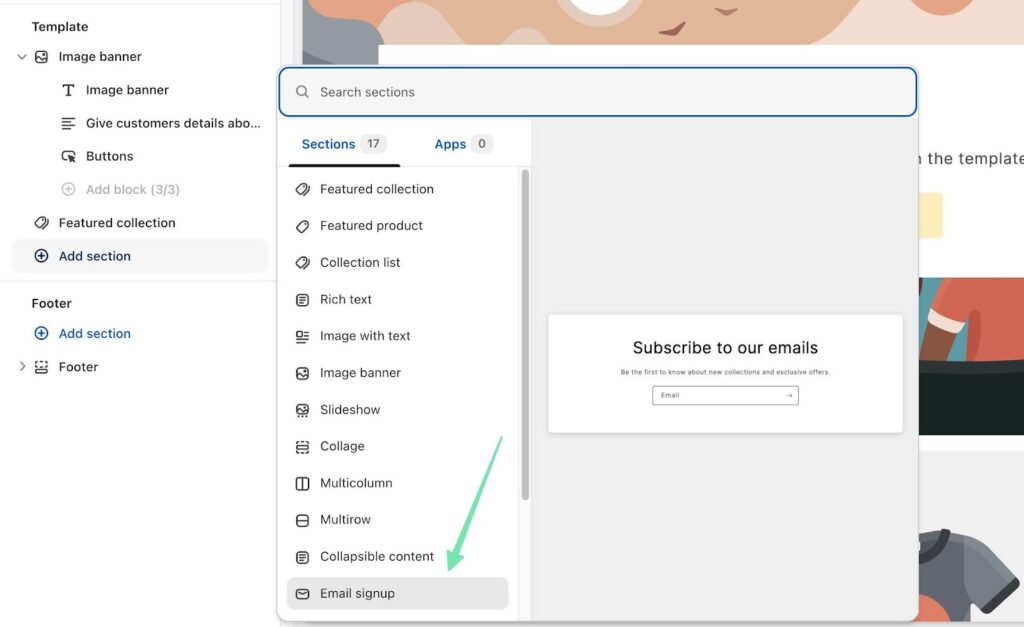
You may, for example, insert any of the following sections to build your homepage:
- Collection list
- Image banner
- Slideshow
- Collage
- Multicolumn or multi row sections
- Email signup
- Contact form
- Rich text
For this tutorial, we’ll add an Image Banner section. This makes for a solid introduction to the site.
In addition, we want to include an Email Signup form, allowing customers to subscribe to an email marketing list.
We encourage you to spend a significant amount of time honing the styling of your homepage and the rest of your website. Use inspiration from your favorite ecommerce brands to decide what to include on each page.
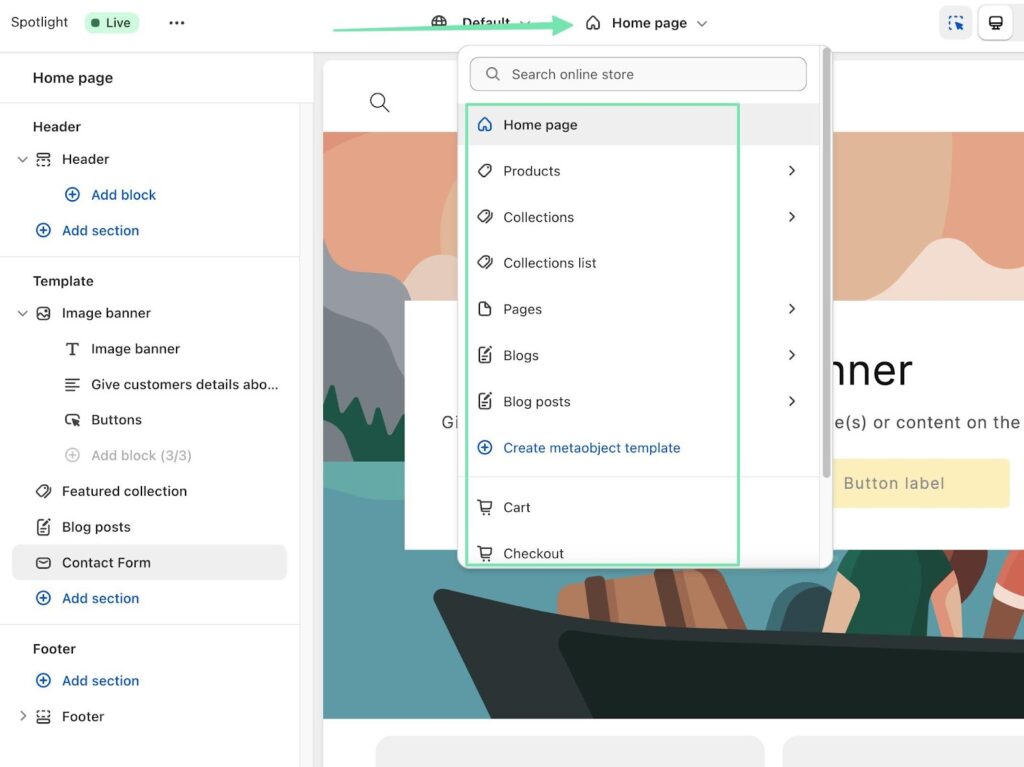
At the top of the editor, there’s a dropdown menu to switch to other parts of the website.
Try customizing the template for your Products pages. Consider adjusting the Checkout or Shopping Cart pages. Even think about adding an entirely new page that relates to your business.
5. Create Products and Services to Sell
No online store is complete without products to sell. Luckily, Shopify makes it easy to generate and sell different types of products, including digital and physical items.

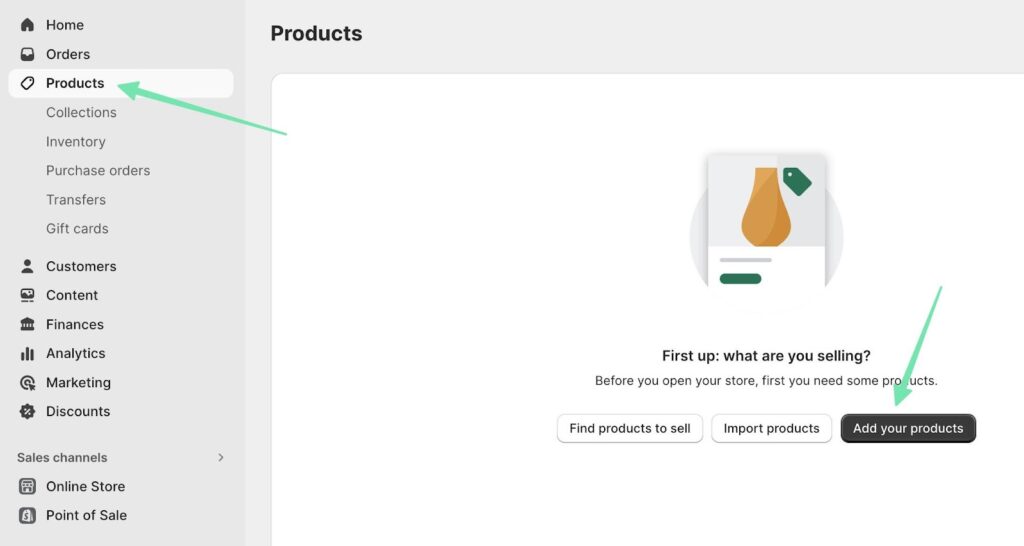
To add and customize products in Shopify, navigate back to the main dashboard.
Click on the Products tab. Select the Add Your Products button. There are also options to find products to sell or import items with a CSV file.
When constructing your product pages, include high-quality images, detailed descriptions, and pricing information to entice potential customers.
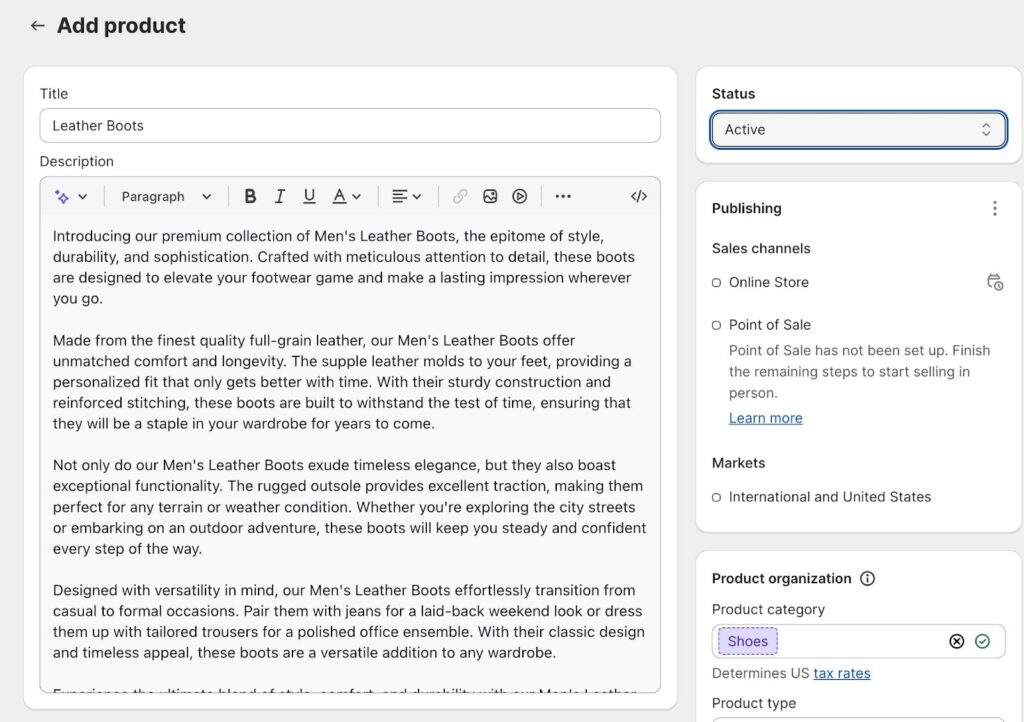
Upload a myriad of photos from different angles, and don’t forget to address settings like inventory management, shipping, product variants, and SEO (search engine optimization).
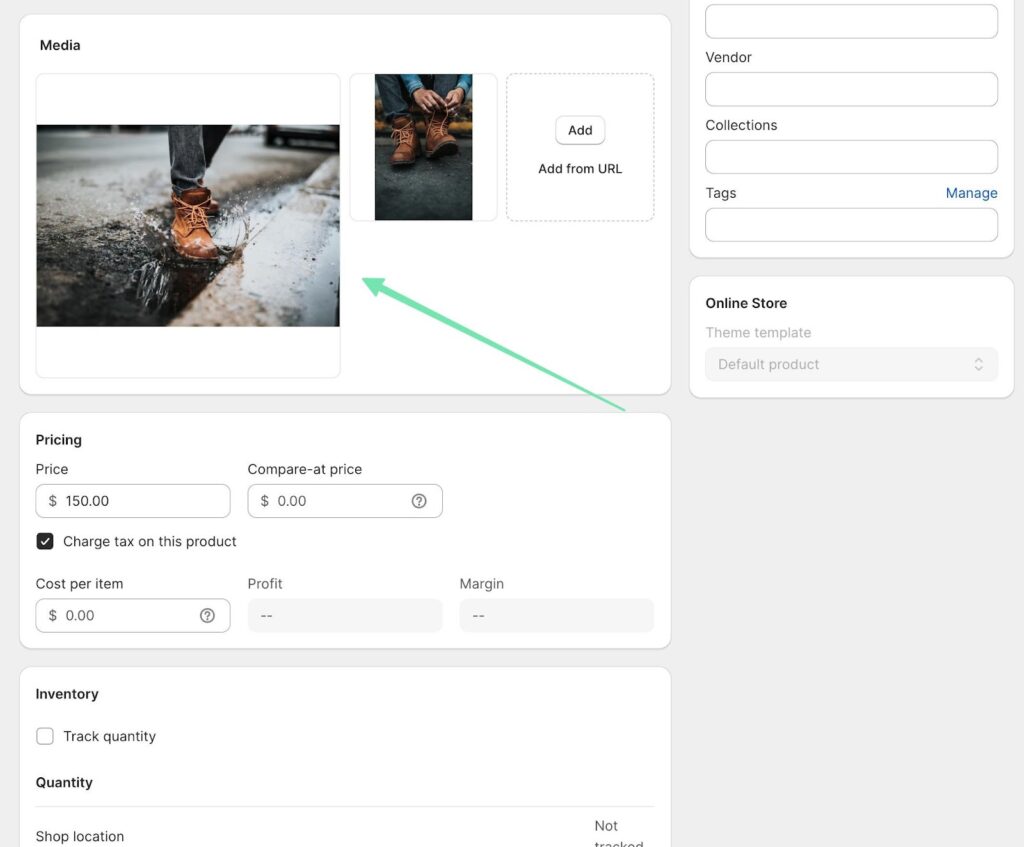
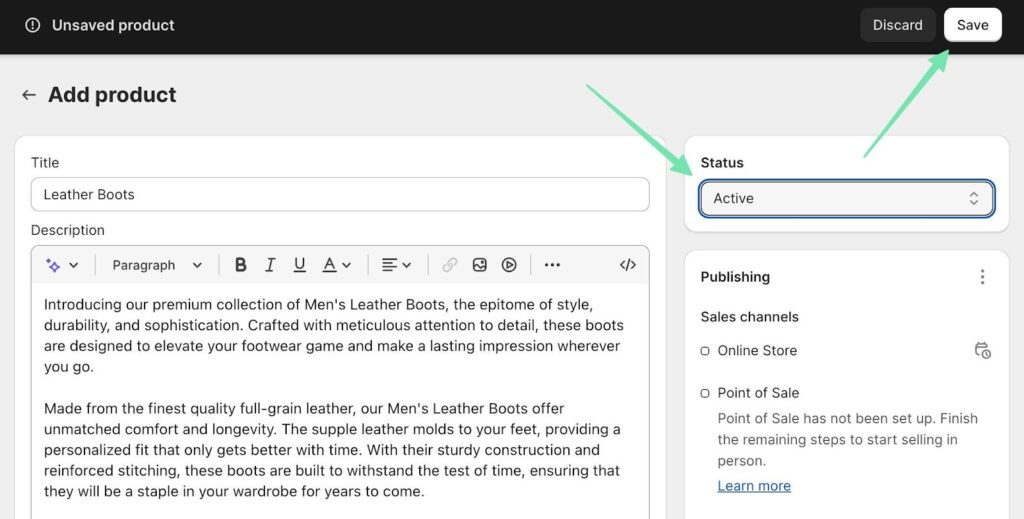
Ensure the Status is set to “Active,” and click the Save button to publish the new product to your website.
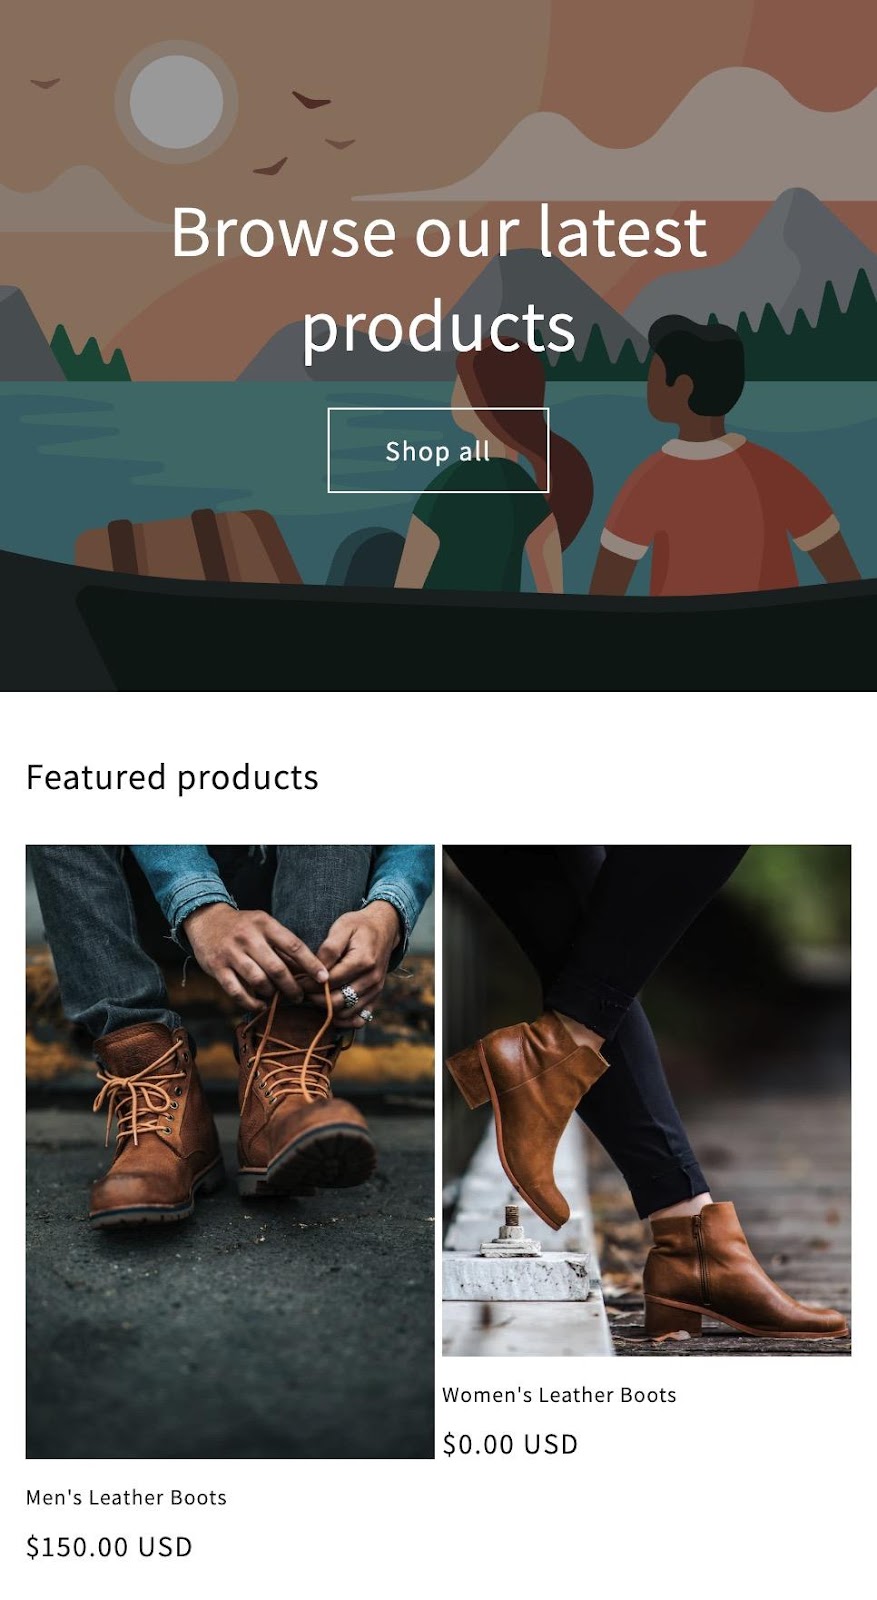
6. Organize Products on the Homepage and Beyond
It’s wise to arrange your products into collections and categories to make it easier for customers to navigate your store. You can also create featured product sections on your homepage to highlight your best-selling items.
To get started with this type of organization, you must have multiple items in your store, and they must be related in some way.
Go to the Products page. We have two items that fall into the “Boots” or “Footwear” categories.
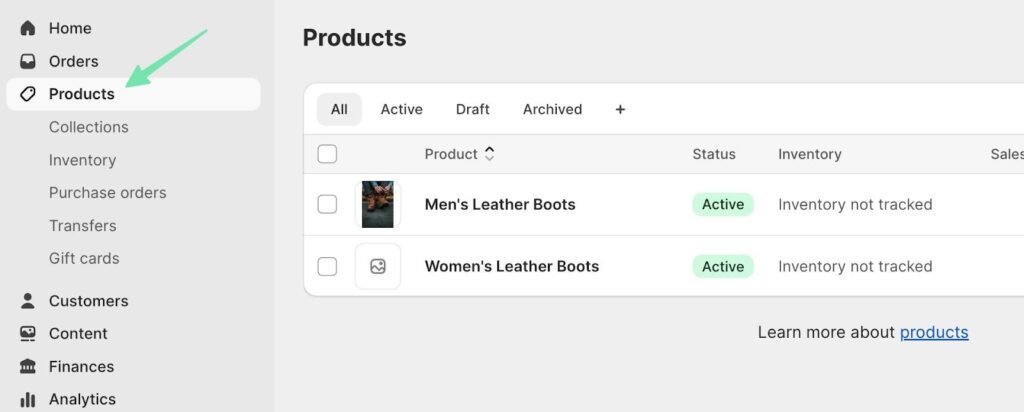
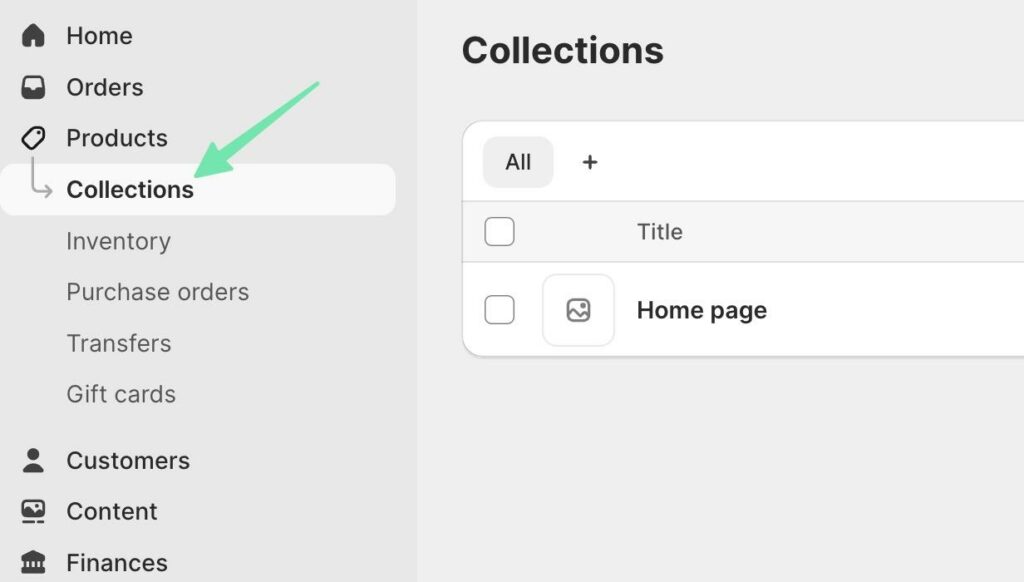
As such, select the Collections tab to make a collection that relates to them both.
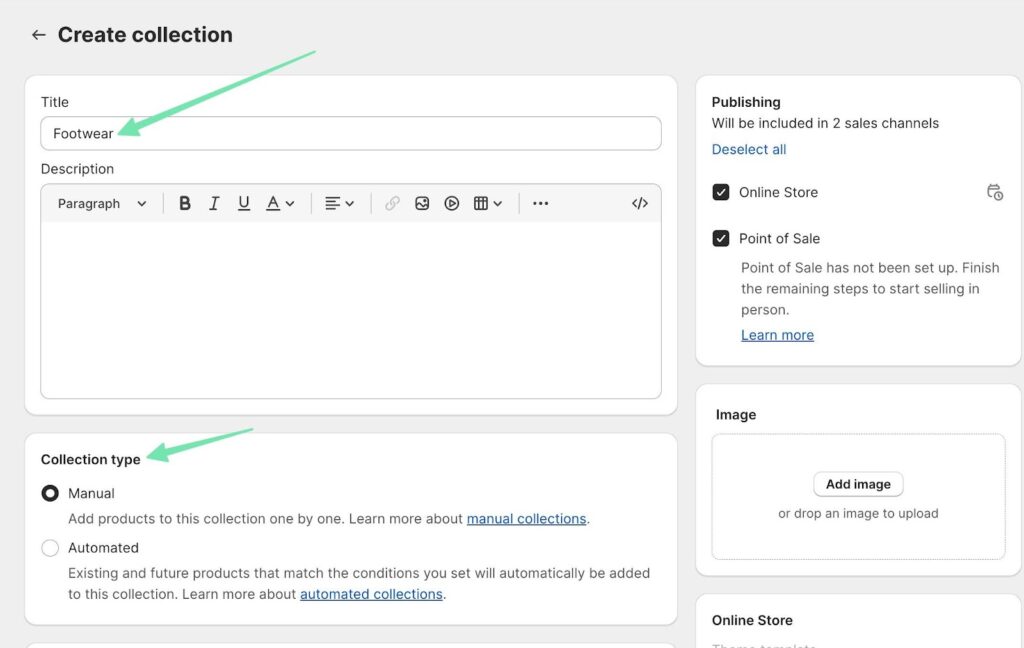
Click Create Collection, and fill out the Title, Description, and other settings on the page. You can add products to the collection manually or with an automated tool.
Once the collection is saved, you can manually search for products to add them to a collection.
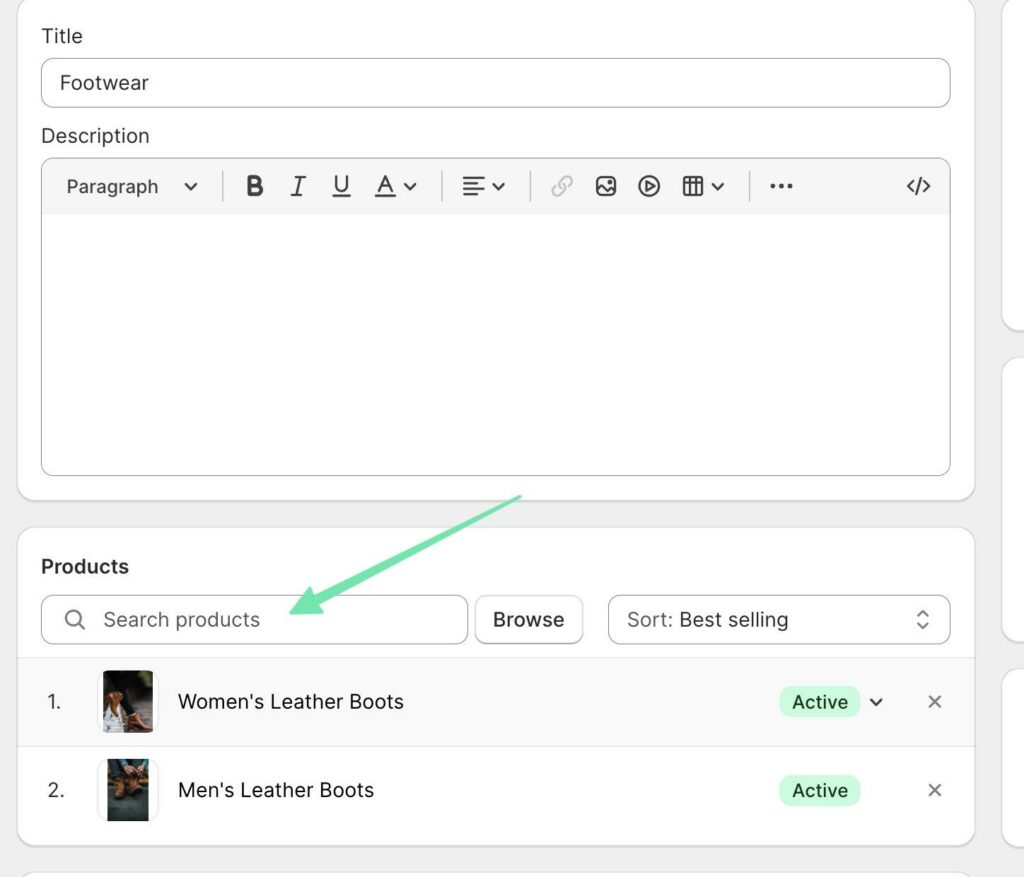
The automated process, on the other hand, does a wonderful job of sorting related products into collections, even as they’re added to your store in the future.
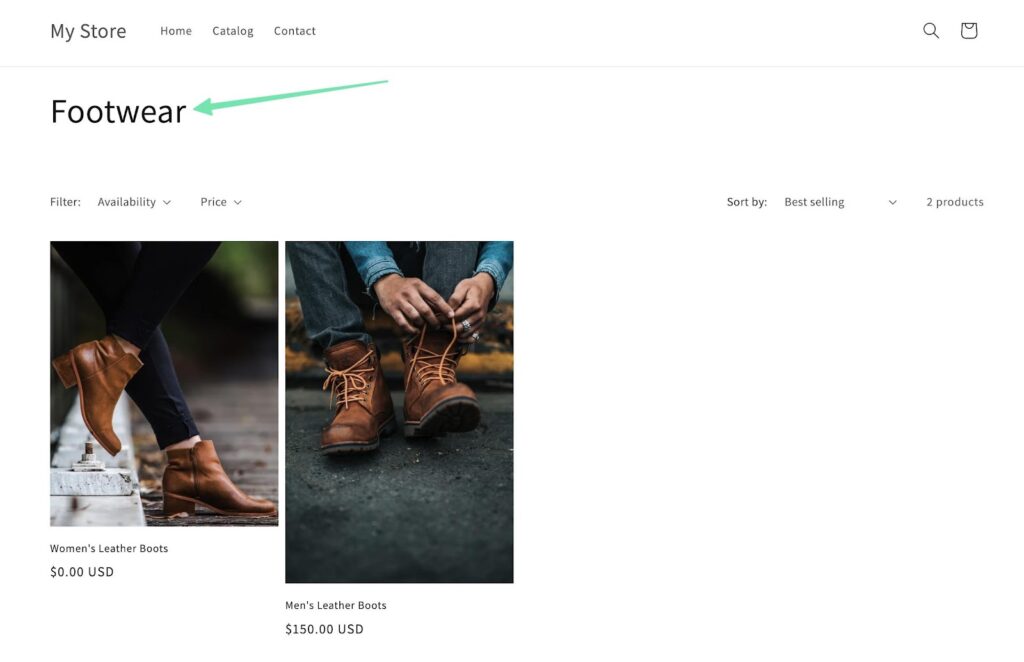
Every collection you make receives a separate page for you to customize, market, and link to.
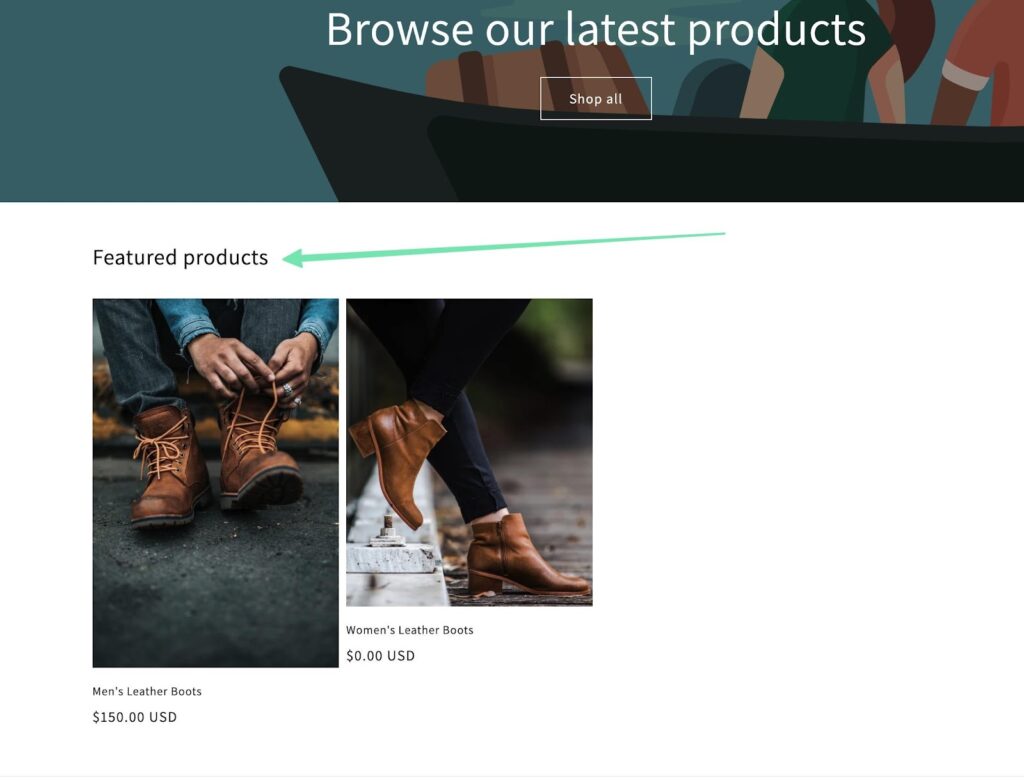
Shopify automatically provides a Home Page collection, which starts adding items to a homepage gallery. You are welcome to customize this gallery in the Shopify Website Builder.
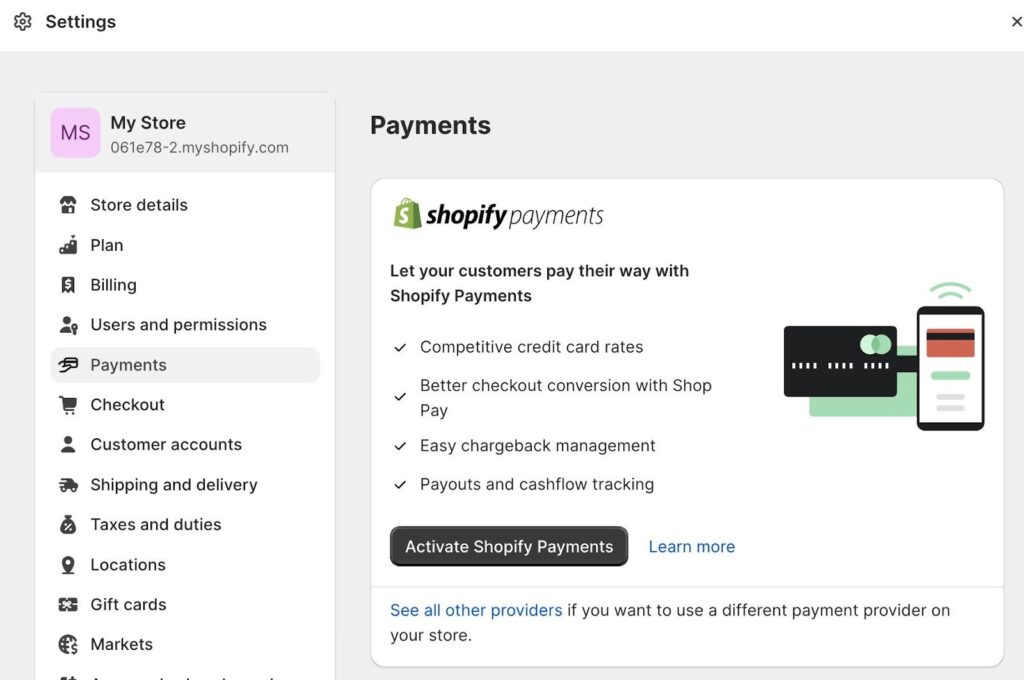
7. Set up Shopify Payments for Payment Processing
Shopify Payments is an integrated payment gateway that allows you to accept credit card payments directly on your store.
Configure this feature to streamline your payment processing, or consider using one of the hundreds of third-party payment gateway integrations supported by Shopify.
Navigate to Settings > Payments to activate and manage payment gateways. Click to Activate Shopify Payments if you’d like 0% transaction fees and fast payouts.
Walk through the process of adding your contact information, connecting a bank account (for payouts), and turning on Shopify Payments. You’re then ready to accept money from customers. Keep in mind, however, that you must pick a Shopify pricing plan in order to turn on payments.
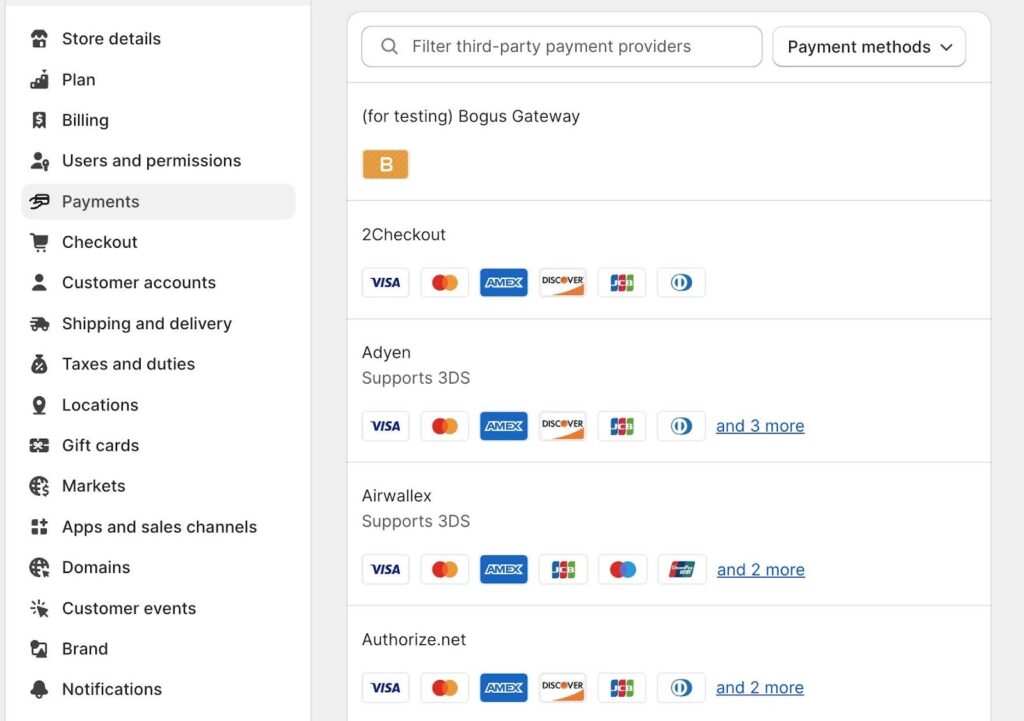
Some companies, due to regional or industry restrictions, may opt for a third-party payment provider. In such cases, click on the See all providers link in the Payments section of the Shopify dashboard.
This page lets you select from a long list of reputable payment providers such as Authorize.net, 2Checkout, and Checkout.com.
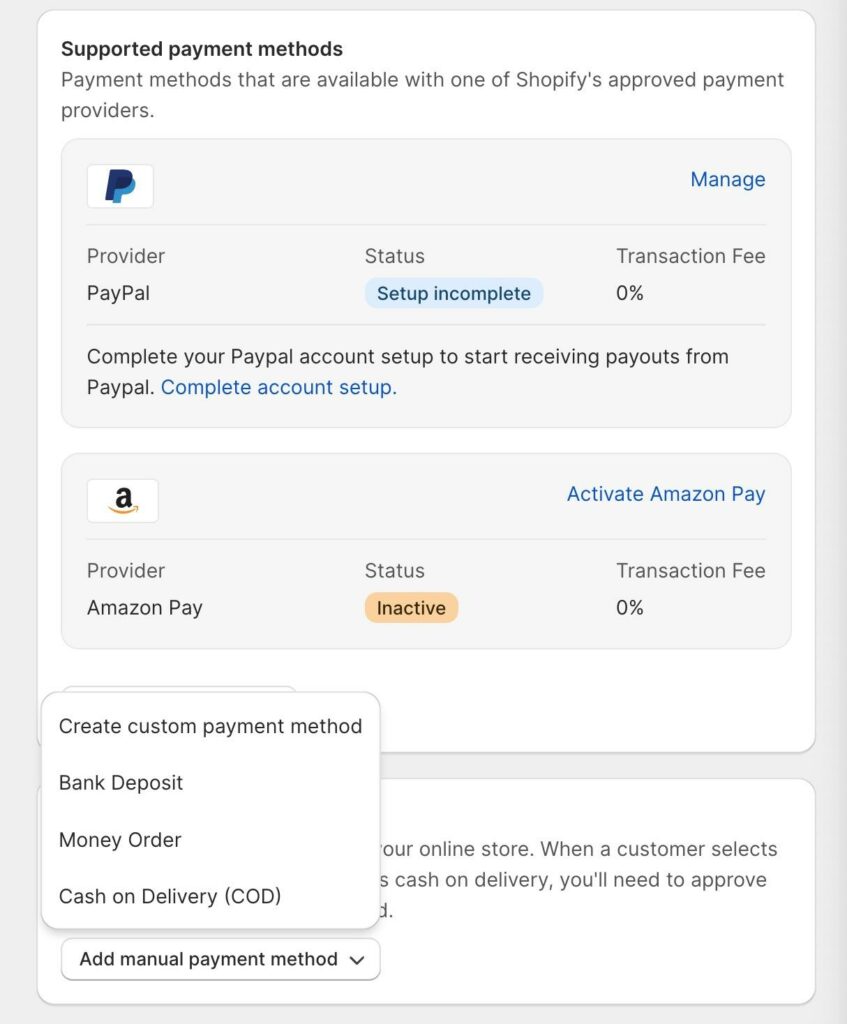
Lastly, the Payments section of Shopify offers additional payment options—those that you can add on top of your main credit card processor.
Examples include digital wallets like Amazon Pay and PayPal, or even manual payment methods like money orders, cash on delivery, or bank deposits.
Once you’re done confirming every payment method you need, move onto the next step to figure out which apps may work well for your company.
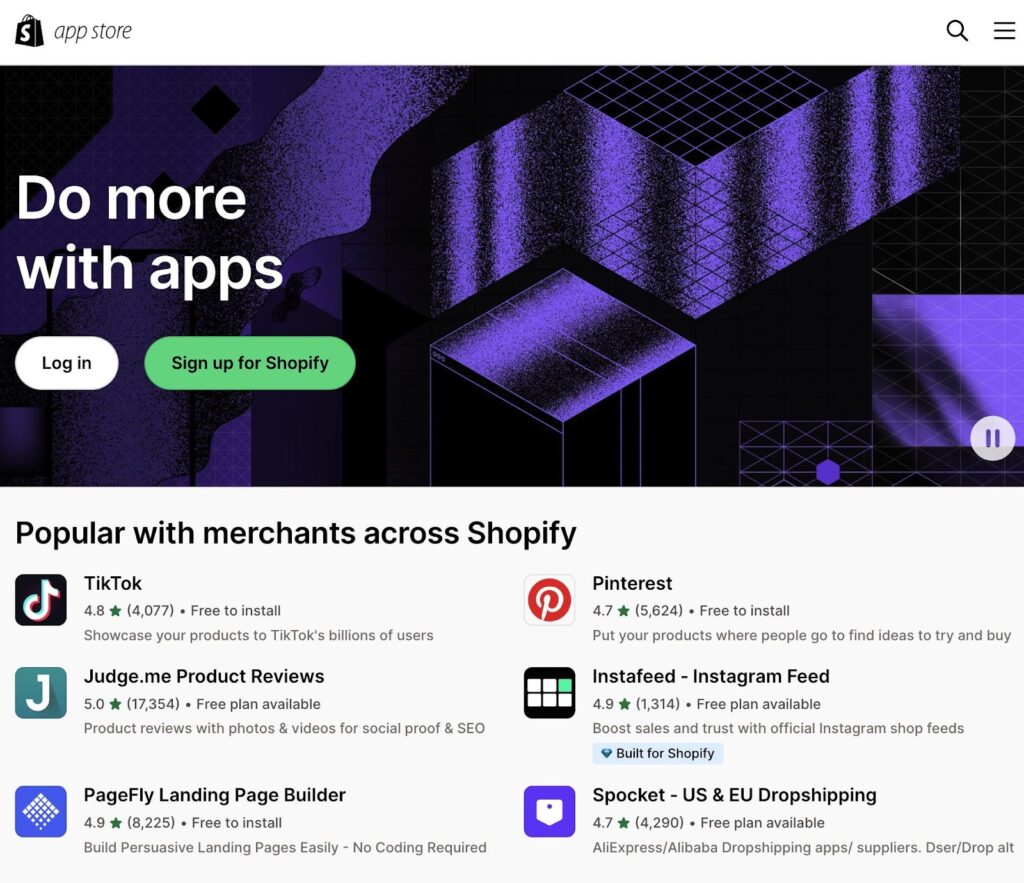
8. Add Relevant Apps to the Shopify Website Builder
Shopify's App Store lets merchants install apps that can enhance your store's functionality.
To be clear, no store requires apps, yet, you may find that some functionality is missing in Shopify; in that case, it’s easy to turn to an app, essentially extending the functionality of the platform.
To browse the large collection of apps, go to the Shopify App Store. There’s a link inside the dashboard, or you can go straight to the store.
Categories include:
- Finding products
- Selling products
- Orders and shipping
- Store web design
- Marketing and conversion
- Store management
You could spend days sifting through the thousands of apps available through Shopify.
Instead, here are some apps we recommend for first-time store owners:
- A product sourcing or dropshipping app like DSers or Printful.
- Sales channel apps like Facebook/Instagram and Google/YouTube.
- A shipping management app like ShipStation.
- Apps to improve your user experience and conversions, like Judge.me Product Reviews or the PageFly Landing Page Builder.
- Marketing apps like Mailchimp and Smile (Loyalty and Rewards).
- Store management apps like Matrixify (migrations) and Shopify Flow (automations).
To install any app, simply go to its product page and click Install. That brings you to a new page for agreeing to terms and integrating the new app with your store.
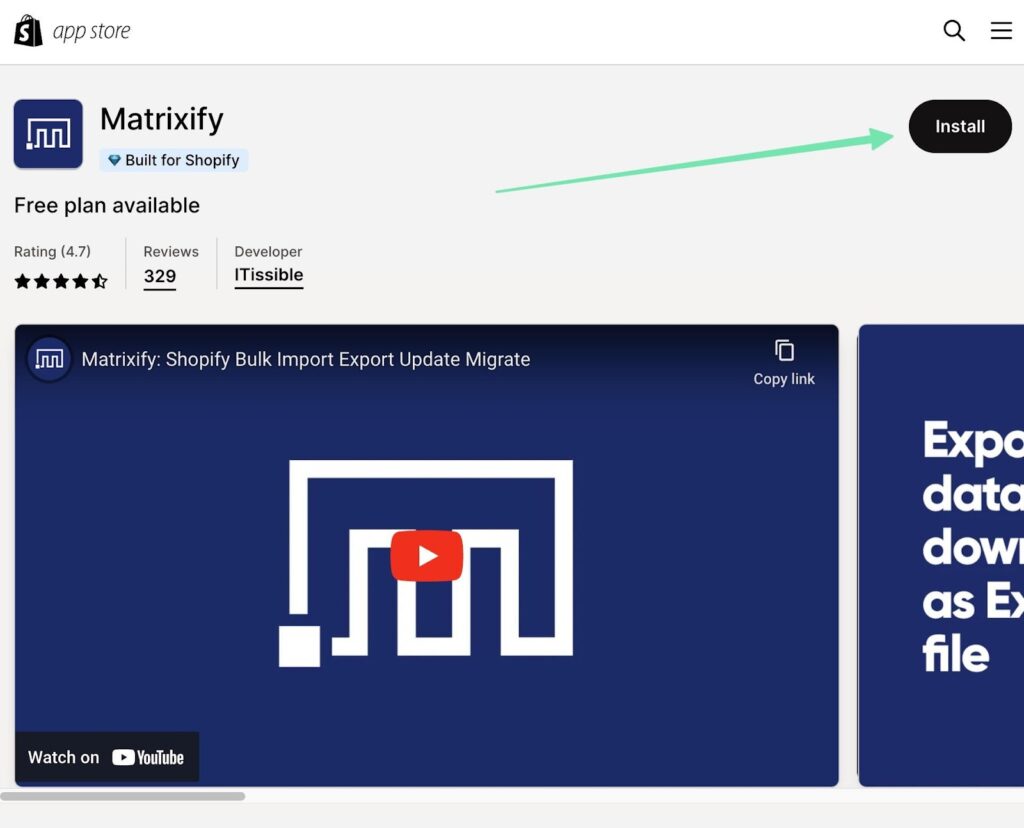
Thereafter, you can find all installed apps on your Shopify dashboard. Remember, though, that many of the apps are either limited or paid solutions.
We recommend seeking out entirely free apps or budgeting for additional costs (to use premium apps).
9. Configure Your Shopify Marketing Tools
The good thing about Shopify is that you rarely have to rely entirely on apps to run your marketing campaigns. Instead, many of the tools are built right into the system.
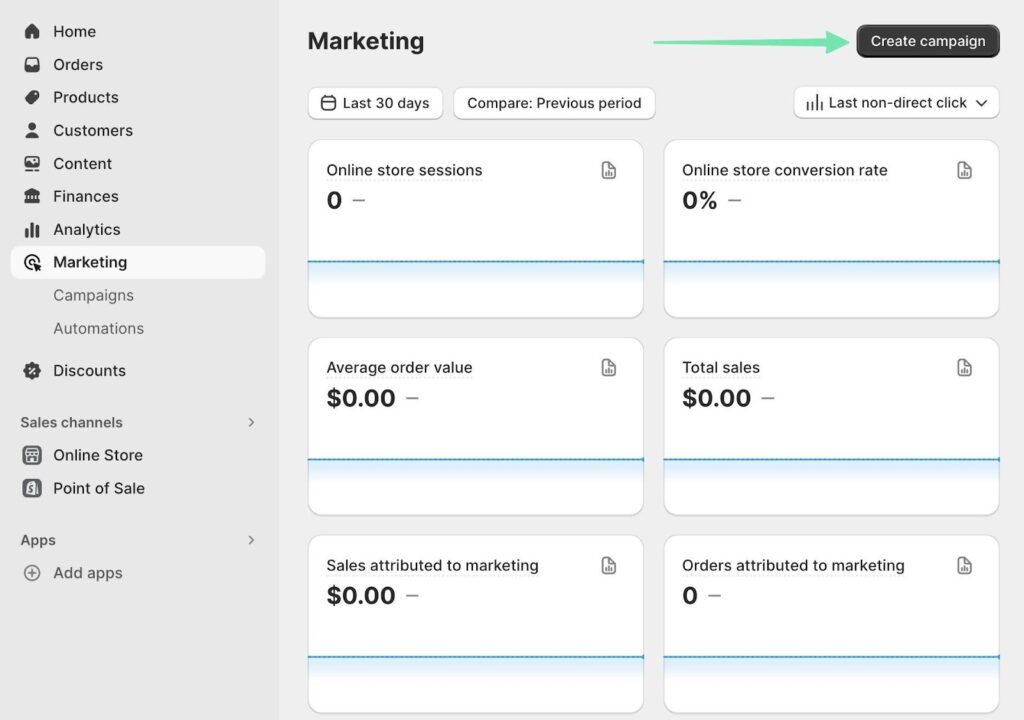
You can utilize Shopify's built-in marketing tools to promote your store. Set up discounts, create email campaigns, and optimize your store for search engines to attract more customers.
There’s a dedicated Marketing tab to access everything. Click Create Campaign to generate an email marketing campaign, a Microsoft Bid Strategy Campaign, or something like a social post or SMS campaign.
You even have direct access to tools for promoting your brand on social media outlets.
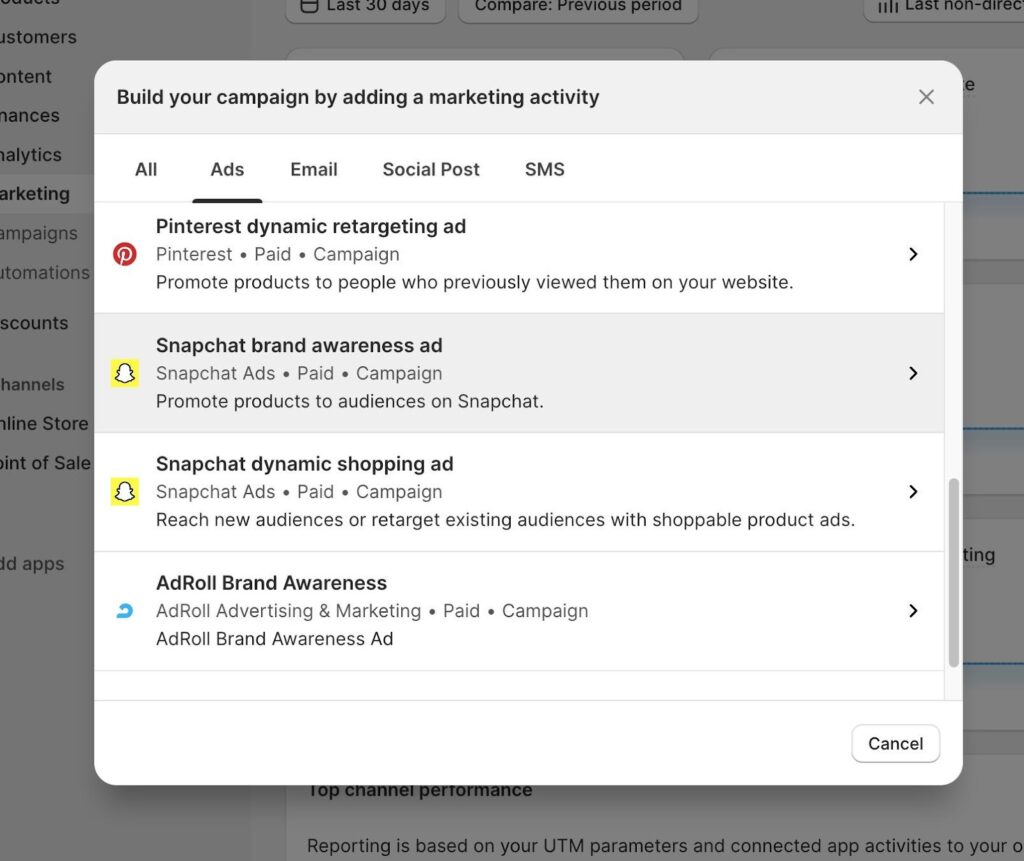
As you create campaigns, remember to sync your store products and customize the advertisements. Shopify handles automation of your ads rather well, but there’s no replacement for human editing and customization.
10. Launch Your Online Store
Once you've completed all the necessary steps, it's time to launch your online store. Double-check everything, test the purchasing process, and make any final adjustments before making your store live.
Check every interface your website will be seen on. We’re talking smartphones, tablets, and desktop computers, and all the major browsers.
Learn how to switch your Shopify store to test mode for the utmost understanding of how everything works, from buttons to the payment processing.
Only then, when you’re entirely confident in the store’s ability to offer a smooth shopping experience, should you publish the website for all to see. Congrats, you’ve successfully built an online store with the Shopify Website Builder!
Congratulations! You now have a fully functional Shopify online store.
Our Conclusion on How to Build an Online Store with Shopify
Building an online store with the Shopify Website Builder is a straightforward process that doesn't require technical expertise.
With its user-friendly interface, extensive theme collection, and robust features, Shopify provides everything you need to create a successful ecommerce store.
Follow the steps outlined above, and you'll be well on your way to launching your own online business.
If you have questions about the tutorial, or would like to share your experience using the Shopify Website Builder in the past, please leave us a comment in the section below!


Hi, Thank you for this great article, but do we need an LLC in the USA to start a Shopify store, or not?
Yes Shopify is the best platform for online business growth. There are some benefits of choosing Shopify are:
Start-Up Cost
Free Features
Shopify Admin
Dropshipping
Support
We have best Shopify developers for eCommerce development. SynergyTop
ótimo conteúdo, muito rico com muitas informações. Nós sabemos o quanto é difícil o início do nada do mundo digital, e sabendo que tem pessoas que se importam com próximo é muito gratificante. E nome de todas as pessoas estão nesta jornada inicial difícil e em meio a essa pandemia nós da Maddame Borddôh agradecemos imensamente muito obrigada.
You’re welcome!
Hi, Very important information about the creation of Shopify website with step by step methods. It’s a great blog post. Thank you 💕
Thank you!
This has been an awesome guide. The level of detail is great and very easy to follow.
It’s reduced my estimated startup time greatly and removed alot of uncertainty about where to start.
Keep up the great work, appreciated!
Thanks Lee!
I wish it was as easy as you say, you have to set up payments, terms of service, a privacy policy, shipping policy. Not to mention designing the whole entire thing
Thank you so much for this guide, everything makes clear after watching your video. Do you have any recommended Shopify theme? thanks
You’re welcome Ulysses!
Here is a list of 30 best Shopify themes. I hope you’ll find it useful.
Great article!
I would also include necessary apps that would help with the store, like:
-OBERLO for product fulfillment
-SIXADS for getting traffic
-Shogun for landing page optimization
-Privy for email marketing
Well explained..i am going to start it asap..could you please tell the approximate cost? Shopify fees?.etc
Hello Imran,
You can use our Shopify Pricing Calculator to see exactly how much any plan will cost you per month and the Shopify fees.
–
Bogdan – Editor at ecommerce-platforms.com
Can I drop ship through my shopify store?
Hello Neeta,
Yes of course! They have a pre-installed extension called Oberlo that allows you to import products from AliExpress.
–
Bogdan – Editor at ecommerce-platforms.com
Wow! Great explaination! I recently set my own ecommerce platform up and I wish I had this guide. Shopify is the best. Another strategy to combine with shopify is dropshipping. Best way to expand your store fast without the risk of buying a bunch of stuff you can’t guarantee will sell
Hi Catalin,
This is awesome. I never knew that setting up an e-commerce site could be this easy until I saw more insight from your post.
Shopify is a great and easier platform to use but my biggest challenge is being able to provide that tax clearance details since I’m not resident in the US. Stripe that I know always ask of that if you select to receive payment through them. How do non-US residents deal with it?
Thanks. I look forward to hearing from you.
Emenike Emmanuel
Hi Emmanuel, you don’t necessarily have to use Stripe if your business is based outside of US. 2Checkout is available in more than 200 countries. You can read our full review here: https://ecommerce-platforms.com/ecommerce-selling-advice/top-10-best-ways-sell-digital-goods-online
–
Bogdan – Editor at ecommerce-platforms.com
Well done, thanks for such a great tutorial your efforts are appreciated!
Dan
We’re really glad you found it useful Dan!
–
Bogdan – Editor at ecommerce-platforms.com
Great job! Excellent explanations. Accurate, straight to the point and easy to understand, even for a beginner like me. Congratulations!
Thank you so much for this excellent tutorial! I really appreciate the time you took to explain the many features that Shopify offers. Great explanations!