When a potential customer lands on your Shopify website, they’ll use the images to decide if they’d like to make a purchase. Your job as a merchant, therefore, is to ensure the images don’t bog down the site loading speeds (so to push people away) and to format and size the images properly.
This way, the images don’t appear stretched out or cut off. In our ultimate Shopify image size guide, we show you the importance of specific image sizes for Shopify photography, and provide the ideal sizes for things like your logo, banner image, and product images.
Keep reading to learn all about Shopify image sizes!
Why Should You Care About Shopify Image Sizes?
It’s tedious to manage and upload images. Yet, they’re often the main offenders when it comes to slow site speeds, SEO issues, and low conversions on an ecommerce site.
And the tricky part about all website builders and ecommerce platforms is that you need to stick with very particular image sizes to ensure they’re optimized and look presentable.
To sum that up, here’s why Shopify image sizes matter:
- Each image type in Shopify requires unique dimensions, like how logos should be differently sized than banner images.
- Users are more likely to convert into paying customers when they can clearly see the images in the right format.
- Properly sized and optimized images can boost your SEO potential.
- Poorly sized photography may cause stretched out or cropped images, leading to an ugly website.
- You may find that images with the wrong size cause your site to slow down, or prevent customers from wanting to wait around altogether.
Along with those points: crisp, well-sized images present a certain level of professionalism, delivering emotional reactions to customers that you’re a trusted business, and your products are of the highest quality. Bad photos simply appear like you aren't concerned about your products, or the way they’re displayed. Your customers may ask, “where else are they cutting corners?”
With that said, take a look at our quick reference guide on the best Shopify image sizes for areas like product pages, banner images, and logos.
The Best Shopify Image Sizes (Based on Where The Images Are Used)
Not all of these are hard rules, but it’s best to stick to the “ideal size” as much as possible. Themes occasionally have their own image standards, so keep an eye on that. Otherwise, we’ll explain when you have some leeway in terms of the dimensions.
Is There a Go-to Image Size to Use Across Shopify?
No, but if you plan to take that approach, here’s what we recommend:
- Make sure all images are large enough to show the intricate details of the product.
- Yet, keep the images small enough so as to not hinder site performance.
- A good rule of thumb is to stick with 2048 × 2048 pixels for square images.
- Avoid anything smaller than 800 × 800 pixels for square images.
- Avoid anything larger than 4472 × 4472 for square images.
For non-square images, we definitely suggest using the guides below. It’s also worth noting that some themes crop images differently, so you may have to guess and check to see which image sizes work best for your online store.
For the best guidance, take a look at the ideal Shopify image sizes below, all categorized based on image type:
1. Shopify Product Image Size (Ideal Size: 2048 × 2048 pixels)
Product images serve as the primary forms of media used to make sales. Shopify's themes do a pretty good job of cropping and optimizing product images for you, but you should never rely on the automated tools.
The recommended dimensions for product images on Shopify are 2048 x 2048 pixels.
This is a wonderful spot to ensure your images don’t slow down your page speeds, while also ensuring customers see the richness in detail from your original photos.
We propose a square image for product photos, to avoid unwanted cropping from Shopify themes.
The screenshot below shows an image uploaded as 2048 × 2048 pixels, and it resulted in no cropping.
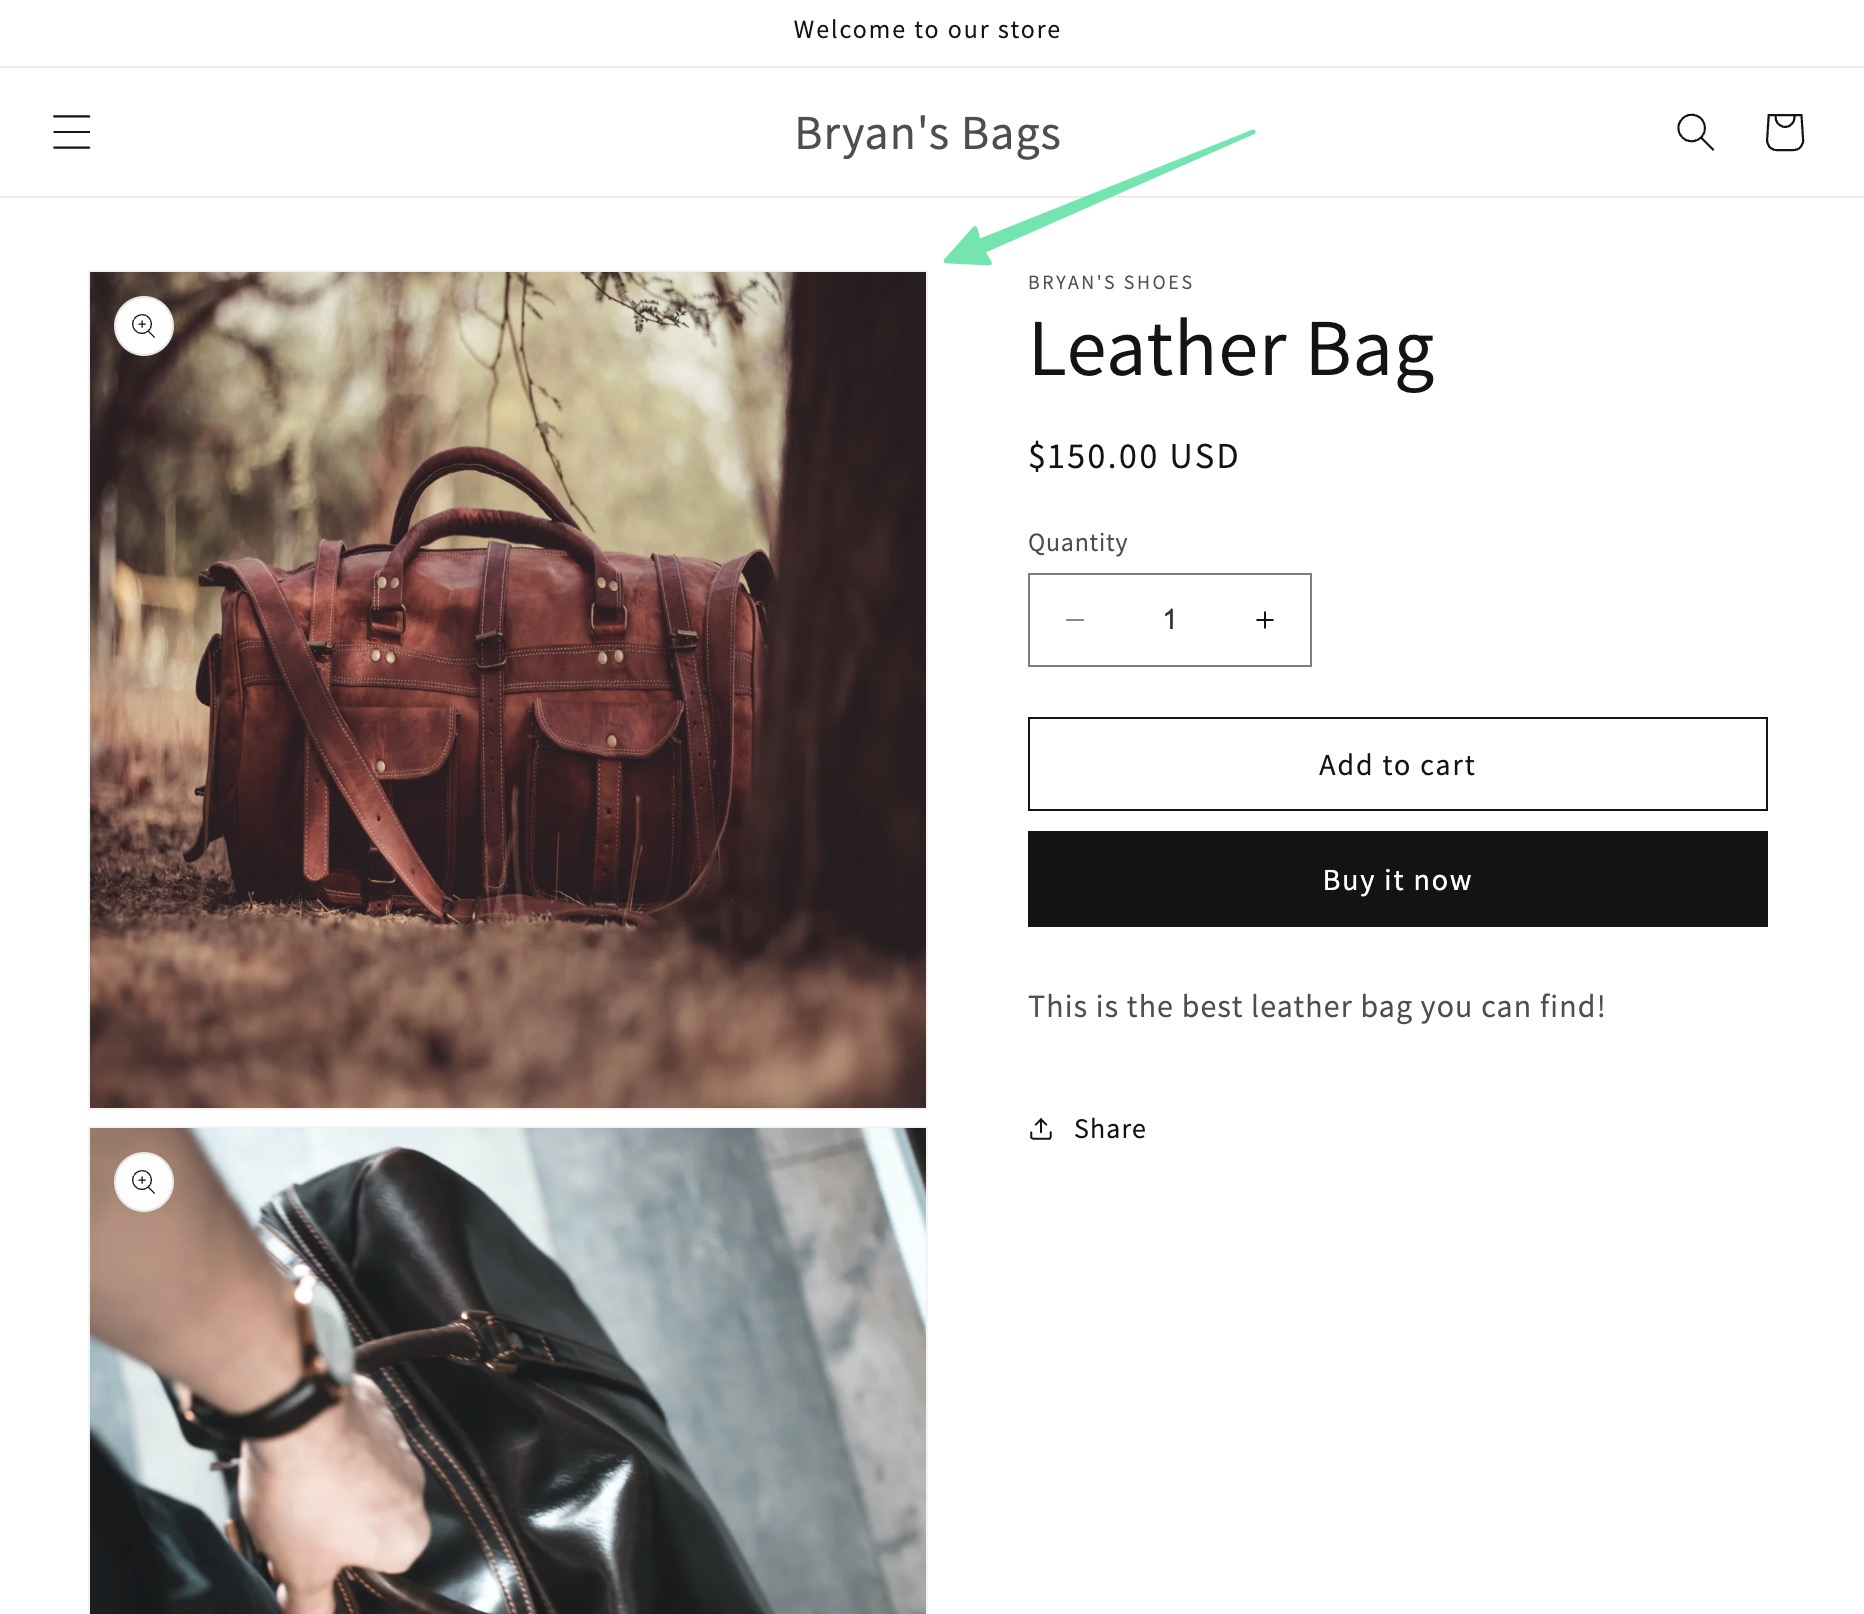
Longer and wider images can still work for product photos, but there’s less control over what the theme does to your images. You may find that landscape photos get decreased in size in comparison to the portrait format.
2. Shopify Collection Image Size (Ideal Size: 2048 × 2048 pixels)
Adding a collection doesn’t necessarily require an image, but doing so allows you to create a separate page for that collection, almost like a landing page made just for a small subset of products.
A collection image is uploaded under the Create Collection section in Shopify.
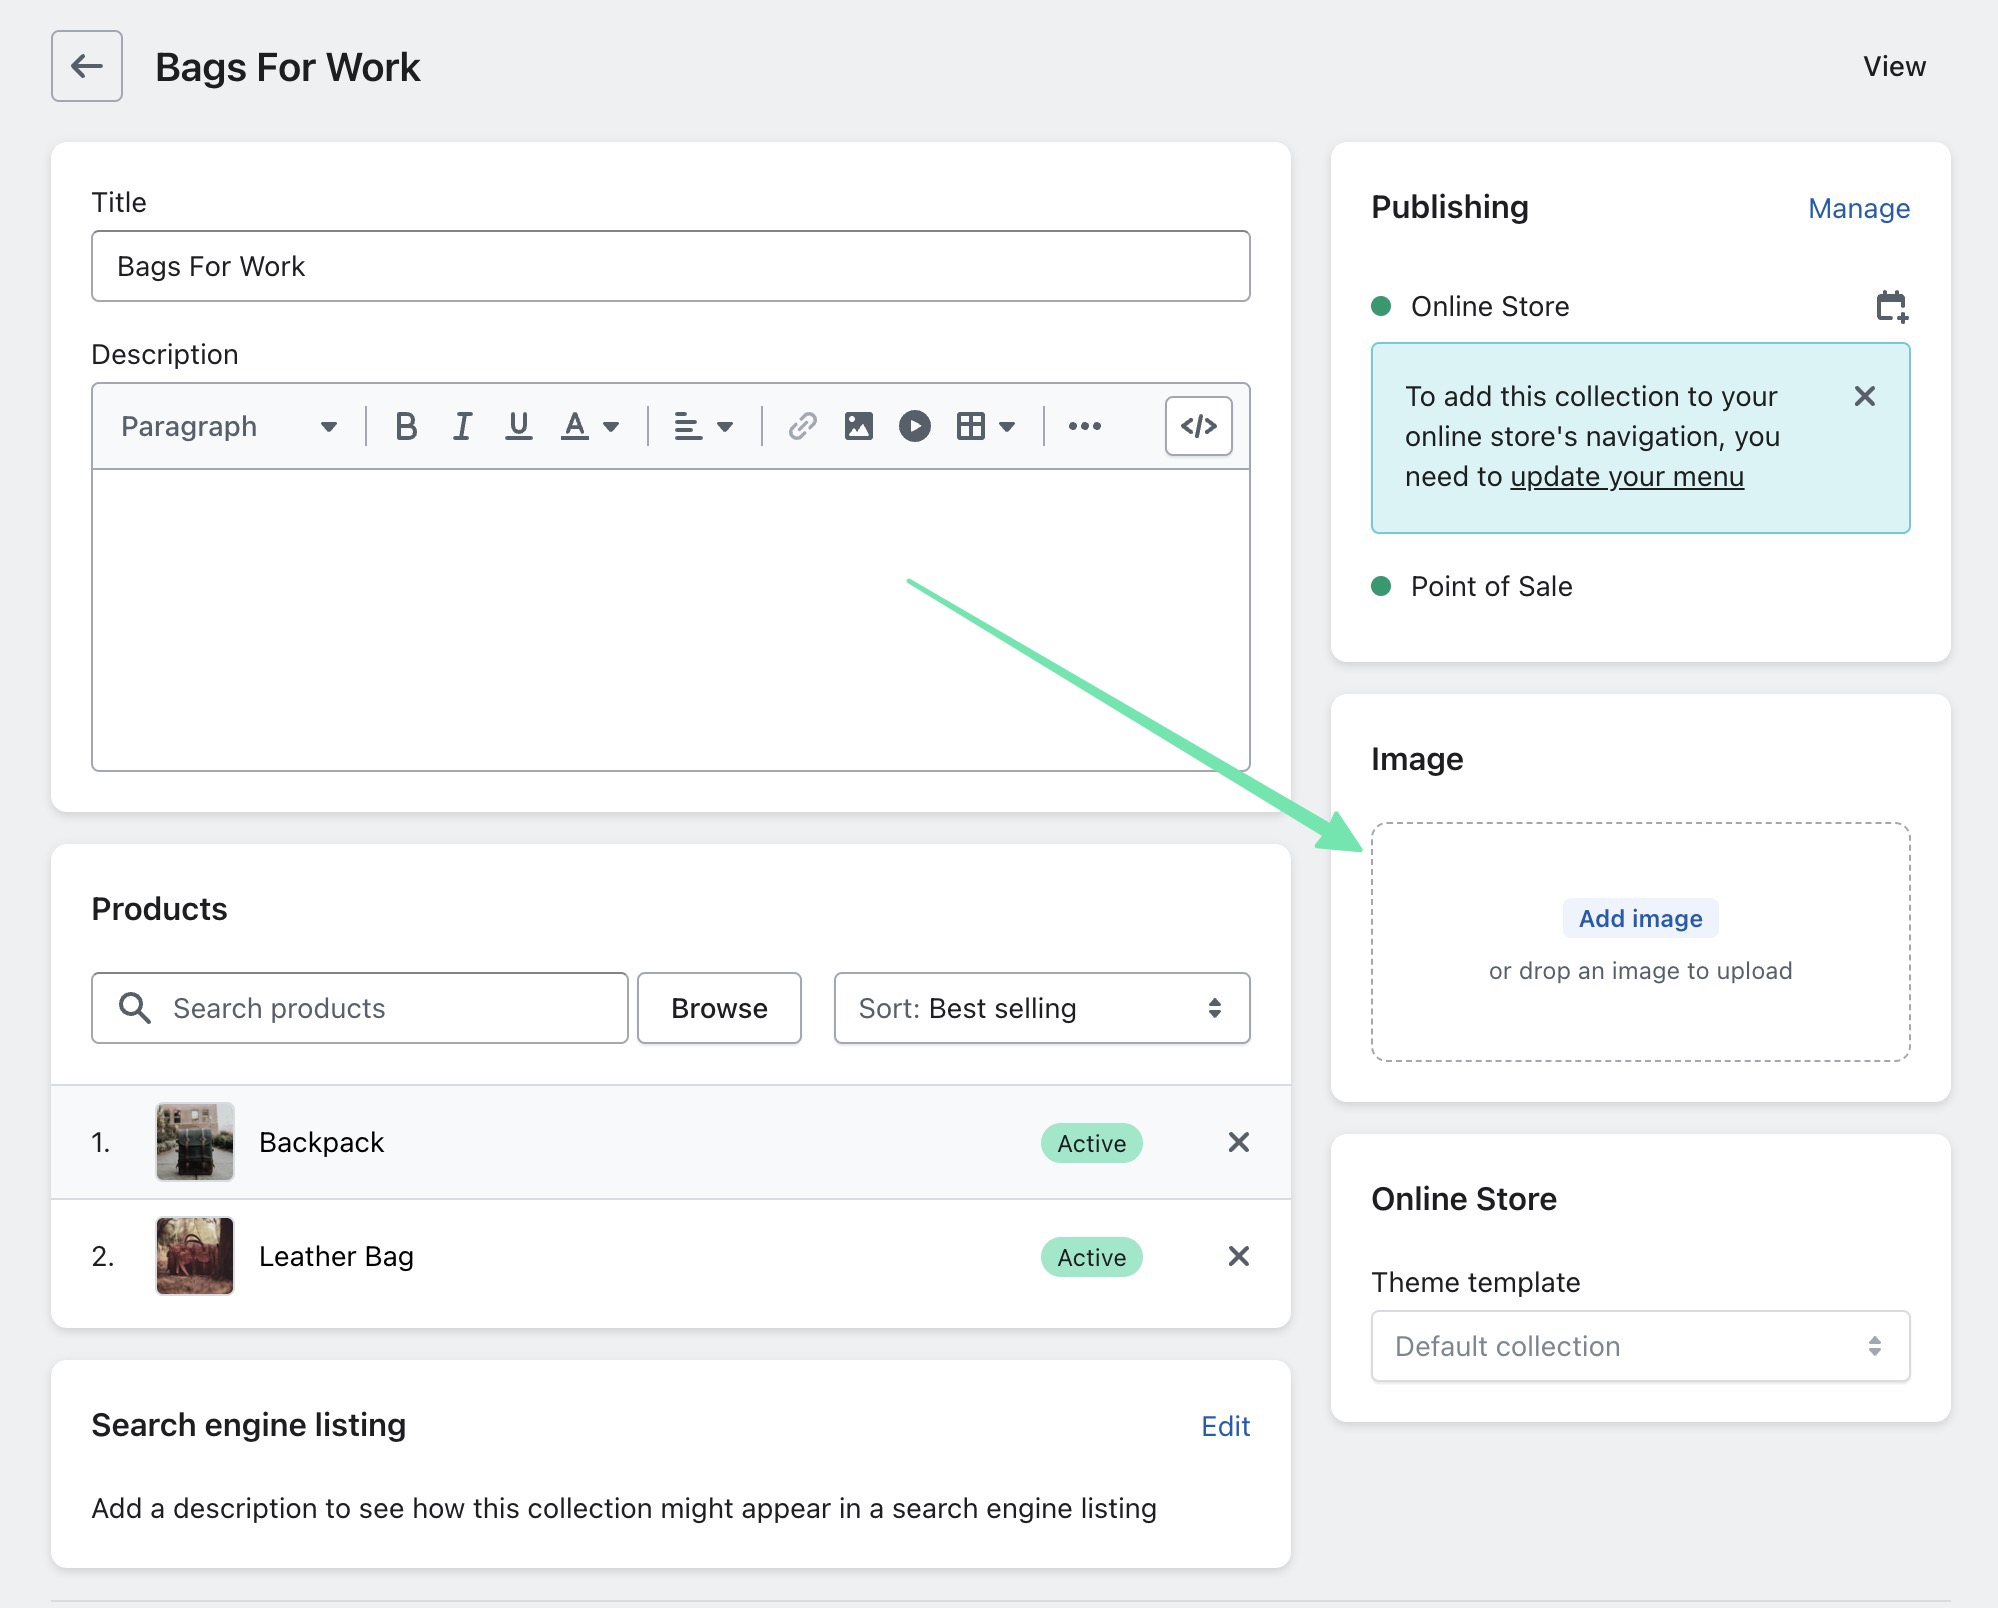
After which, you can add a product to that collection and display it in a content block on the homepage or as a page on its own.
If you leave the Image field blank on a collection page, it will take one of the featured product images from that collection as the default.
The recommended Shopify image size for collections is 2048 × 2048 pixels.
The square dimensions help establish a standardized format across all collections, especially when displayed next to each other.
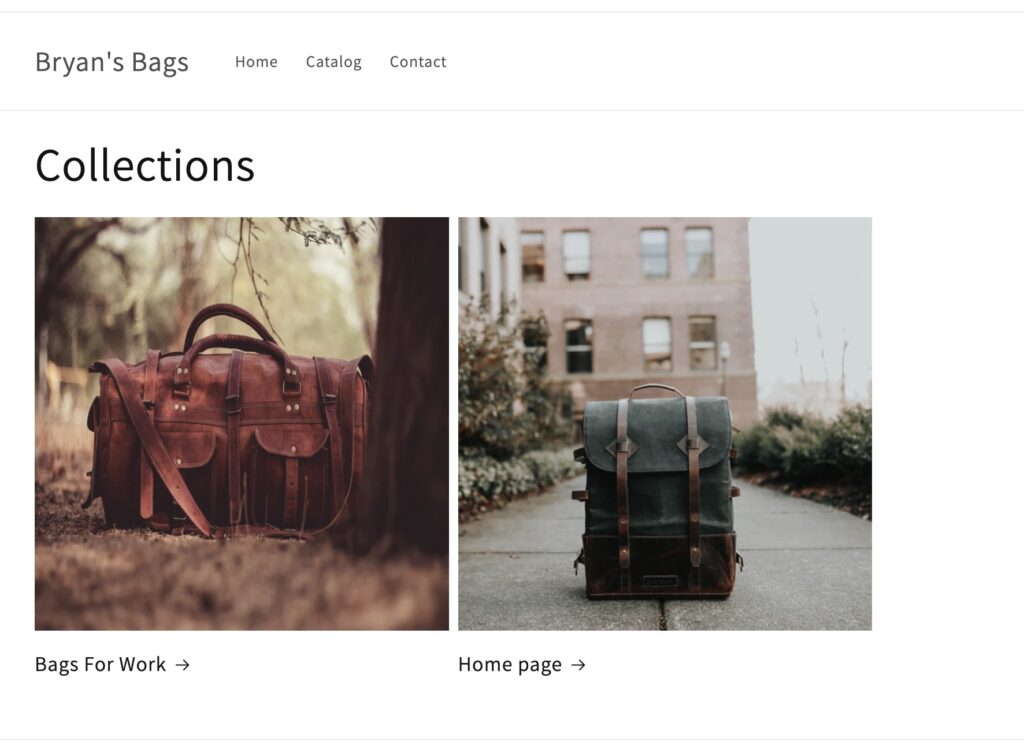
You’ll also find that square images are easier to work with when you utilize content blocks that showcase collections.
As always, your results may vary based on the theme used. Some themes, in fact, offer further capabilities with your collection images, allowing you to share the image like a banner on a separate collection page. In this case, the optimal size of your collection image may be entirely different from what we’ve been talking about here. Overall, your best plan of action is to go through testing with your theme. Upload several images of unique sizes to your collections. Write down the ones that work, then always use those dimensions. Just make sure the images aren’t too large or too small, and you’ll be fine.
3. Shopify Logo Image Size (Ideal Size: 450W × 250H pixels)
The logo stands out as the marquee of your ecommerce store. It’s shown right when someone lands on your homepage, and throughout the entire website, considering it’s usually visible within the header area.
Shopify users having issues with logo sizes may find that the logo isn’t large enough, or it makes the navigational menu deformed in some way. Or, you might find that the logo leaves a lot of white space below or above.
To fix most of those problems, we suggest using logo dimensions of 250 pixels in height by 450 pixels in width.
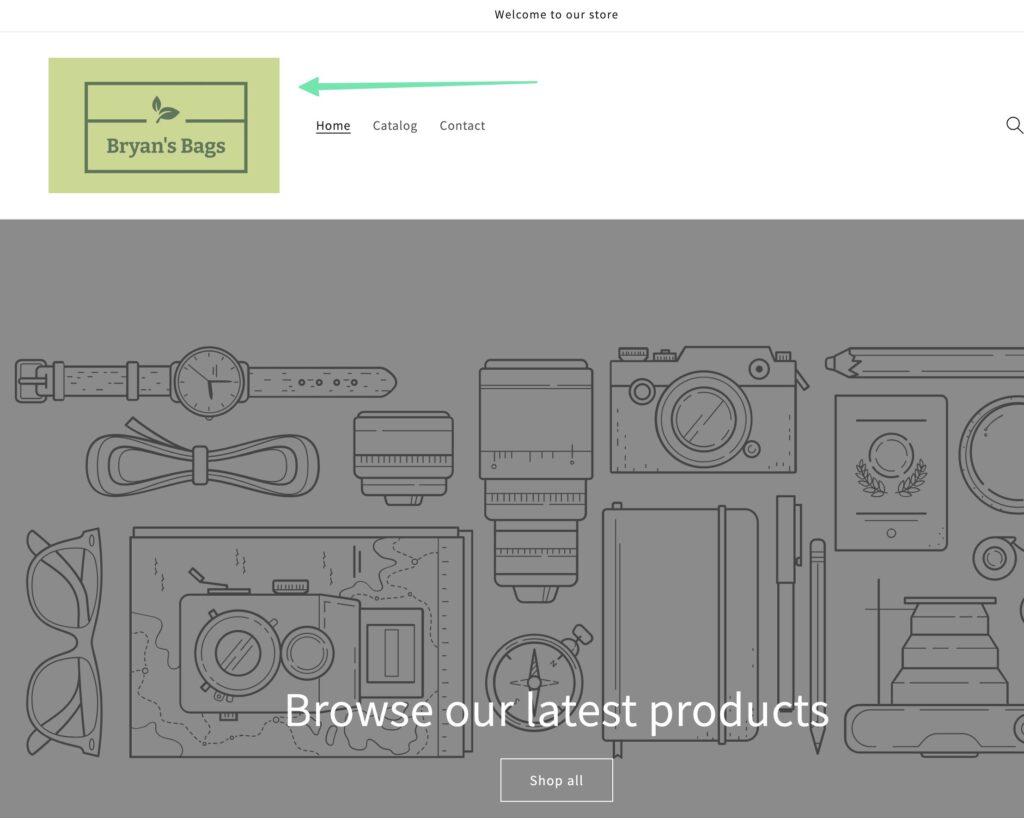
In fact, Shopify recommends never going higher than these dimensions for width and height. Having said that, you can go smaller, as long as your theme allows it.
Every so often, the sidebar throws things off, or perhaps your navigational menu has too many elements pushing the logo in a strange direction. Regardless, it’s best to play around with your logo dimensions and site settings to achieve the best look.
As an alternative, some themes look great with square logos, but keep it under the 250 x 250 pixel mark, so it doesn’t take up too much space.
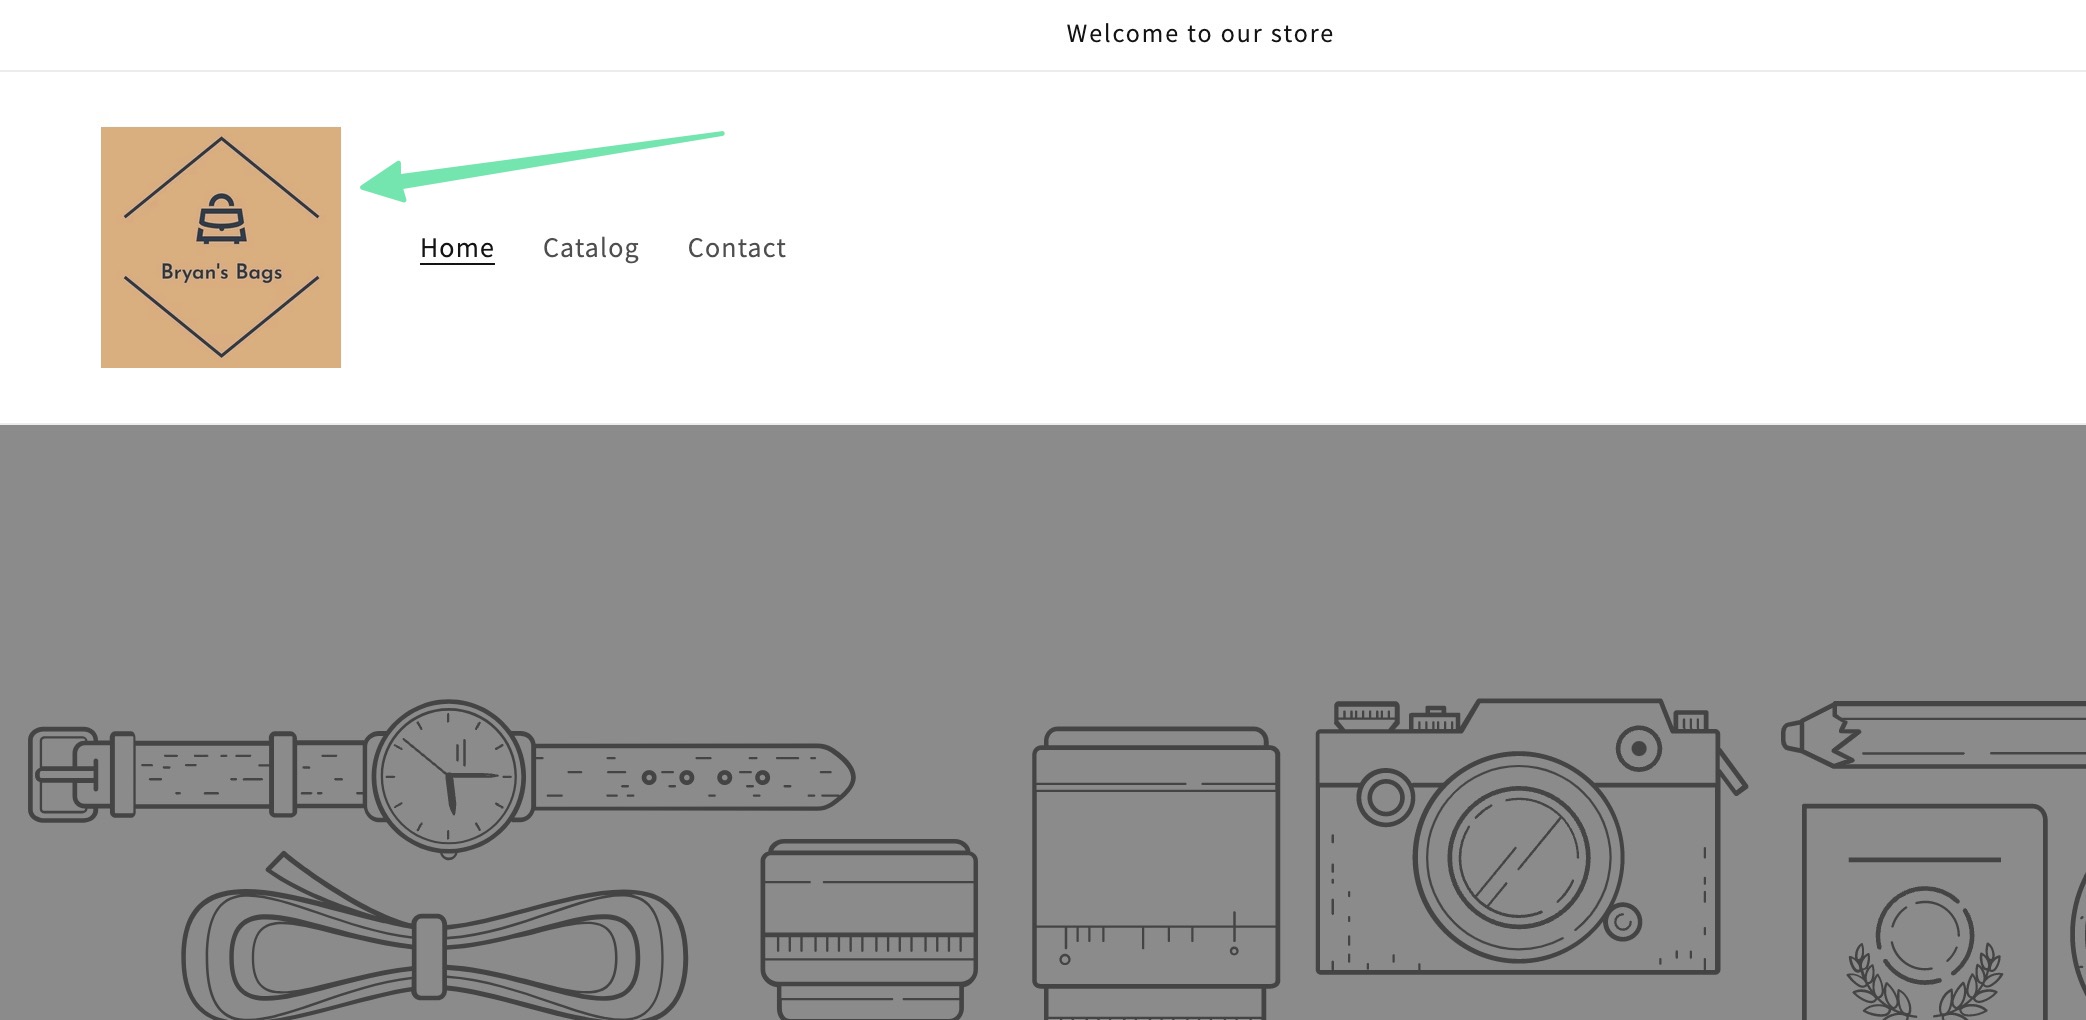
For the most versatility, go to Settings > Brand in Shopify to add a Default and Square image. This way, you can upload either depending on the situation.

4. Shopify Banner Image Size (Ideal Size: 2000 W × 600H pixels)
Regularly called a Hero image or image banner, these are the larger images you might place at the top of a homepage to showcase new products and include text with a button. It’s essential that banner images be high resolution to prevent graininess after resizing, and when viewed on different devices.

Shopify also has a Header content section, which functions similar to the Banner Image content section.
Regardless of which one you choose, we recommend sticking to the dimensions of 1200 pixels in width x 600 pixels in height for banners and hero images.
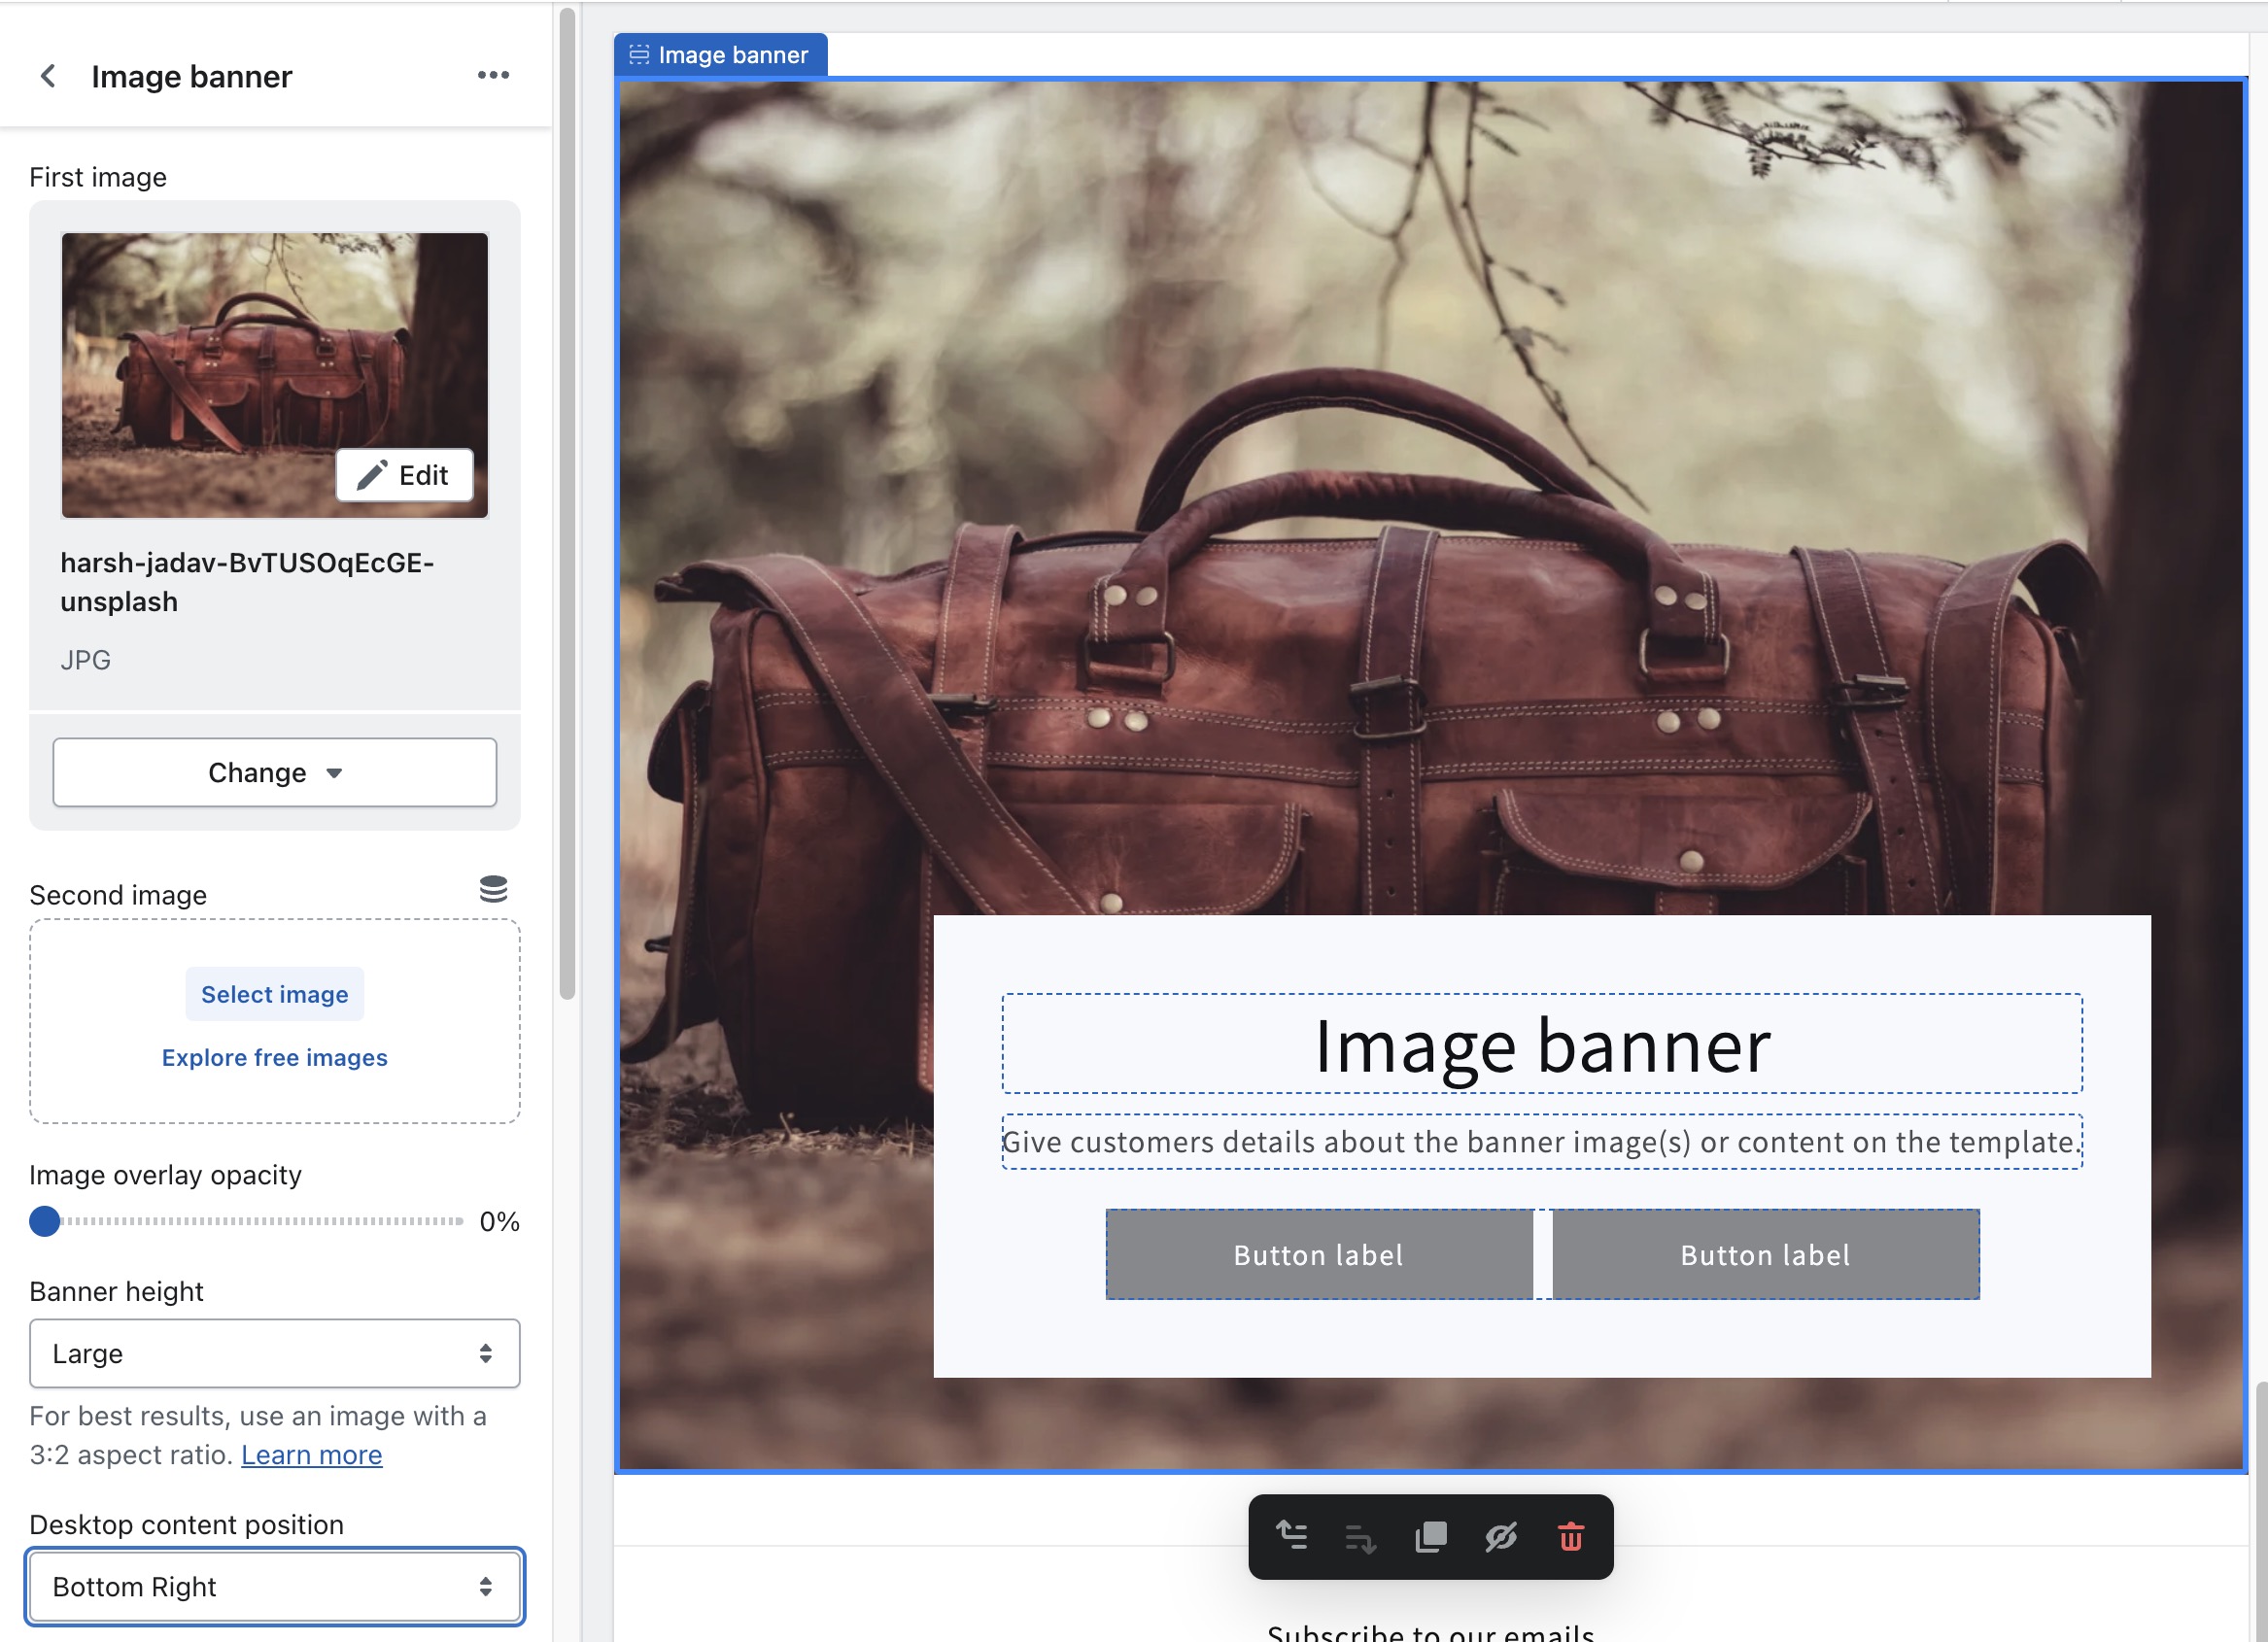
Having said that, you can often get away with anywhere from 1200–2000 pixels for your width and 400–600 pixels for the height. And as always, it depends on your theme.
Finally, it’s also wise to adjust settings for all image banners and hero images. You can modify the banner height for most themes, and tell Shopify where you’d like the banner content to sit, like in the bottom-right corner or at the top—to get a better view of the image behind the content.
5. Shopify Slideshow Image Size (Ideal Size: 2000W × 600H pixels)
Much like a banner, you must use high-resolution images in slideshows. These content sections allow you to display multiple photographs in one area of a page. They then slide to the next image in succession.
Since they’re so similar to banners, you’ll actually maintain the same width and height that you would for a hero or banner image. The recommendation is a width of 2000 pixels and a height of 600 pixels. However, the height can range from 400–600 pixels, and the width can go from 1200–2000 pixels.
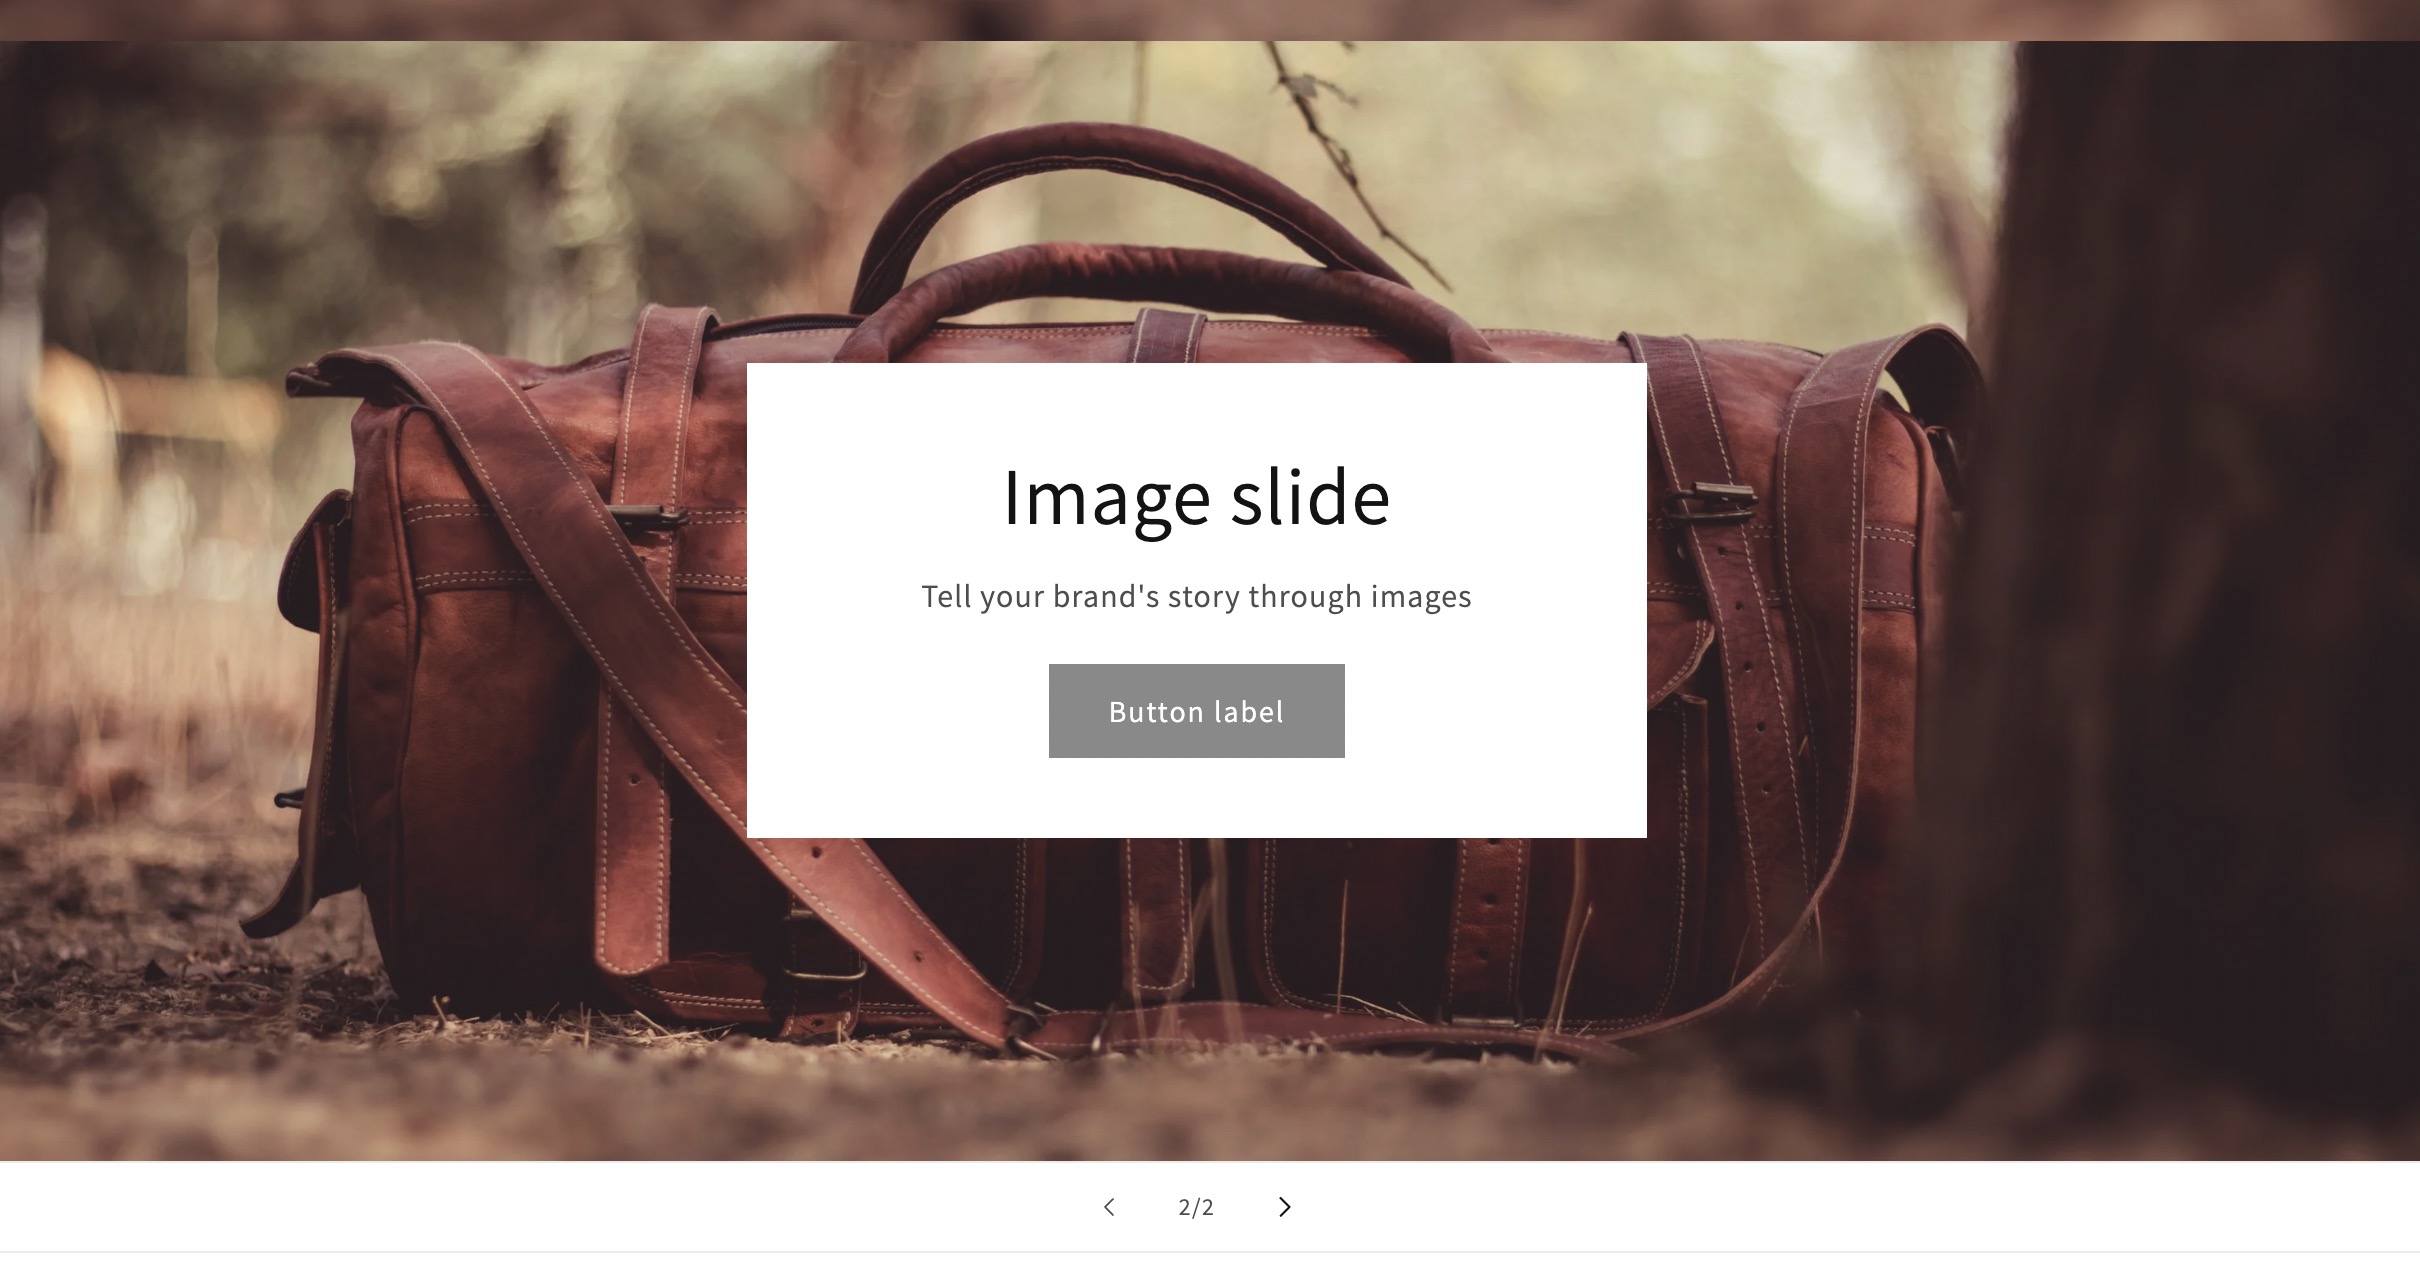
Be sure to manage all slideshow settings to establish the best formatting for your slideshow. You may need to move the content box to a different location, or perhaps the slideshow would look better if you extended the height a bit.
One of the main rules of a slideshow is to always upload the same sized images for the same slideshow. You’re more than welcome to adjust dimensions when creating a separate slideshow, but just make sure that the images combined together in one slideshow all have the same dimensions, for continuity and user experiencer.
How to Optimize Shopify Images
The optimization of your images helps you improve how photos load on your ecommerce store. It also helps you create a more user-friendly experience on the website, seeing as how the images should complement the shopping experience, not overpower it.
There are several aspects to consider when optimizing your images for Shopify. These areas include optimal image formats, compressions, image sources, styling, and more. Keep reading to learn all about the best practices and steps to take for optimizing images in Shopify.
Step 1: Choose the Optimal Image Format
Shopify image sizes are important, but the first step in any photo optimization should involve choosing the best image format.
There are numerous image formats that Shopify allows.
Here’s what makes them special:
- JPEG/JPG: Perhaps the most common file format for images, and rightly so. JPEGs compress well and provide excellent quality. We recommend them for product pages, especially when you have fine detail in the photos.
- PNG: This file type is actually better than JPEGs at maintaining quality after reducing image size. However, you may find that PNGs don’t compress as much. They’re best when you need a transparent background (not supported by JPEGs), so we like them for logos and some banner images.
- GIF: The GIF is an image format for animations. It’s essentially like turning a short video into a moving image, which is helpful for briefly explaining a product without the overbearing size of a video. We like them on homepages, product pages, and blog posts. Don’t overuse GIFs, though, since they lack the rich color quality found in other formats like JPEG, TIFF, and PNG.
- WebP: Perhaps the most versatile of all image formats, WebP is becoming more and more common since it offers stronger compression and quality than both JPEG and PNG, along with the transparency benefits of PNG. Not to mention, you can make animations with WebP as well. Consider using WebP for all types of images in Shopify. We expect to see WebP used more frequently across the internet in the future.
Other than that, Shopify supports formats like HEIC, progressive JPEG, and AVIF. HEIC is the image format standard used across Apple devices. It’s extremely compact, can contain multiple pictures in one image, and provides excellent quality. However, they’re incompatible with most non-Apple devices, making it a tough one to recommend. The AVIF image format has rather strong advantages due to its high quality and dramatic compression rates. In short, your performance with an AVIF should actually be stronger than with JPEG and WebP images. However, it’s taking a while for desktop and mobile browsers to adopt it as a file format standard. So, we can’t recommend it right now. Not until just about everyone with an internet connection can actually view the images online.
Based on what you plan to use the image for, pick the suitable format from above. Then, move to the next step so that your image styles remain the same across your website.
Step 2: Shoot for the Same Style Across All Photographs
Continuity is key for photograph in ecommerce. It establishes the overall look of your brand and creates a standardized feel across your entire website.
For example, it’s common for brands to use one background color for all product images.
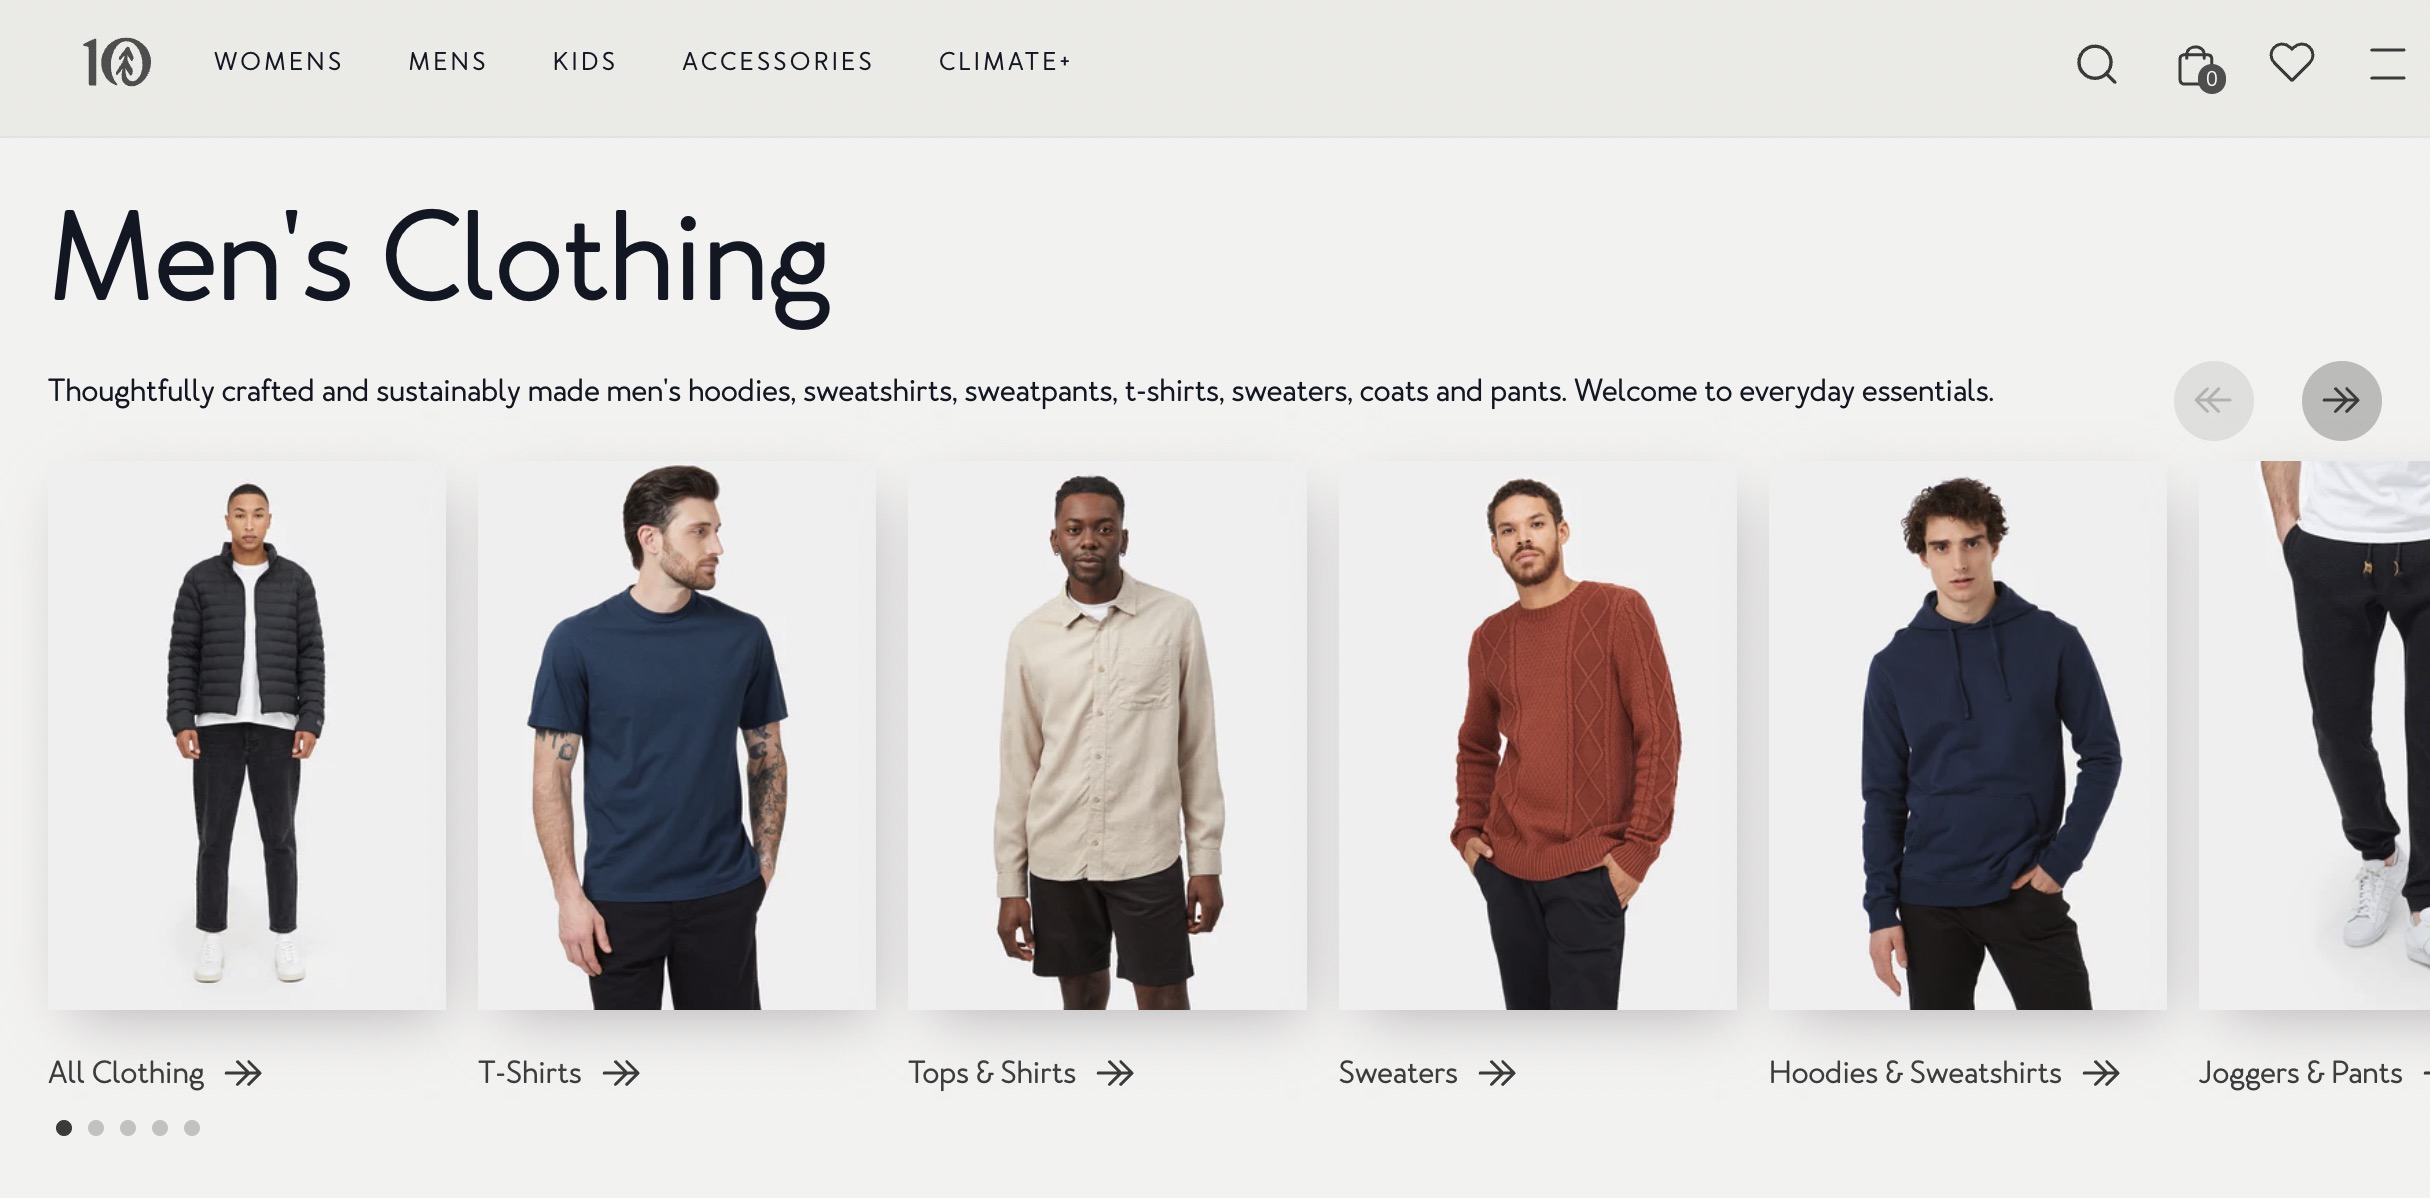
This goes for the dimensions and style of the images as well. If most of your product images are in landscape orientation, refrain from mixing in a few photos with landscape orientation. You’re more than welcome to incorporate both lifestyle and product photos into the mix, but it’s best to stick with one style for the majority of your shoots.
Step 3: Create a Mix of Both Product and Lifestyle Photography
As mentioned, you’ll most likely want to use one type of photography style for the majority of your product photos. However, it’s essential to include some lifestyle photos to complement the standard product photos with mono-colored backgrounds and different view of the products.
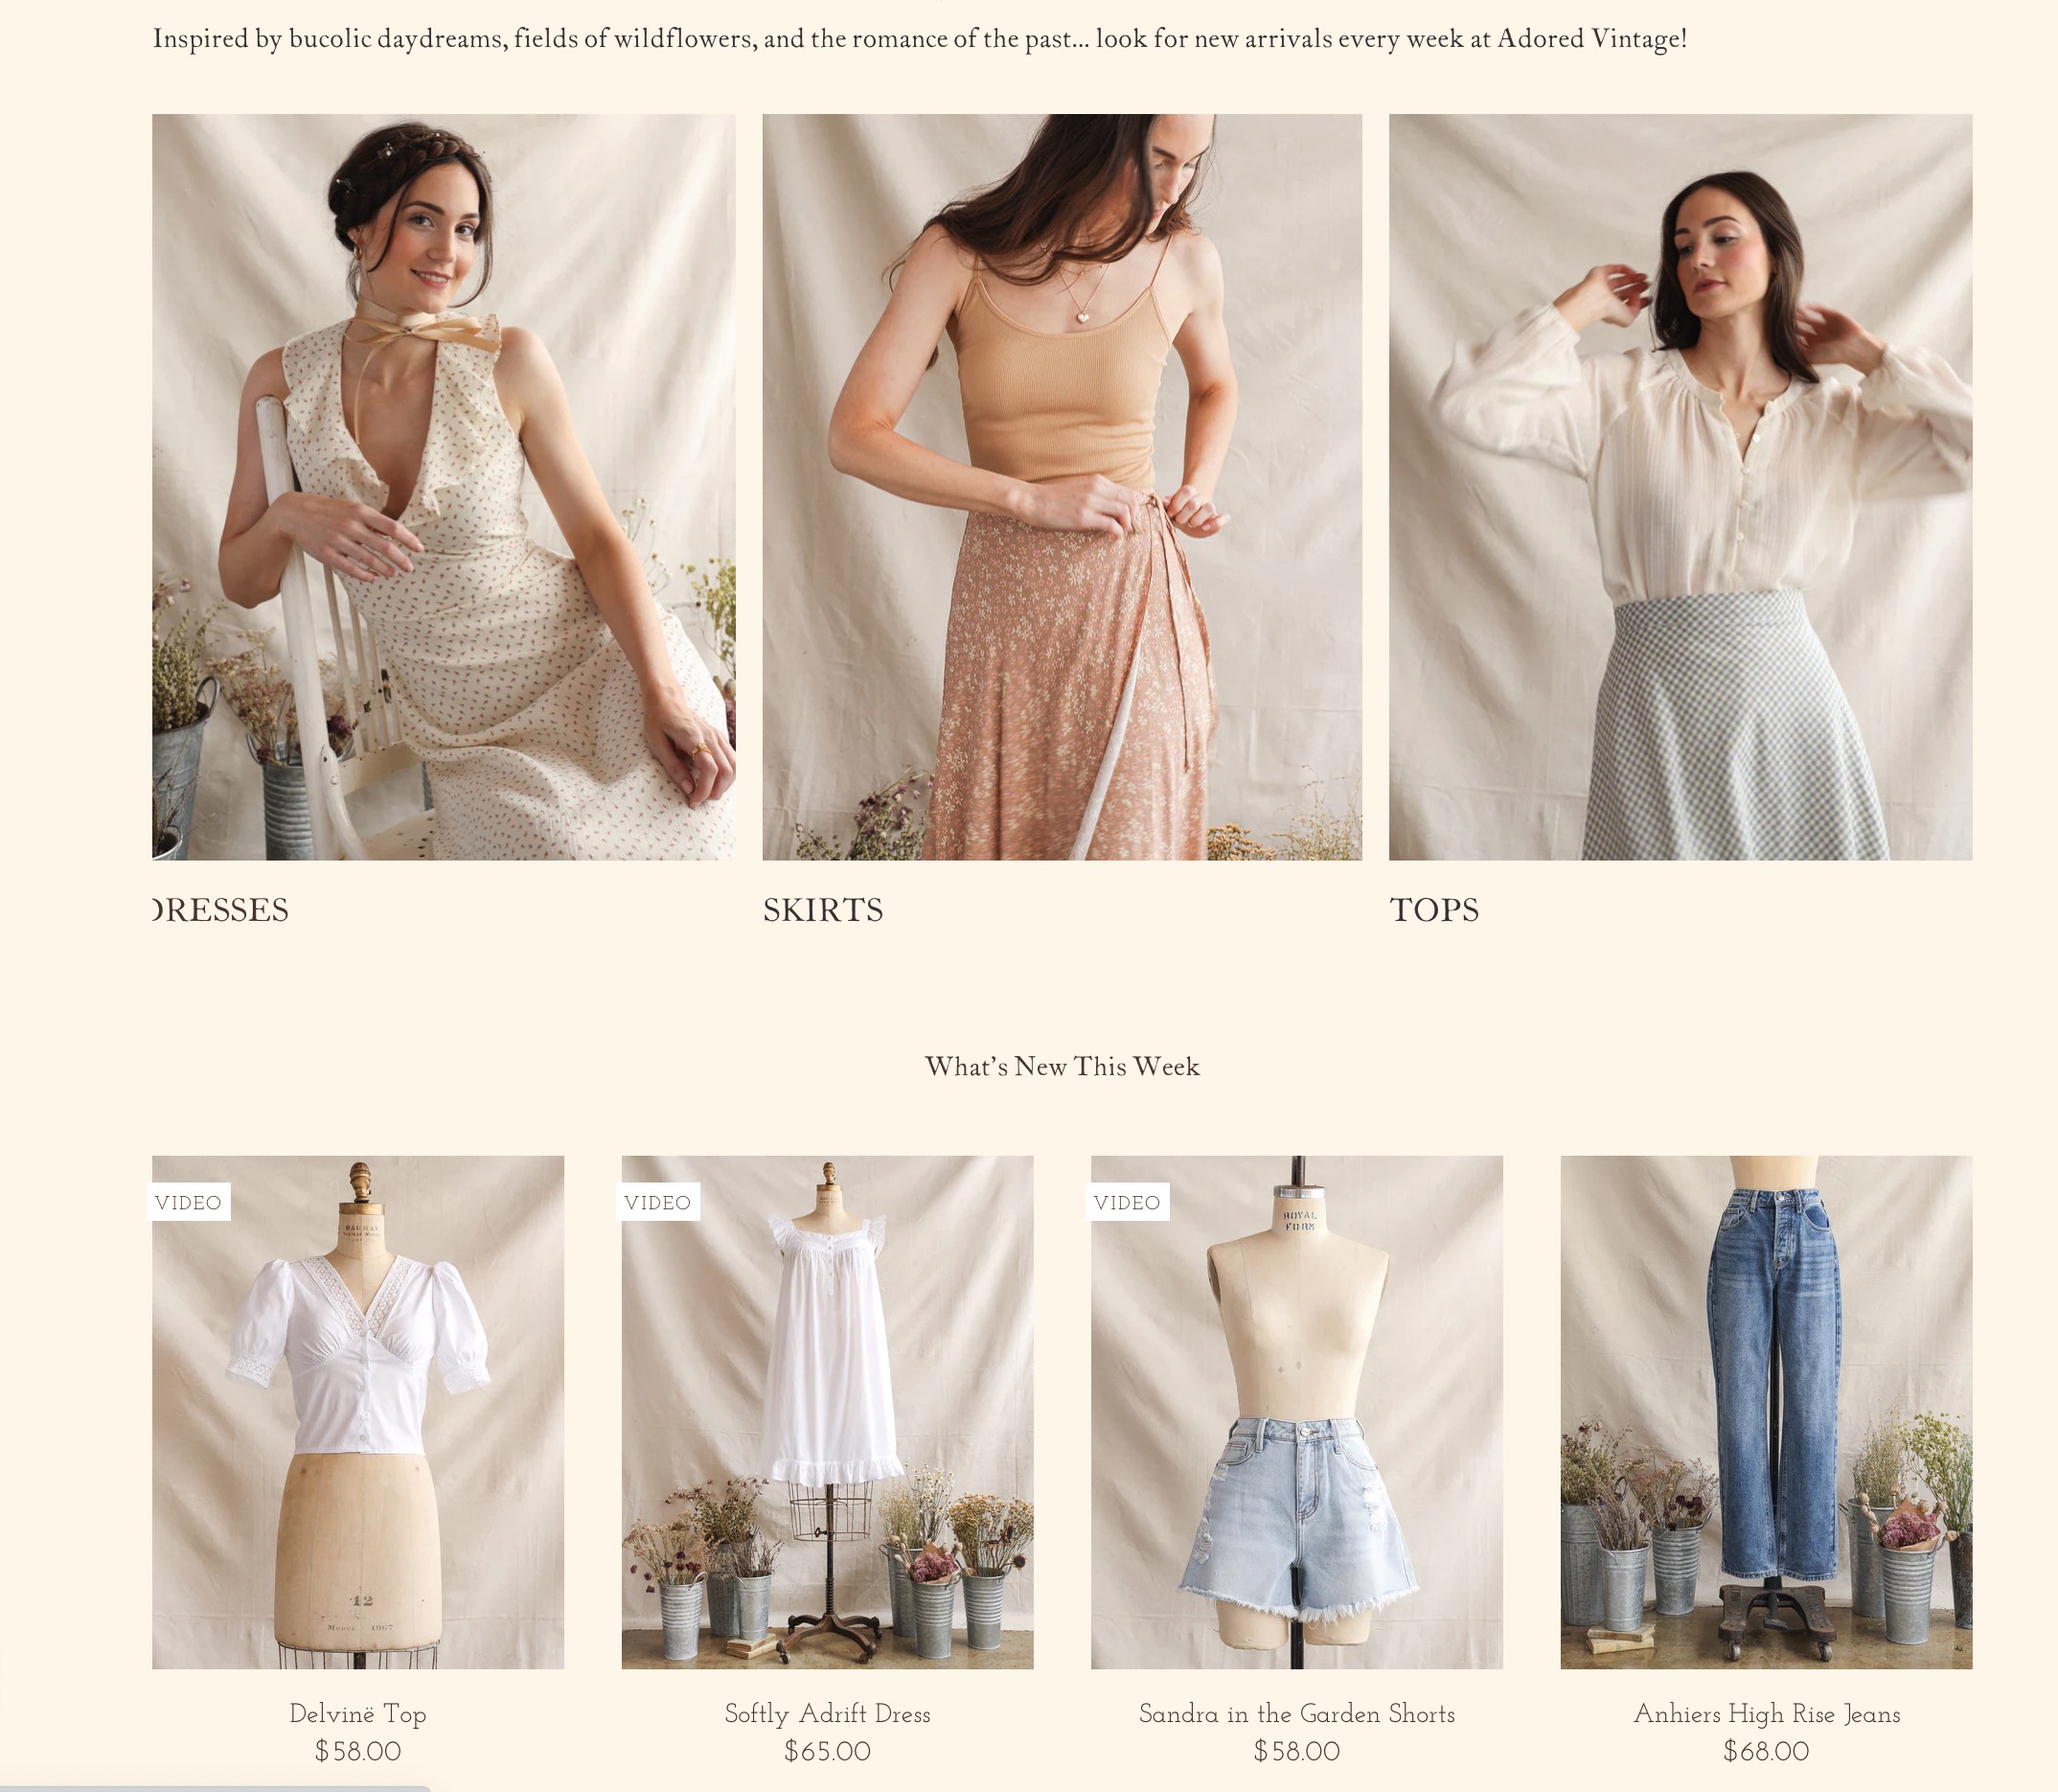
Ecommerce businesses have a disadvantage where customers can’t try on or touch the products right there. That’s where lifestyle photos come into play. Users can see what the products look like in action. How a shirt drapes over the body, or the size of a skateboard with someone actually standing on it.
Step 4: Choose Suitable File Names and Titles
Every image file has a name, and Shopify takes that file name and publishes it in the metadata of your website (every ecommerce platform does this).
So, if you save photos as new-photo(1).jpg on your computer, and upload them to your store, the search engines will have no information about the contents of the photo. This could hurt your SEO.
When optimizing images, walk through these steps to ensure the search engines (and those with visual impairments) can understand what’s going on in the image:
- Add a file name that’s reminiscent of what’s inside the image.
- If you happen to upload a generic file name, change the image Title in Shopify. This replaces the default.
- Use alt tags for an even stronger representation of what’s shown in the image. These are the main elements the search engines look at, since it shows your user experience is improved for the visually impaired.
Step 5: Compress Images Before or During the Upload
Shopify offers automatic compression for all images uploaded to its servers, but you shouldn’t rely on that entirely.
Your best bet is to either use a third-party tool to compress images before uploading to Shopify, or install a Shopify plugin that automatically compresses photos upon upload.
It’s much easier to go the app route, but most of them require a subscription, so we understand if you need to remain on a budget.
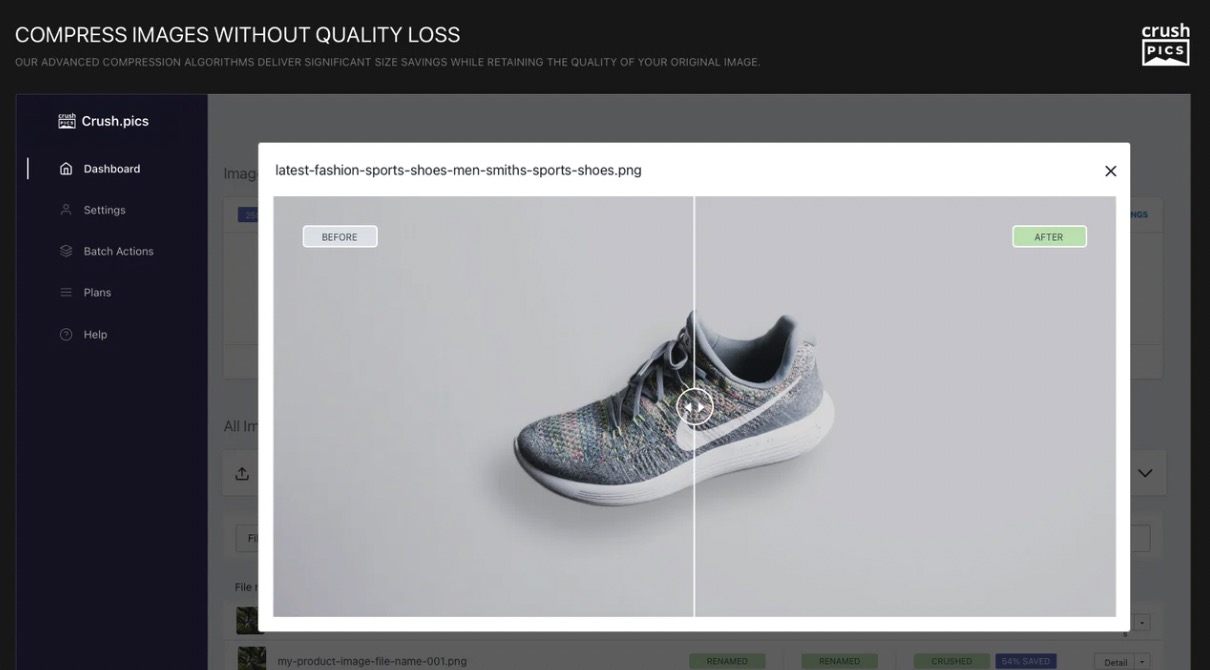
Some apps that work well for image compression include:
Test out these apps with their free trials to understand how well they compress images, and how automated the process is for you. After that, you can commit to a subscription. For third-party tools, we recommend TinyPNG and Image Resizer.
Step 6: Consider Free Image Finder Apps
Although it’s highly recommended that ecommerce brands take their own photos (instead of finding free alternatives, or taking them from a manufacturer’s website), there are some areas of an online store that are suitable for use with free images.
For instance, you may need a scenic shot of someone looking over a canyon to complement a blog post. On the other hand, you might want to use a photo as a background to a hero image, allowing you to drop the actual product image and description on top of the background.
For those situations, we suggest using some of these Creative Commons licensed image sites:
It’s important to point out that a Creative Commons license doesn’t mean that you can just take the image for free and put it on your website. Occasionally that’s the case, but you must check each image to ensure which rights you have for its usage.
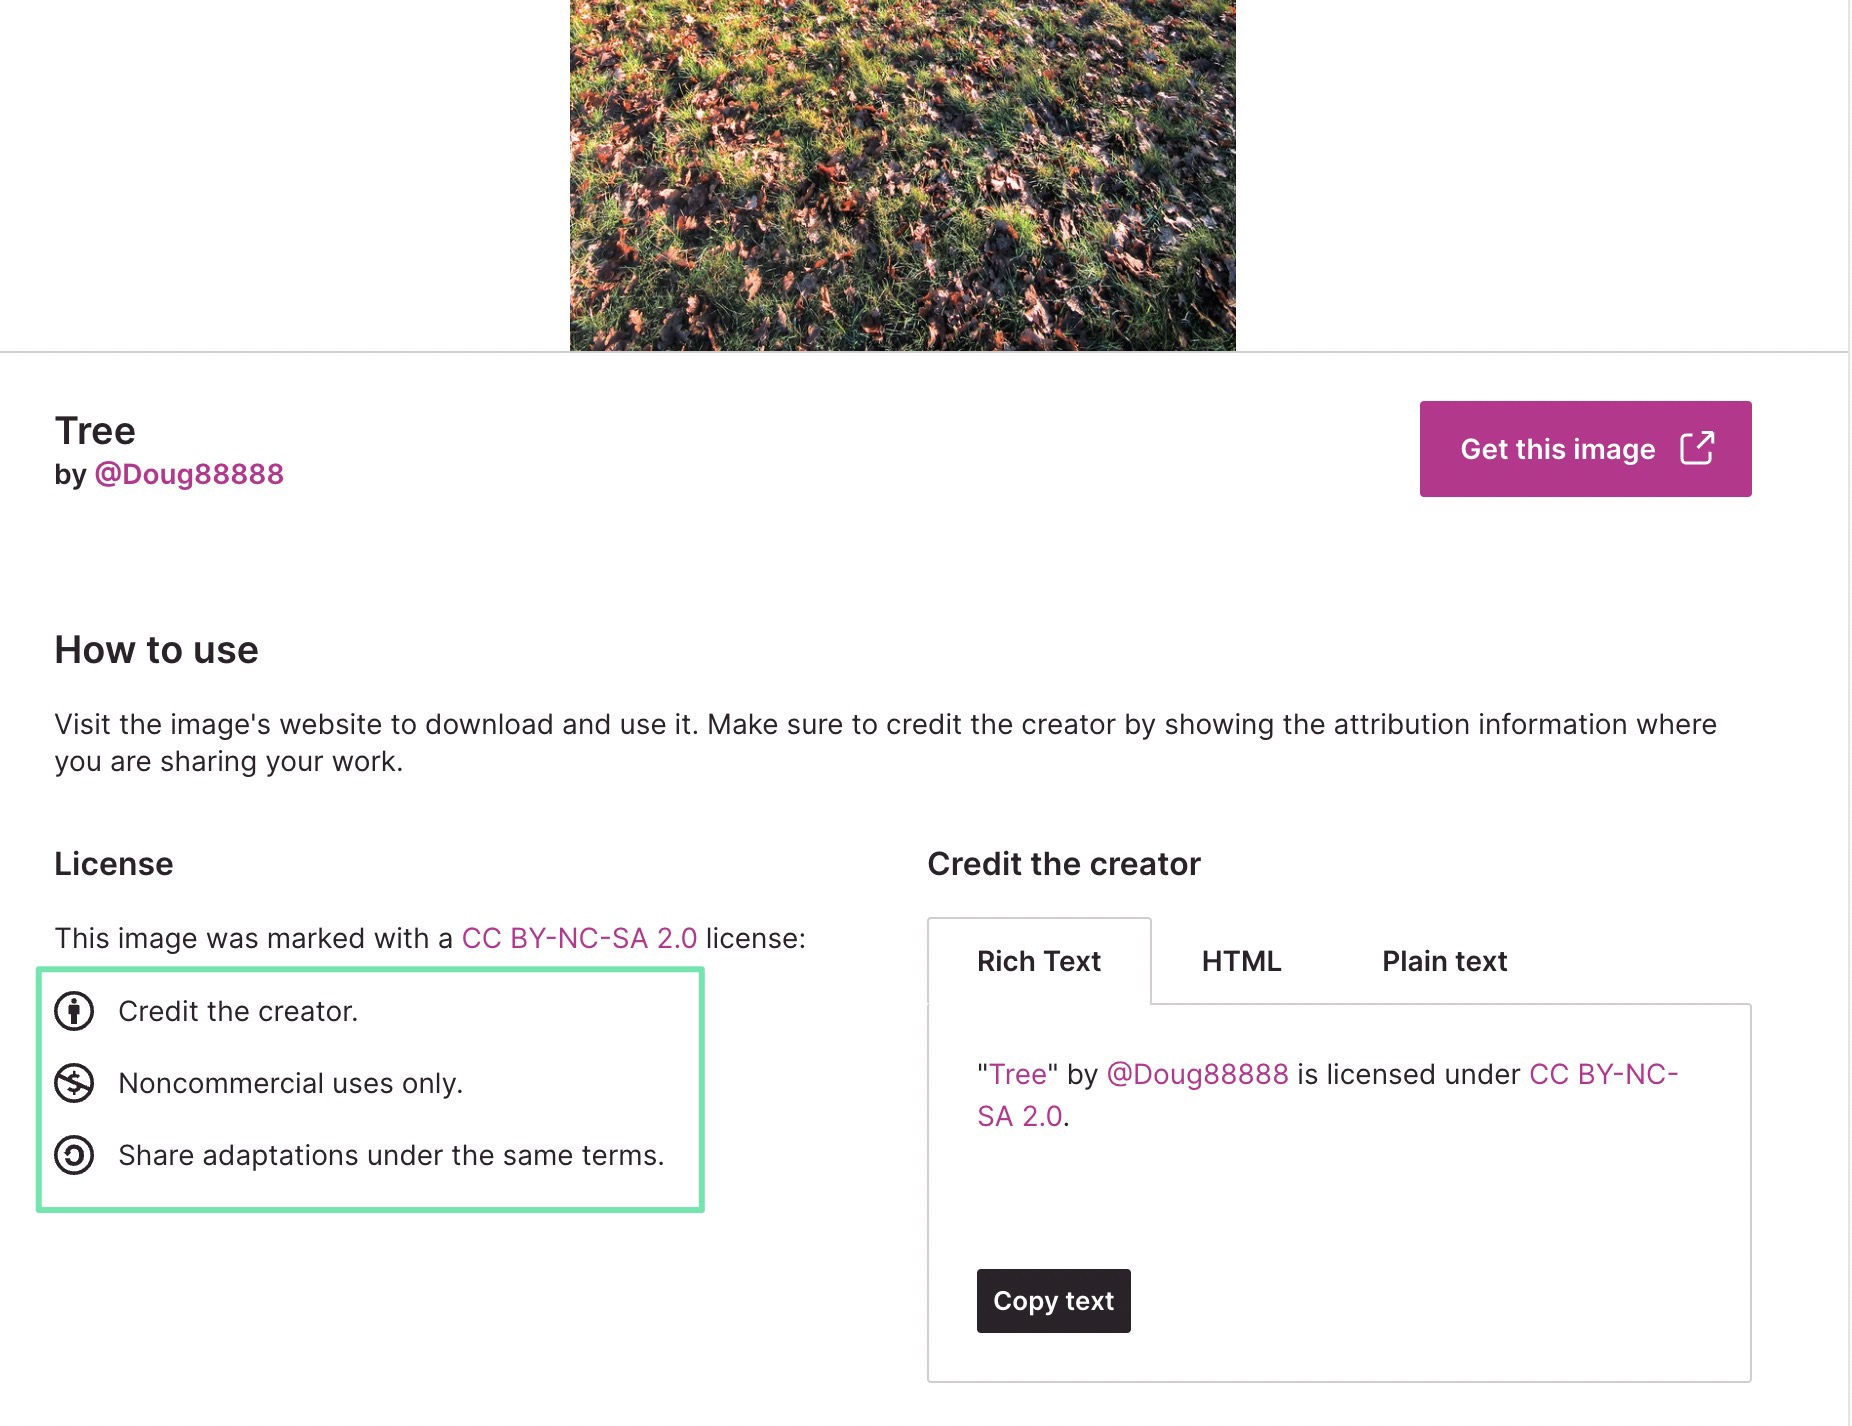
For instance, Creative Commons licensing tells you:
- If you can use the image for commercial or noncommercial purposes
- When you must credit the creator, or if it’s simply recommended you do that
- If you’re allowed to modify the image in any way
In addition, there are plenty of free image editing apps to take control of resizing, filters, and cropping without paying a dime:
We suggest:
Step 7: Run A/B Testing to Figure out the Best Images and Formats
After giving your photos relevant file names, resizing them, cropping them, and deciding on the perfect format and size, it’s time to see how they look in your store.
Luckily, you mustn’t cross your fingers and hope that the images are the best for conversions. You have the ability to upload multiple variants of the same images on product pages, landing pages, and homepages, then see which of them perform the best in terms of conversions.
Both Theme Scientist and Shogun offer A/B testing features for several parts of your Shopify design.
What’s great about A/B testing is that the experiment is never over. It allows you to keep an eye on every aspect of your website. You can swap out images that lose momentum over time, and run multiple tests throughout one time period.
Shopify Image Size Guide: Our Conclusion
Sticking with square images is one way to ensure that your ecommerce photography remains uncropped. However, you may find that this rule isn’t always true when it comes to your Shopify theme.
Therefore, we recommend uploading multiple image sizes for products, collections, and banners to understand what your theme can handle best. Otherwise, we like the 2046 × 2046 pixels standard. But for banners and logos and slideshows, you’ll want to use the more specific dimensions mentioned above in this article.
Please let us know in the comments below if you need any clarification about Shopify image sizes!


Comments 0 Responses