
Shopify has become one of the most popular platforms for building online stores — and for good reason. It’s beginner-friendly, scalable, and packed with features designed to help you sell online quickly. But getting your store up and running can feel overwhelming if you're new to ecommerce.
In this step-by-step Shopify tutorial, you'll learn how to build your store, set up the essentials, optimize for your first sale, and start attracting traffic.
Whether you're launching a side hustle, a full-fledged business, or migrating from another platform, this guide will walk you through the key steps to getting started with Shopify.
Shopify Tutorial — video version
Prefer watching to reading? We've got you covered! Check out our step-by-step Shopify tutorial video below. It covers everything in this article, plus shows you how to use Shopify's AI features in action. Perfect for visual learners!
👉 Watch the Video Tutorial:
Step 1: Sign Up for Shopify and Choose the Right Plan
Before anything else, you’ll need to register for a Shopify account. The platform offers a 3-day free trial, and once it ends, you can choose one of several pricing plans based on your needs.
Shopify Pricing Plans (as of 2025):
| Plan Name | Monthly Price | Best For |
|---|---|---|
| Basic | $39/month | New stores just getting started |
| Shopify | $105/month | Growing stores needing more features |
| Advanced | $399/month | High-volume stores and analytics |
Tip: Start with the Basic plan if you're just getting started. You can upgrade later as you scale.
What’s included in all plans:
- SSL certificate
- Unlimited products
- Abandoned cart recovery
- Access to the Shopify App Store
- Shopify Payments and third-party gateway support
To sign up:
- Go to Shopify.com
- Click “Start Free Trial”
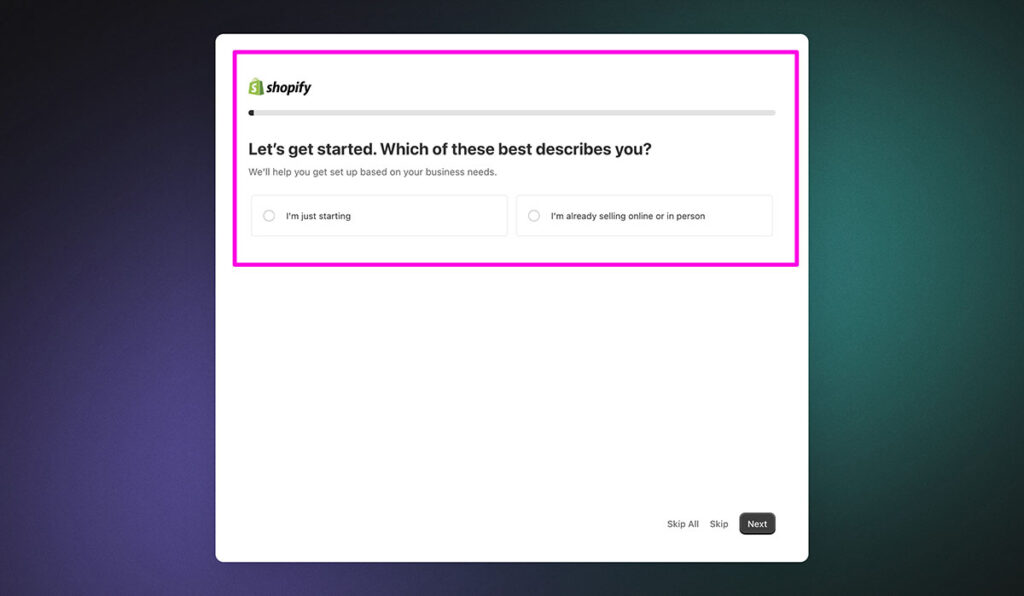
- Enter your email, password, and store name
- Answer a few business questions or skip them
- You’ll be taken to your admin dashboard
Once you're inside, you’re ready to start customizing.
Step 2: Choose and Customize a Shopify Theme
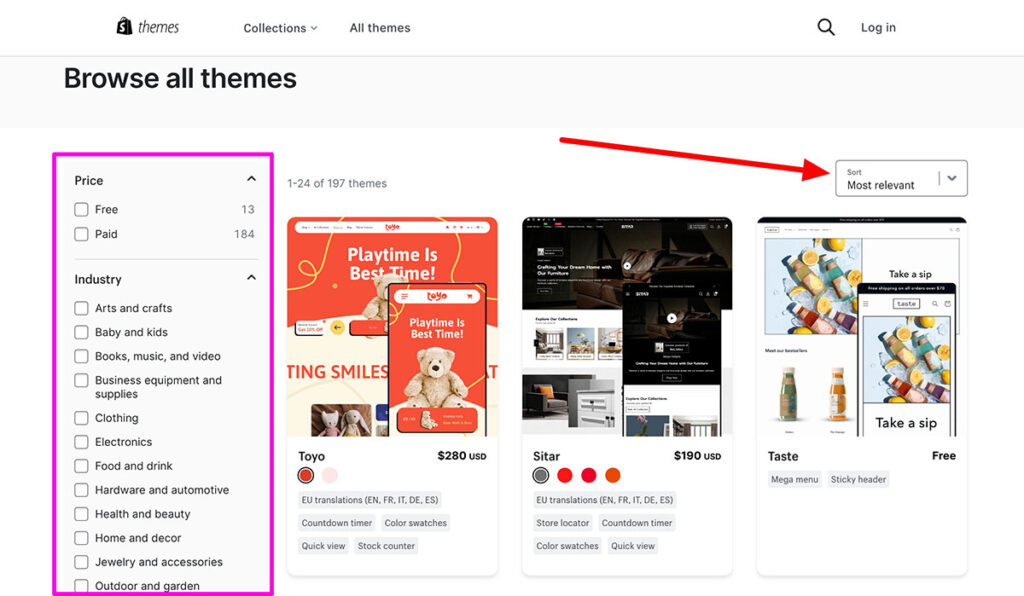
Your store's design is the first thing your visitors will see — and it plays a major role in whether they trust you enough to buy. Shopify offers a wide range of free and premium themes inside its official Theme Store. These themes are fully responsive, optimized for mobile, and designed to help you sell.
For beginners, using a free theme like Dawn or Refresh is a smart starting point. Both are clean, fast-loading, and follow Shopify’s latest Online Store 2.0 standards — which means more flexibility, better speed, and a drag-and-drop section editor.
But in 2024–2025, Shopify quietly rolled out a powerful new collection called Horizon themes — and they’ve quickly become the go-to for store owners who want performance and flexibility without going custom.
Popular Free Shopify Themes:
| Theme | Best For | Features |
|---|---|---|
| Dawn | General products | Fast, clean design, good starter |
| Sense | Health & beauty | Bright and professional |
| Craft | Handmade, home goods | Warm, artisan-style layout |
| Refresh | Modern product catalogs | Great layout options, minimal look |
Steps to pick and edit a theme:
- Go to Online Store > Themes
- Click “Explore free themes” or visit the Theme Store
- Choose a theme and click “Add”
- Click “Customize” to launch the theme editor
Use the visual drag-and-drop builder to tweak:
- Header and navigation
- Homepage layout
- Fonts and colors
- Product pages
- Footer
Pro tip: Don’t overcomplicate the design. Simple stores with strong product images convert better than cluttered layouts.
Step 3: Add Your Products
Once your theme is in place, it’s time to add the products you want to sell. You can add products manually or use CSV import if you’re uploading in bulk.
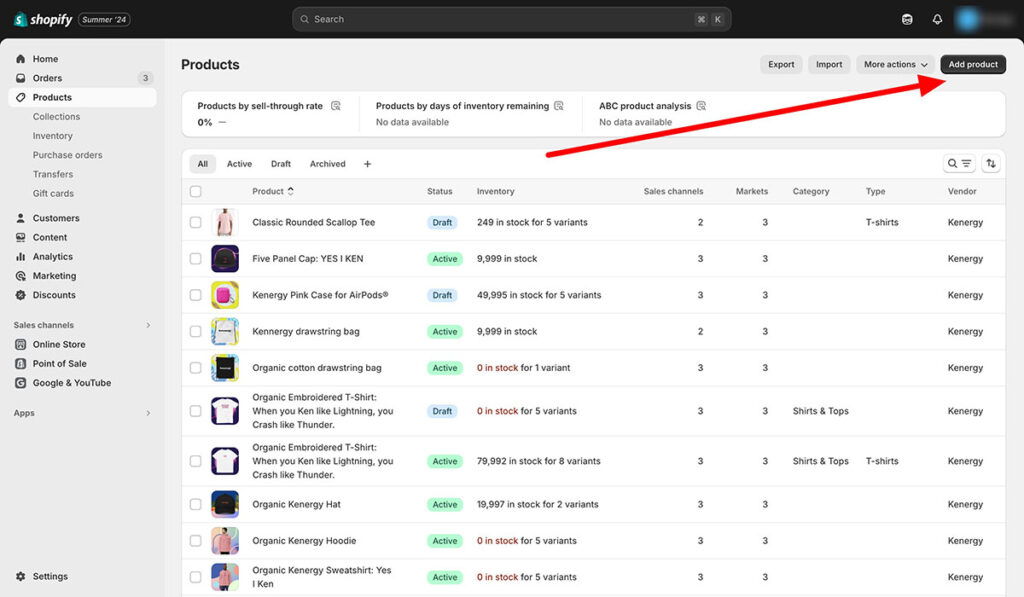
To add products:
- Go to Products > Add product
- Fill in:
- Product title
- Description
- Price
- Media (upload high-quality photos)
- Inventory (SKU, quantity)
- Shipping (weight, options)
- Add product tags and collections
- Save the product
Product listing checklist:
- Use clear, keyword-focused product titles
- Write benefit-driven descriptions (include features, materials, sizing)
- Upload at least 3-5 images per product
- Use white backgrounds or lifestyle images
- Include product reviews for social proof (use apps like Judge.me)
Don’t skip the product SEO. Use concise, keyword-rich meta titles and descriptions.
Step 4: Set Up Payments, Taxes, and Shipping
One of the most important steps is ensuring that your customers can actually buy from your store. You’ll need to configure payment gateways, tax settings, and shipping rates.
Payment options:
| Payment Method | Benefits |
|---|---|
| Shopify Payments | No transaction fees, integrates instantly |
| PayPal | Trusted, widely used for buyer confidence |
| Stripe | Secure card processing, works globally |
| Apple Pay / Google Pay | Quick checkout on mobile |
| Shop Pay Installments | Buy Now, Pay Later option increases average order size |
Offering multiple payment options boosts trust and reduces cart abandonment. Shopify Payments is the easiest to start with since it’s native to the platform and automatically includes fraud protection. If you’re in a country where Shopify Payments isn’t supported, Stripe or PayPal are good backups.
Pro tip: Test your payment setup by placing a live order and refunding it — this ensures everything is working before customers try to pay.
Tax setup:
Shopify automates a lot of tax settings for you, especially if you’re based in the US, Canada, EU, or UK. But it’s still your responsibility to ensure you comply with local laws.
To configure taxes:
- Go to Settings > Taxes and duties
- Enable automatic tax calculation
- Set tax overrides if you sell in states or regions with unique tax rules
Shopify also lets you collect VAT and supports IOSS for cross-border sales in the EU. If you sell digital goods, make sure to define your product type properly for digital tax rules.
If you use third-party apps or integrations like Avalara or TaxJar, those can help automate sales tax filing. But for most new stores, Shopify’s built-in tools are enough.
Shipping setup:
Shipping is often the biggest headache for new sellers, so keep it simple at first.
To get started:
- Go to Settings > Shipping and delivery
- Create shipping zones (domestic and international)
- Add flat rate, weight-based, or carrier-calculated options
- Set a free shipping threshold (e.g., “Free shipping over $50”)
| Shipping Option | Good For |
|---|---|
| Flat rate ($5, $10) | Simplicity and predictability |
| Weight-based | Sellers with mixed product sizes |
| Carrier-calculated (USPS, UPS, DHL) | Real-time shipping quotes |
| Local pickup/delivery | Food, beverage, or local brands |
Tip: Test your shipping rates in checkout as if you're a customer. Nothing frustrates buyers faster than unexpected fees.
Adding a clear Shipping Policy and Returns Policy helps set expectations and builds trust. These should be linked in both your footer and checkout pages.

Step 5: Build Core Pages and Navigation
Your store needs more than just product listings. Informational pages build trust, improve SEO, and answer buyer questions before they abandon your site.
Essential Shopify pages:
- About Us – Share your story and mission
- Contact Us – Add a form or email + social links
- FAQs – Cover common concerns: returns, shipping, sizing
- Shipping Policy – Clearly explain timeframes and carriers
- Return Policy – Outline refund windows, eligibility
- Privacy Policy – Required for GDPR, Shopify has a template
- Terms of Service – Legal protection and clarity for buyers
Each of these pages improves your authority and helps avoid customer service overload later. Plus, these help Google understand your site’s trustworthiness — a big SEO signal.
Creating pages in Shopify:
- Go to Online Store > Pages
- Click Add Page
- Title your page and add content
- Hit Save and link it in your menus
After creating your pages, organize them into your main navigation (top menu) and footer menu:
| Menu Location | Best Links to Include |
|---|---|
| Top Nav | Home, Shop, About, Contact |
| Footer | Shipping Policy, Returns, Privacy, Terms, FAQs |
Tip: Don’t overload your navigation. Keep the top menu focused on key actions — shopping, learning about your brand, and contacting you.
A good navigation structure helps users find what they need quickly. On mobile, where 75%+ of Shopify traffic comes from, keeping menus clean is even more important.
Step 6: Install Key Apps
Shopify’s App Store has thousands of options — but more isn’t always better. Apps can slow down your site and bloat your code if you install too many.
Start with just a few essential apps that help you sell, track, and build trust.
Must-have Shopify apps:
| App Name | Function | Price |
|---|---|---|
| Klaviyo | Email marketing & flows | Free (up to 250 contacts) |
| Judge.me | Product reviews & UGC | Free or $15/month |
| PageFly | Custom landing/product pages | Free with paid tiers |
| SEOAnt | SEO tools for meta tags & speed | Free and paid versions |
| ReConvert | Post-purchase upsell funnel | Free & paid plans |
Apps like Klaviyo and Judge.me directly impact conversions by building trust and nurturing abandoned carts. PageFly lets you customize landing pages beyond the built-in Shopify layout limitations.
How to install apps:
- Go to Apps > Shopify App Store
- Search for the app you need
- Click Add app and follow install prompts
- Configure app settings from your dashboard
Keep track of which apps affect page speed. Test your site with Google PageSpeed before and after installing.
You can uninstall apps anytime, but always check if they leave code behind. Use a cleanup tool like TinyIMG or SpeedBooster if needed.
Step 7: Launch Your Store
Once your store is set up, you’re almost ready to go live. But before removing the password page, double-check that your store runs smoothly on desktop and mobile.
Final checklist before launch:
- ✅ Place a test order using Shopify’s test payment gateway
- ✅ Review your product pages, titles, and descriptions
- ✅ Verify meta titles and alt text for SEO
- ✅ Proofread your content and store policies
- ✅ Test checkout and mobile navigation
These small tweaks can make or break your first impression. Customers will bounce fast if your checkout is buggy or your images look unprofessional.
How to remove password protection:
Before customers can access your store, you’ll need to remove the password page. By default, Shopify keeps your store locked while you build.
Removing it takes just a few clicks:
- Go to Online Store > Preferences
- Scroll down to Password Protection
- Uncheck “Enable password”
- Click Save
Once the password is removed, your store is officially live and ready for traffic. Make sure everything is tested and polished before flipping the switch — first impressions count.
| Step | Action Needed |
|---|---|
| Enable checkout | Confirm payment settings are active |
| Test purchase | Use Shopify’s test credit card to simulate sale |
| Turn off password | Make store public to real customers |
Pro tip: Send your store to 5–10 friends and ask them to buy (or try to). Watch where they get stuck. That feedback is gold.
Step 8: Start Driving Traffic and Sales
Your store is live — but sales don’t just show up. You need consistent traffic, and you need to convert that traffic into paying customers.
Free traffic methods:
- SEO: Optimize product and collection pages with relevant keywords
- TikTok & Reels: Short-form video content showcasing products
- Pinterest: Visual search engine for ecommerce
- UGC & Influencers: Send products to creators for review
- Email: Build a list with popups and send consistent campaigns
Paid traffic methods:
| Platform | Use Case |
|---|---|
| Facebook Ads | Retargeting and broad interest targeting |
| Google Shopping | High intent traffic, especially for search |
| TikTok Ads | Good for viral, impulse-buy products |
| Instagram Ads | Great for visual branding + ecommerce |
Simple sales funnel to follow:
- Capture attention: Short videos, TikToks, or engaging posts
- Collect leads: Use popups, discount codes, or free shipping
- Convert with email flows: Welcome series, abandoned cart, post-purchase
- Retarget with ads: Show your products to warm traffic
First sales usually take 30–60 days with free methods. Paid ads speed that up — but come with costs and learning curves.
Don’t get discouraged. The goal at this stage is to test traffic sources, build your email list, and learn what works for your audience.
Step 9: Analyze Performance and Optimize
Once traffic and sales are coming in, it’s time to optimize. This is where the real growth happens.
Key metrics to track:
- Conversion rate (goal: 1.5–3% for most stores)
- Average order value (AOV)
- Customer lifetime value (CLTV)
- Bounce rate
- Cart abandonment rate
| Tool | What It Tracks |
|---|---|
| Shopify Analytics | Sales, sessions, product performance |
| GA4 | Deep behavior analytics + traffic channels |
| Hotjar | Heatmaps, session recordings |
| Triple Whale | Attribution, LTV, real-time analytics |
Use these insights to improve product pages, test different shipping offers, tweak headlines, and fine-tune your pricing.
Easy wins for faster optimization:
- Speed up your homepage and collection pages
- Test new product images or descriptions
- Add customer reviews or testimonials
- Improve CTAs (“Add to Cart”, “Buy Now”)
- Offer bundles or post-purchase upsells
Don’t try to fix everything at once. Pick one area, run a small test, and keep moving forward.
Over time, your store will become more efficient, more profitable, and easier to scale.
Final Thoughts
Setting up a Shopify store doesn’t require coding or tech expertise — but it does require strategy and consistency. Start with the basics, keep things simple, and focus on testing what works.
If you follow this tutorial step-by-step, you’ll go from blank store to launched business with a real shot at getting sales.
Start lean, learn fast, and scale smart.
Shopify Tutorial for Beginners: Get a Head Start!
Looking to build your own online store on Shopify? At Ecommerce-Platforms, we offer a fully done-for-you service, where our experts will build your dream store.
From brand design to starter templates to conversion rate optimization, our team will take care of everything for you.
Check out our Custom Shopify Store services and let us help you get maximum conversions and boost your sales by leveraging the experience of industry experts!


Comments 0 Responses