
If you thought that choosing the right product was more than enough, think again.
Photos define the product and show a potential customer a plethora of things – the uses for the product, the demographics of the people who use the product, the feelings associated with it, and of course, the perceived value of the product.
But, there’s more to this than meets the eye.
Believe it or not, even the most effortless product photos require so much effort. This is because a product photo conveys so much more than the product itself.
Beauty lies in the eye of the beholder but in this case, you get to choose what your customers will see.
I welcome you to the wonderful world of product photography!
Let's get started with the basics.
How To Take Product Photos
Many fall into the trap of just ticking boxes in their quest to getting the best photos of their product taken. It takes more than this.
Carefully planning out the theme of your photo shoot or pictorial should be part of the process, and before you can do this, your branding has to be set straight. If your product photo is not passing along the message of your brand then you clearly have to take a step back and replan.
Make sure that the theme is in line with what your company, business or enterprise stands for because a properly executed photo shoot can be an extension of your whole company image.
Have you heard the saying “cut once measure twice”?
It’s the same concept here: shoot once, plan twice. Photography is a business expense that can easily cost you a lot of money so proper planning will save you money in the long run.
The Message You Want To Convey
This all boils down to the personality you want your product to have. Yes, it's as important as determining a price for your product.
Think about this for a while.
It’s called product positioning.
Do you want it to look like the best thing since sliced bread, or would you want it to be sophisticated and chic? Perhaps, you’d want the fun side of your offering presented?
It doesn’t matter what you want. But, what really matters is that you have it all planned out before you even start the photo shoot.
The Subject
There are plenty of ways for you to present your product photo.
One simple method involves displaying your offerings as a singular product in front of a white or light wooden background. Do scale photographs to give the viewer a sense of the size of your offerings and you can use close-ups to highlight particular details.
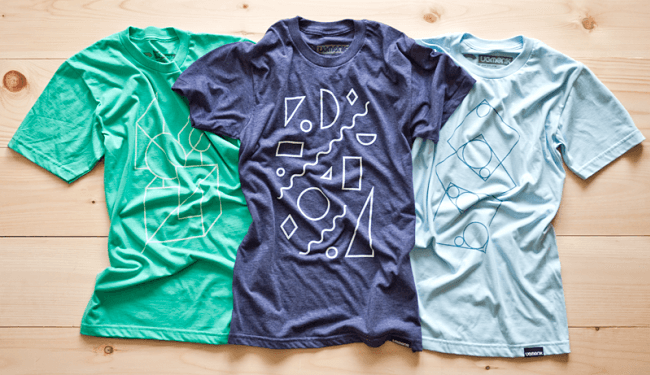
Image credits: Shape Series/Behance
It gets better.
Remember when we talked about the message that you want to convey with your photograph? This is where you can throw everything you know about the studio, out through that window.
Lifestyle shots are a great way to show your product in action. However, they might be trickier to do because you don’t control all the variables like in a studio, but they really drive your brand image across.
Group shots are another way to present how your product integrates with the rest of the products in your portfolio. If you have different variations of the product i.e. different colors, or sizes, you’ll give the potential customer an easier time comparing.
Don’t forget the packaging too!
Great products are always presented well and that should be your goal. As much as a consumer is excited about the product itself, the packaging can make a difference. Remember how many YouTube channels rose to fame because of unboxing videos?
So, are you ready?
Once you have all the planning laid out, it’s time for us to start the photoshoot! The following steps are a quick guide for you to set everything up, it covers everything from your lighting to prep!
Getting Started: Preparation
Make sure that you have more than one of the item you’re photographing.
Why?
If something happens to it, it would be relieving to know that you have a backup.
Prep the item beforehand. Did you know that those food photos you see from restaurants aren’t real food most of the time?
Looking for that refreshing look? Get a spray gun and mist your product. (Not advisable for electronics mind you.) Want that “sizzle” effect? Get a vaporizer or a smoke machine and give it that mysterious air.
Want to have a little more fun?
Make your product levitate with a thin piece of string and get rid of the string during this stage.
Like we said, product photography is a great time for you to unleash your creativity!
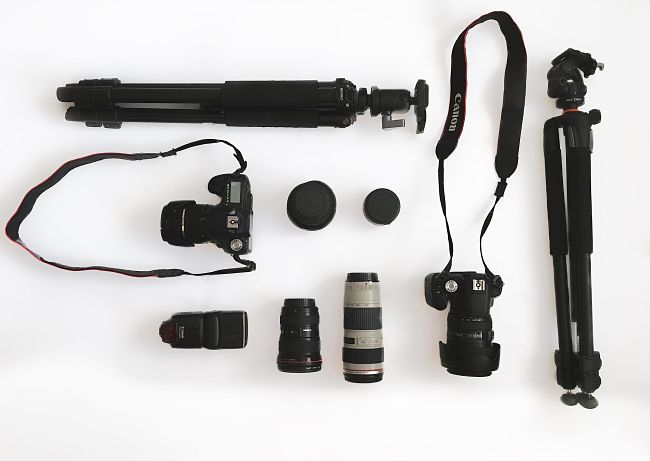
How to Choose The Perfect Camera
If you have the money, get the best camera that you can. At the end of the day, it’s a worthwhile investment especially if you’re planning to take a lot of photos or if you have a wide product inventory that you have to get on an ecommerce platform.
If you still can’t afford to invest in the best camera ever made then you can always borrow one from a friend.
But, hold your horses.
If you are truly looking for the most affordable product photography options, don’t discount that little technological marvel in your pocket.
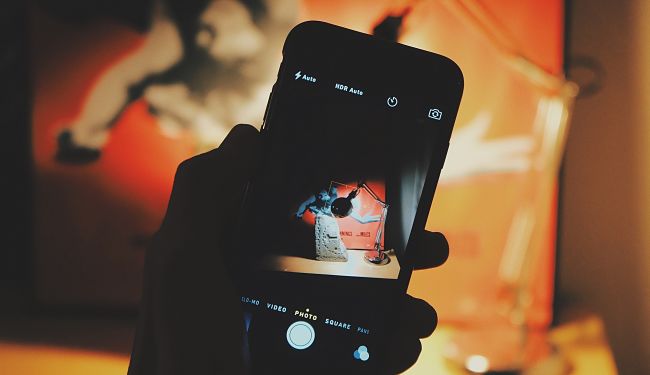
Sometimes the hardware on your seemingly regular smartphone can do the trick, but make sure it takes clear photos!
So once you’ve got your camera, I have a few more tips to share with you.
- Aperture size matters, smaller apertures will keep your product in focus, wider ones will create a distortion effect. Don’t dismiss the distortion effect if you’re eyeing some creative shots though.
- White balance has to be consistent with the product photography lighting set up (more on this later) that you have in the photo shoot location.
- As per ISO, experiment with this because it's dependent on your lighting needs. Remember, too much ISO results in noise in most cases.
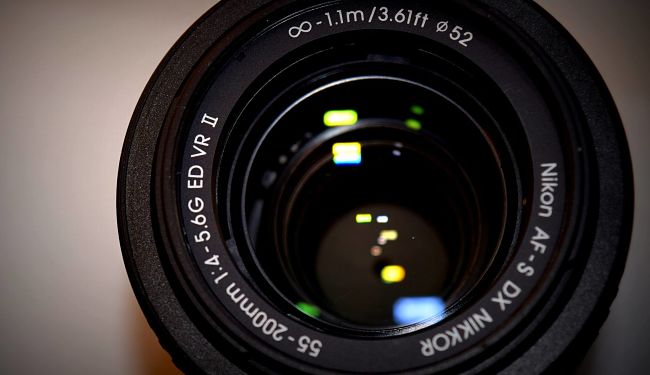
- Different lenses for different purposes. You don’t need a telescopic lens unless you’re photographing your product from a mile away. Don’t use macro lenses unless you’re selling something tiny.
- Shutter speed affects light, so depending on how much exposure you need to adjust accordingly.
Isn’t it easier to use your phone sometimes?
Use A Tripod To Hold It Still
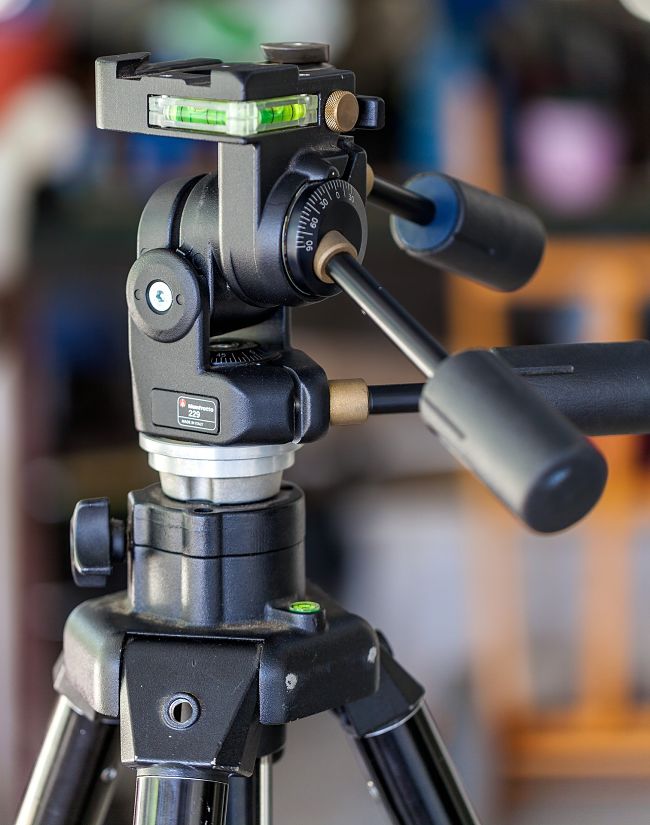
If you are taking a photograph of a stationary object, your camera has to be stationary as well.

Why? Because movement creates blurriness and distortion.
There are different kinds of tripods available and at best guess, you will just need one of those regular ones that they sell in camera stores. You could get a fancier setup which would cost more, or a monopod if you plan on doing other things with it after the shoot, but a tripod should be enough for now.
A good tripod is also a sound investment like a camera; they last for years and they rarely go out of date.
Want to know the best part?
You can even use your tripod for personal purposes, think about all those professional looking photos you can take with your friends and family.
Product Photography Lighting Techniques
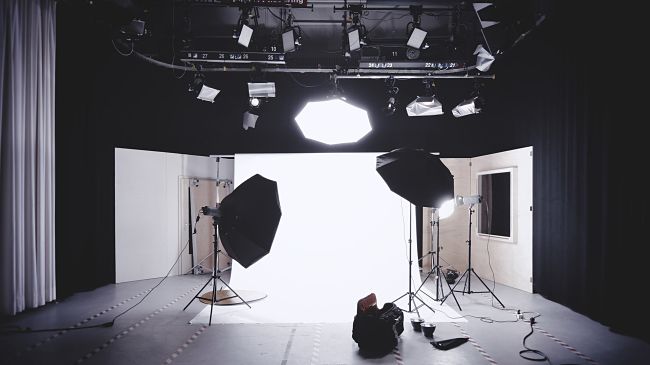
You have plenty of options for lighting but that doesn’t mean you should rush out and get yourself studio-grade lighting equipment. You can get yourself a lightbox, which can disperse light evenly and minimize shadows.
But before you pick your lighting options, find out what color your product is because of the fact that this greatly affects how everything works out. You can bounce cards from white foam, and even play with the reflections and shadows to create your desired effects.
The opportunities are endless.
But, wait.
How about if you want to use natural light coming in from the windows? You can do that too! The trick is to control the natural light coming in through the window; you don’t want it to be too one-sided to any degree. So, use bounce boards if necessary.
Quick advice?
Make sure you always have two sources of light. Well, if you don’t, a pair of bright bulbs – the cool 5000K kind will usually do the trick.
Remember, that lighting can be tricky and dependent on a number of factors that are not directly related to lightning per se. For example, the aperture of the camera plays a vital role in how much exposure your product photograph gets in general.
Don’t forget about white balance and ISO filters, these play such a crucial role in the exposure of your photograph.
More importantly, don't be afraid of shadows. In a perfect environment, you would want to eliminate them altogether, but it can also be a creative way to “frame” your photo.
Setting Up Your Background
Product photographs usually utilize white backgrounds. Again, as we’ve repeated time and time again, if you have the money and are going to do this often, it’s better to invest in something great.
White sweeps can be bought online, or if you’re on a tight budget, you can always use poster board or cardboard, and sometimes even a sheet.
But, here’s the caveat:
Remember that the color that you see now has a chance to look different in photographs. This is especially the case with poster boards.
Off-white as opposed to pure white really looks different when you start “framing” your product.
What kind of sweep should you get? It really depends on you. Paper sweep is a good choice because it’s cost effective since you can always get rid of the dirty areas. Also, make sure that the white background is seamless.
The Extras
There are a few other things that you will need in order to set up the product photo shoot. Make sure you have a table in order for you to have a place to put the products on.
Make sure you have some tape ready to get everything in order and have someone around to help you out, should the need arise.
The Checklist: How to Take Product Photos
- Get your table in order; this means getting your product in place and making sure you’ve got everything you need.
- Set your camera with the product in focus.
- Double check the background, is there anything that will mess up the photo to begin with? Everything in the background has to be clean.
- Get your light right. It helps if you have a hand with the bounce cards at this point.
- Using the tips that we gave you adjust your camera as necessary
and here's more:
- Click the shutter
- It’s probably going to be a bad photo.
- So, readjust and hit that button again, and take as many photos as you wish.
Congratulations, you now have a product photo! And now, let's move onto touching up.
Touching Up Yout Photos
There are plenty of post-processing programs that you can use like Adobe Lightroom (or VSCOCam if you did plan on post-processing on your phone). They offer you many benefits; they can alter lighting and change the mood with a flick of the switch.
Always look for ways to enhance your photo with minimal effort. You don’t want to end up with something that looks completely natural. If you nailed down most of the steps above, then you shouldn’t even be spending too much time with post-processing.
Want a better way to do this?
Get your photos touched up by a professional.
You would be surprised at how affordable it’ll be to just send the photos to a professional.
Some would even only charge you roughly $4 per photograph that you submit for a professional touch up.
Final Thoughts
The fact is that you won’t be able to get everything down on your first “click”, but that’s all part of the process. Just give it a little time.
Drop us a line, and we'll help you to find the right one for you.
I hope that this article will give you the basics of painting the theme that you want them to capture.
Believe it or not, it takes a lot of photos and preparation to even score one perfect photograph to be used commercially. Let your enthusiasm and creativity get the best of you.
Product photography lighting is a crucial skill to learn and you can always apply it to future products that you release.
It certainly is a win-win situation.


Comments 0 Responses