
Here's a job title you never thought you would have you considered starting your ecommerce store: photographer.
Sure, you would have expected to be an accountant, marketer, salesperson, designer, and some of the many other roles you would have to fill, but photography is something most ecommerce marketers don't think of.
But studies show that photos have a tremendous impact on sales, so it's important that you learn how to take product photos.
Unfortunately, small and midsized ecommerce businesses don't have tons of money to spend on a fancy product photographer. Luckily, we have some product photography tricks to make your photos beautiful, somewhat easy to take, and inexpensive.
Before keep on reading, if you do have money and want to invest in professional product photography, drop us a line, and we'll help you find the right partner for you.
Here's how:
Use the Right Photography Equipment (It Doesn't Have to Be Expensive)
Here's a super simple list of the main equipment you need:
- Tripod
- White backdrop
- Lighting
- A Camera
Some other things like tape and lenses can help along the way, but these are the primary four elements of your photo studio.
The tripod will depend on your camera, and the white backdrop can be anything from white sheets to white poster boards. We'll also talk about lighting below.
If you plan on using an iPhone, you'll most likely want to download an app like VSCO Cam to create professional-looking images.
Otherwise, we recommend purchasing a consumer DSLR camera, since it allows for stunning pictures, and you can get one for under $400, and it will have settings for crisper photos.
Prime Your Camera For Product Shots
When it comes to taking photographs from your phone, the quality of your photo mainly depends on how good the camera is.
Since phones get updated a lot, we won't go through our favorite options right now, but I've found that Android phones usually have more powerful cameras. That said, you can make some killer product photos with an iPhone.
After you get the right phone, there's not much to do in terms of adjusting camera settings. Like mentioned before, you might want to find a great app for cleaner product shots (and maybe a physical lense,) but the default camera settings are fine.
But if you have a DSLR camera it's a totally different story. After all, it's naive to invest in a DSLR if you're not going to configure it properly.
Therefore, we recommend following these tips:
- Adjust your white balance so that the setting is at the exact same Kelvin temperature as your lighting.
- Having the right aperture is a big deal for product photos. Stick to an aperture of f8 or f11 so that your products are in focus. If you stray into a wider aperture, like f2.8 or f4.5, you're going to notice that some products don't look as crisp.
- Avoid a wide angle lens. It will only cause your product images to look out of focus.
Don't Forget to Perfect Your Lighting
Many photographers will argue that the most important part of a photo shoot, especially for product shots, is the lighting. You can make a junky camera look respectable with the right lighting and backdrop.
Here's our step-by-step process for setting up an affordable (less than $100,) and beautiful lighting configurations:
- The proper backdrop should actually be more of a box than a onesided setup. Therefore, buy a light tent or make your own with the help of sheets or white poster board. You can tape the poster board onto a clear storage box on its side.
- Construct your lights with mounts and colored 5000K bulbs from a hardware store. You typically only need two mounted at the top of your box so that they point inwards from both sides, left and right. The main rule is to make sure both lights are the same power.
- You can add additional lights if you would like, but the minimum is two from the left and right.
- Consider the colors in your product. You're looking for contrast here, so if you have a white item, use a darker backdrop. It's best to Google for the same item to see what professionals are doing with their stock photos.
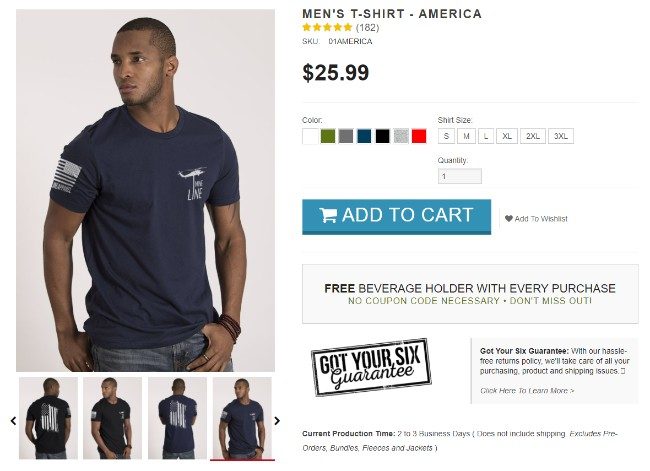
- If the item is meant to be in action (or worn) you may need to make a larger lighting area for a model. It's also a good idea to have a studio photo and an outdoors photo for the customers to see what it looks like in different environments.
Make Your Photos Accurate and Plentiful
You're not trying to trick your customers. That's a recipe for a bunch of returns.
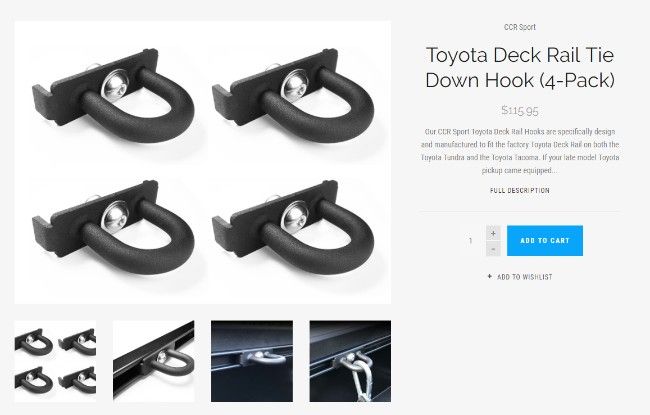
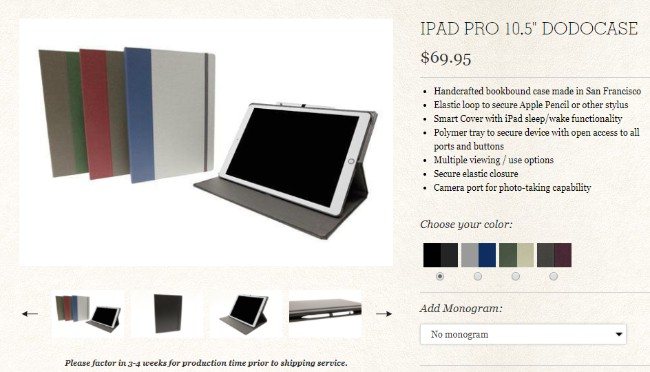
Therefore, you want to have several photos from multiple angles and situations. It depends on the type of product, but a phone case should have several shots from every single angle.
Then, you'll want one with the case actually on a phone and in someone's hand.

Grabbing multiple angles can be done in two ways. You can move the product itself around the staging environment or take the camera off the tripod to move around yourself. I'd suggest doing both and seeing how they come out.
Clean Up Your Photos by Editing
If you're using a DSLR camera, or something similar, we recommend shooting in RAW, because of the format's flexibility while editing.
If shooting in RAW, consider the following software to clean up your photos, cut out imperfections, and adjust lighting if needed:
If not shooting in RAW, Pixlr is your best free option. Photoshop is amazing but super expensive (Gimp is a free alternative though).
Take Your Photos in the Highest Resolution Possible (Then Crop Later)
When you're working with platforms like Volusion, Shopify, and WooCommerce, the shop templates usually have a specific size requirement for product photos.
Some people don't realize this, so they take beautiful photos, upload them, then see that the image has either been degraded or stretched out.
In order to avoid such situations, start by shooting your images as large as possible. For instance, a camera might shoot all the way up to 4416 x 3312 pixels. This is perfect for editing and resizing since you won't lose much quality by shrinking the photo.
However, taking a photo that's too small and stretching it out, or making it bigger, can cause huge problems. So, start with the largest image you can. This also helps with zooming tools, since the higher quality images reveal more detail on your products.
After that, you'll most likely have to crop the photo. That's actually good news since you have to make it the right size for your theme. Crop the image so that all sides have exact space, then try to hit the right dimensions with your crop.
Most of the themes from platforms like Shopify and Bigcommerce tell you what resolution your product photos should be.
Consider Removing the Background in Editing
Shopify found that a significant portion of its professional photographers ended up removing the background during editing.
Why is this the case?
Because you can decrease the file size drastically, get rid of shadows, marks, or other distractions, and make it a perfect transparent or white background.
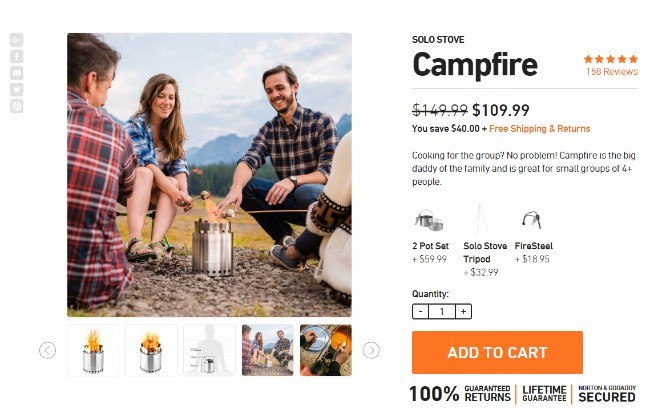
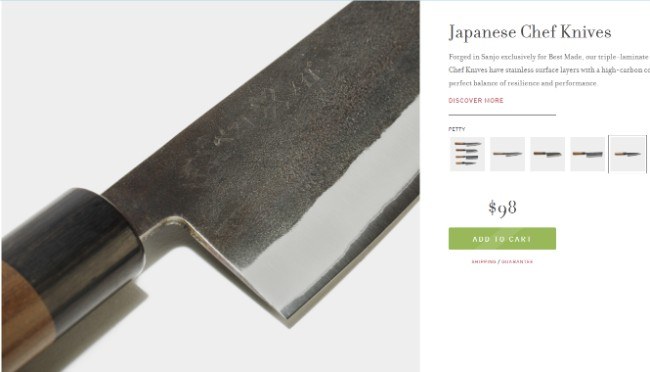
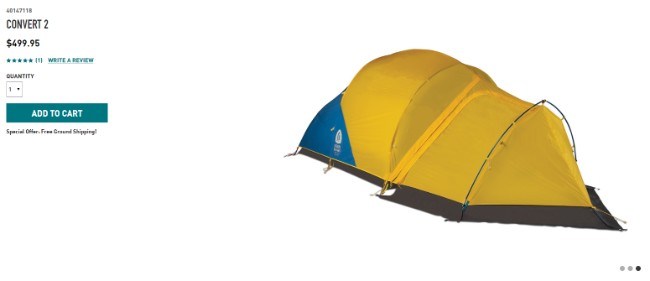
Although the following photo looks pretty nice, it's going to be tough to make changes without a solid colored background.

Use Your Description for Guidance
Everything you mention on a product page should be revealed in the form of an image.
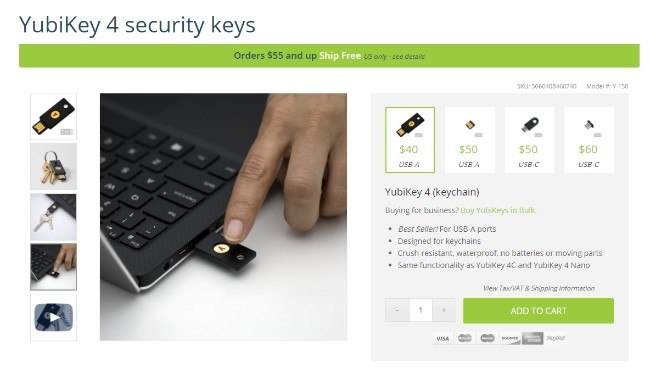
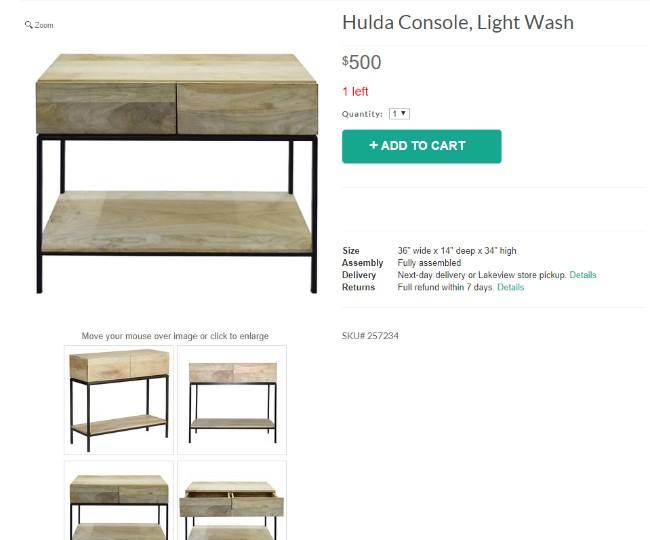
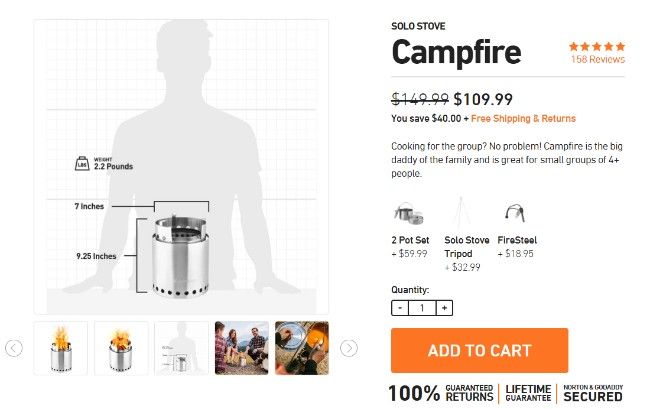
Does your product have important dimensions that are to be shown on the page? Why not show them in a photo?
Do the specs talk about cords and adapters for a computer? These should have their own picture as well.
Hire a Photographer Through a Reputable Program
Taking perfect product photos may sound far too intimidating for you. Although we encourage you to try these tips (you shouldn't end up spending more than $200 for the setup and you can use the phone you have now) you also have the option to outsource your photos to a professional.
Are You Ready to Take Product Photos the Right Way?
If you're bootstrapping your ecommerce business, you have to become a good photographer.
It may not be one of the tasks you immediately want to put on your list (considering you're also a marketer, customer service rep, accountant, and salesperson,) yet taking your own photos the right way is a great route to saving money and improving the number of sales you get on your website.
In addition, you learn a new skill that can be used for your current and future online businesses. This is especially important for brands that have hundreds of products, or items that get released consistently.
As you grow, you might end up paying for an in-house or freelance photographer.
Overall, taking well-detailed product photos is a crucial element to build trust and develop your brand.
If you have any questions about how to take product photos the right way, let us know in the comments below.


hey Joe,
Nicely written and described. It’s gonna be very useful for the beginner like me who’ve just entered into eCommerce.
Louise Rodgers
Thanks Louise!