Accepting cash for your products during in-person interactions is easy. Customers pick a product, hand you their money, and you deal out some change if need be. This physical exchange is quick, simple, and easy to understand.
But when it comes to ecommerce, matters get a little more complicated as your online storefront needs to access customer funds through a payment gateway, be it your customer’s bank account, credit card, PayPal, or otherwise.
It’s vital that your checkout experience is quick, convenient, and accepts a range of payment options. Remember, the average shopping cart abandonment rate is almost 70%, causing ecommerce brands to collectively lose nearly $18 billion in sales each year. For 26% of those abandoned carts, the checkout experience was too long.
The bottom line: Your checkout experience matters!
Fortunately, with platforms like Shopify, you don’t have to worry about how processing orders and payments work. With the Shopify Checkout, you can offer customers a seamless checkout experience.
So, keep reading for more insight into what Shopify Checkout is, how to customize your Shopify Checkout page, its perks, and our final thoughts on the platform.
There's lots to cover, so let’s make a start.
What is Shopify Checkout?

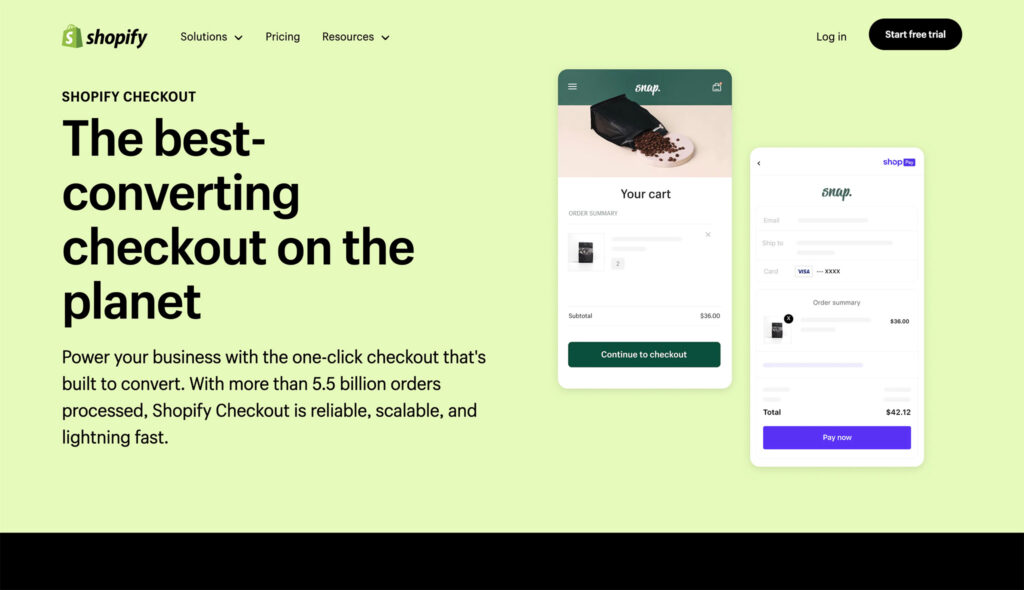
As hinted in the intro, Shopify Checkout is the part of your Shopify store that handles everything after a customer has clicked “proceed to checkout” on the cart page.
The Shopify Checkout handles many complicated processes and makes them quite simple. Most importantly, it lets customers review their order and shipping rates, enter their shipping and payment details, apply discount codes, and pay for the product. This, in turn, confirms the order. It’s then up to you whether you fulfill that order manually or an automated fulfillment service takes over.
It’s also worth highlighting that whatever products the customer wants to purchase are checked against your inventory levels. If their selection is available, they can then complete the payment. However, suppose their items are no longer available by the time the customer has reached the payment page. In that case, the customer will receive an error message.
In addition, Shopify Checkout only puts inventory on hold once a customer has submitted their payment information. However, if the customer’s payment is declined, for example, if they have insufficient funds or they accidentally input incorrect card details, the inventory being held is released until your customer makes a successful payment.
How to Manage Shopify Checkout
You can manage every aspect of your online store, including your Shopify Checkout settings, from your Shopify Admin panel. From here, you’ll see several sections, including:
- Discounts
- Marketing and promotions
- Analytics
- Orders
- Checkout Settings
It’s the last of these that we’re interested in. From here, you can:
- View and change your checkout settings
- Manage how you collect customer email addresses for promotional marketing purposes
- Manage your order status page
- Customize the look of your Shopify Checkout page
Let’s take a look at these options in more detail:
View and Change Your Checkout Settings
From this page, you can customize the information you require from customers to make a purchase. For example, you can choose whether customers can:
- Only checkout as guests
- Checkout by creating an account or as a guest
- Only checkout by creating a customer account
You can also select which contact method customers need to input to checkout (phone number or email). This enables Shopify to send order confirmation notifications and shipping updates via SMS. These are simple notifications customers can’t respond to. To customize more open-ended messages, you’ll need to install a third-party messaging app from the Shopify App Store.
This page is also where you can specify the customer information you need to deliver their orders. For instance, an address and, optionally, a company name (which unlocks business delivery options if you sell B2B). You can also enable customers to use their billing address as their shipping address as default.
Collect Customer Email Addresses
On your Shopify Checkout page, you can decide if you want to offer customers the choice to sign up for your email and/or SMS marketing list.
You can also choose whether customers are automatically preselected to receive emails or if they need to opt out.
Manage Order Status Page
You can also customize your order status page. As you’ve probably gathered, this is the page that displays order status messages to your customers.
At this point, it’s with highlighting that if you’ve translated the language of your entire Shopify store, your order status page will also be in that language.
But translation isn’t the only reason to modify the text. You might want to customize other aspects of the order status page to better fit the tone of your brand. Perhaps to make it sound more cheerful, professional, humorous, etc.
Lastly, you can use Shopify’s “additional scripts” to create extra sections on your order status page. These might only appear to shoppers based on the customer’s location or previous order history. However, to utilize this feature, you’ll need to be versed in HTML, Javascript, and CSS or hire someone who is.
Customize Shopify Checkout
You can change the appearance and layout of the checkout page.
If you want to play around with this before you sign up for Shopify, you’re out of luck. You can only activate Shopify checkout once you’ve signed up for a plan and created your first product.
However, we can walk you through this step all the same. At this point, it’s worth highlighting that you can customize your checkout page via your desktop, Android device, or iOS phone or tablet.
Once you’ve signed up for a Shopify plan, you’ll find the “customize checkout” area in the Checkout settings section of your Shopify Admin panel. This will open the theme editor.
There are a range of actions you can carry out here if you want to customize your Shopify Checkout page. Here are just a few:
- Upload a background image to the banner: within the banner section, upload the image you want to use and click ‘Save.’
- Add your logo to the checkout page: If you’re using a banner image, your logo will appear on top of that. However, you can move its position, i.e., to the right, left, or center of that area. In the logo section, click ‘upload image’ or select an image you already have in your library. Select what size you want your logo to be, and click ‘Save’ once you’re done.
- Change your font: There are fonts to choose from, but you can’t change the font color. With that said, here’s how to modify the font on your Shopify checkout page. Once you’re on the Checkout page of your Shopify Admin dashboard, click on ‘Style.’ This takes you to the theme editor, where you need to click on ‘Open checkout settings’ and scroll down to ‘Typography.’ You’ll see a couple of drop-down menu options for changing the font for your headings or the font for the body of your text. Choose which you want to change, pick your font, and then click ‘Save.’
That’s just a few of the customization actions you can carry out on Shopify Checkout, including:
- Changing the colors of buttons, links, and error messages
- Changing or removing an image from the Shopify Checkout page
- Adding a background image or color to the order summary
- Adding a background image or color to the main content area.
Shopify Checkout Benefits
There are several positives to using Shopify Checkout:
- The Shopify Checkout process is straightforward to set up for your store.
- Detailed self-help support is available via the Shopify Help Center. Here you can find point-by-point steps to customizing your Shopify Checkout page.
- There’s a range of customization options you can utilize to enhance the user experience; again, they’re mostly simple to execute. You don’t need coding or developer experience – apart from customizing the order status page we referred to above.
- The Shopify Checkout page is optimized for mobile (iOS and Android) to support the shopping habits of today’s consumers, with around 69.4% using mobile devices for ecommerce.
- Shopify Checkout supports popular payment methods, including Shopify’s own Shopify Payments – an accelerated payment solution. It’s one-click, so shoppers can save their payment details on your store for faster future checkouts. Shopify supports other payment methods, including Visa, Mastercard, Amex, PayPal, Apple Pay, and Google Pay.
Shopify Checkout Drawbacks
- Some customers have noted that the checkout page is slow to load
- While Shopify Checkout allows you to customize on a functional level, it doesn’t provide granular control over the look of the checkout page. Web builders like Webflow offer more opportunities in this regard.
- You can only run your own checkout script if you’ve opted into Shopify Plus.
Shopify Checkout: My Final Thoughts
The checkout section of your online store is easily overlooked. You might think this last step in the customer’s buying journey is purely functional and doesn’t require much attention, especially when you have a comprehensive ecommerce platform like Shopify to take care of it.
But paying special attention to how customers interact with their carts and the checkout page could help boost your conversion rate. For example, customizing the checkout page's design so that it’s more on-brand, ensuring checkout forms capture meaningful information, or even updating the text's tone a little, can go a long way toward enhancing the customer experience.
We hope this article has helped you understand what functionality to expect with Shopify Checkout and how to edit this particular page to better suit your needs. Let us know how you get on in the comments box below!


Comments 0 Responses