
Är det inte fantastiskt hur mycket enklare det har blivit att starta en e-handelsbutik nuförtiden?
Du har inte bara allt-i-ett-plattformar som Shopify för att hjälpa dig bygga upp och utöka din onlinenärvaro, men du har partners som kan göra det mesta av det tuffa arbetet med att skapa och leverera produkter åt dig, som Gelato.
Om du frågar mig är dessa två plattformar en perfekt matchning för nya säljare. Du får all den omnikanaliga flexibiliteten och skalbarheten som en ... e-handelssystem som stöder både småföretag och storföretag, kombinerat med ett print on demand-företag som verkligen sticker ut.
Gelato ger dig inte bara generiska white label-produkter, Det är ett företag som aktivt bidrar till högre intäkter med hållbara metoder, snabba globala leveranser och ett fantastiskt produktsortiment.Du får till och med ett av de bästa premiumplanalternativen på marknaden med Gelato+.
Fascinerad?
Jag ska visa dig hur du kan använda Gelato och Shopify att lansera, växa och skala upp din POD-butik (utan de vanliga huvudvärken).
Varför Shopify + Gelato Fungerar så bra för POD-säljare
Jag berörde detta ovan, men Shopify och Gelato är en fantastisk kombination.
Shopify är den användarvänliga och flexibla e-handelsplattformen som driver miljontals butiker världen över, och kombinerar webbdesignverktyg med lagerhantering, försäljning över flera kanaler, en världsberömd kassa och till och med praktiska AI-verktyg.
Den är idealisk för utskrift på begäran och dropshipping företag, eftersom det redan är utformat för att integreras sömlöst med de plattformar du använder.
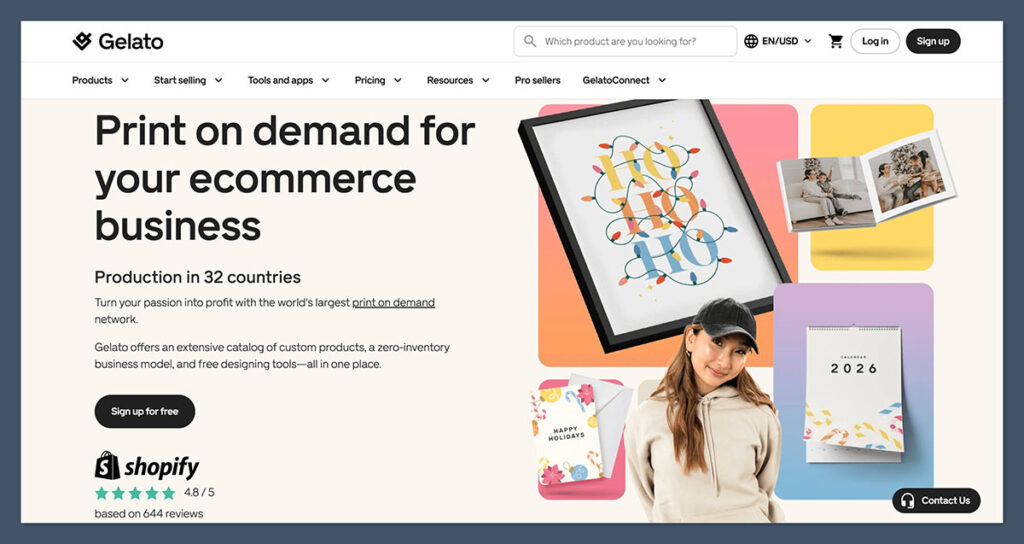
Gelato är ett av mina favoritföretag inom POD av flera anledningar. För det första är det hållbart (vilket är viktigt för dagens kunder) och har ett globalt distributionsnätverk som gör det enklare att få produkter till köpare snabbt (utan ett stort koldioxidavtryck).
Produktkvaliteten är fenomenal (särskilt om du gillar konst, tryck eller inramade verk), och varorna är ganska prisvärda också. Dessutom kan de anpassas av kunder direkt på din Shopify butik med Personaliseringsstudion.
Ovanpå allt detta, Gelato skalar med ditt företag. Du kan hålla dig till gratisplanen så länge du vill och sedan uppgradera till Gelato+ (enligt min mening det bästa premiumalternativet av alla POD-märken).
Det ger dig bättre mockups, produktrabatter på upp till 35 % och till och med tillgång till praktiska tidsbesparande verktyg som hjälper dig att bygga kollektioner, optimera vinster och designa produktbilder.
Hur man kommer igång med Shopify och Gelato
En av de främsta anledningarna till att jag älskar Shopify och Gelato kombinationen är så mycket att det är så enkelt att få dina system i linje. Du kommer att upptäcka Gelato precis i Shopify appmarknaden, så att du inte behöver krångla med Zapier-kopplingar eller API:er. Här är steg-för-steg-processen (tro mig, det är enkelt)
Steg 1: Konfigurera din Shopify lagra
Jag börjar alltid med Shopify eftersom det ger dina produkter ett hem. Även om det är tomt, blir resten av processen lättare att föreställa sig i samma ögonblick som du ser en riktig butik.
Här är vad jag gör innan jag rör vid något kreativt:
- Välj ditt abonnemang. Jag brukar rekommendera Basic-abonnemanget till att börja med. Du behöver förmodligen inte många extrafunktioner direkt.
- Välj ett tema som matchar ditt varumärke. Rent och neutralt är lättare att växa in i.
- Lägg till en logotyp, ett par färger och en kort mening eller två så att platsen inte känns övergiven.
- Slå på betalningar, Shopify Payments kommer att spara dig pengar på avgifter om du vill hålla kostnaderna nere.
- Låt Shopify AI skapar dina juridiska sidor. Du kan justera dem senare när du känner till dina policyer bättre.
I det här skedet kommer din butik inte att imponera på någon, och det är okej. Du bygger en arbetsyta, inte ett showroom.
Steg 2: Skapa din Gelato konto
Nästa steg är att du behöver din Gelato konto. Återigen, det är oftast en bra idé att börja enkelt med gratisplanen om du är ny. Du får fortfarande alla grundläggande funktioner du behöver och full tillgång till Gelatos fantastiska produktutbud. Håll bara ett öga på Gelato+ plan.
Jag tror verkligen att det här alternativet blir mer värdefullt när din butik börjar skala upp. Mockuperna ser bättre ut, du sparar mer pengar på baskostnader med rabatter och du får ett bredare utbud av kreativa verktyg som hjälper dig att sticka ut på marknaden.
När du har ett konto kan du bläddra igenom produkterna, experimentera med de kostnadsfria redigeringsverktygen och kanske lägga till några Shutterstock-bilder i ditt bibliotek om du vill.
Steg 3: Anslut Gelato till Shopify
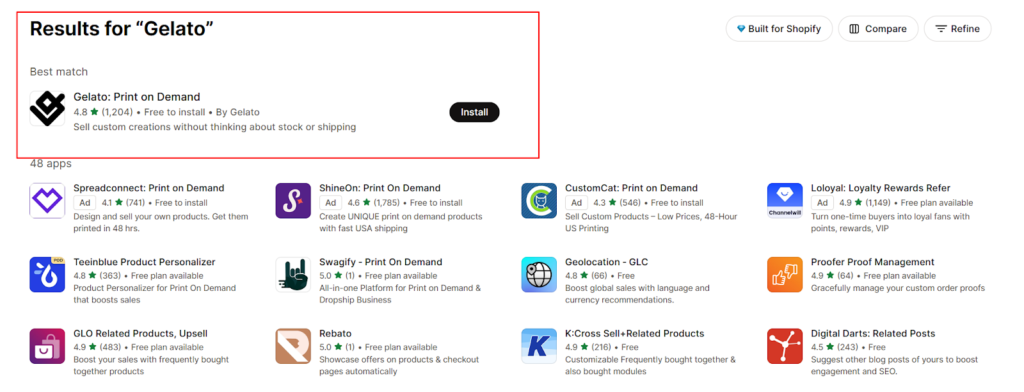
Den här delen ser läskigare ut än den är. Sanningen: inget dramatiskt händer här. Du låter bara de två plattformarna prata med varandra. Gå till Shopify appmarknadsplats och sök efter "Gelato”. Hitta den officiella appen och klicka på ”Installera” och gör sedan följande:
- Logga in.
- Godkänn anslutningen.
- Bestäm om du vill Gelato för att distribuera beställningar automatiskt. Nya säljare gör det vanligtvis.
Om du har drivit en butik ett tag nu finns det några extra funktioner Gelato kan hjälpa dig med detta. Verktyget ”Velocity Switch” låter dig till exempel migrera dina befintliga produkter till GelatoSkapa omedelbart (vilket är otroligt hjälpsamt).
Du kan också använda verktyget "Instant Collections" för att börja bygga hela produktgrupper med AI-genererade designer, automatiserade prissättningsstrategier och optimerade listningar.
Om du inte redan har en katalog, få inte panik, fokusera bara på att få kopplingen på plats. När den väl är där sker allt smidigt. Du publicerar en produkt i Gelato, visas det i Shopify, någon köper den, och Gelato startar produktionen.
Steg 4: Lägg till dina första produkter
Det här är den roliga fasen, men det är lätt att bli överväldigad. Mitt råd är att undvika att försöka lansera för mycket på en gång. Välj några produkter och skala upp när du vet vad som säljer.
För att börja skapa produkter:
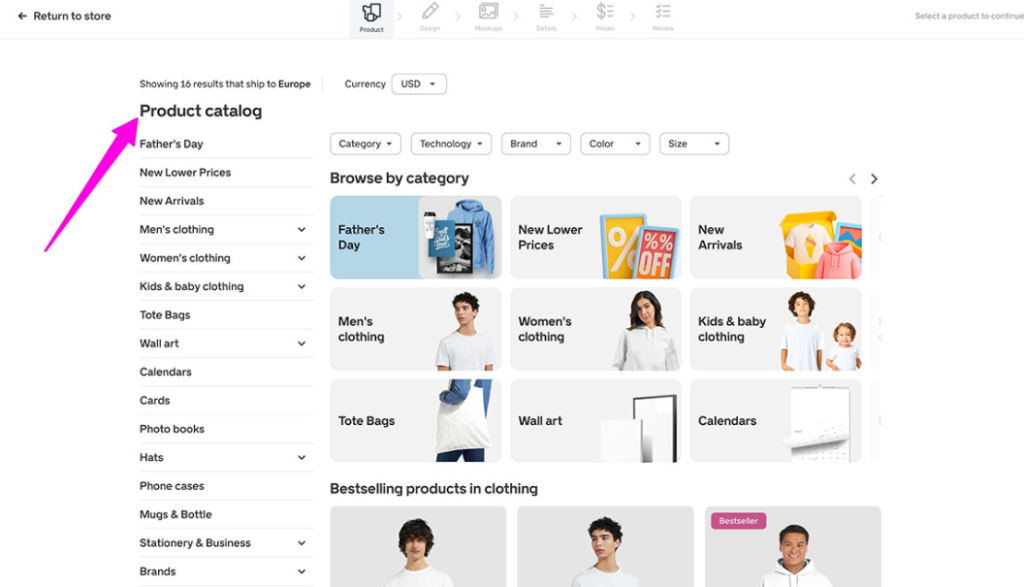
- Öppet Gelato inuti Shopify.
- Gå till "Butiker" och klicka på "Skapa produkt"
- Välj något enkelt, som en affisch eller en t-shirt.
- Ladda upp en design du gillar
- Finjustera placering, färger och teckensnitt.
- Använd Magic Mockup-funktionerna för att skapa fantastiska mockups för dina produktsidor.
- Använd Prisnavigatorn för att välja ett (realistiskt) pris för din nya vara.
- Publicera produkten på båda Gelato och Shopify.
Det är allt som finns, egentligen.
Steg 5: Hantera de "extra" detaljerna

Gelatos Price Navigator gör det enkelt att ställa in dina priser, men du måste fortfarande avsluta din Shopify produktlista med några extra saker:
- En titel som attraherar dina idealkunder
- Din produktbeskrivning (uppmärksamma vad som gör varan unik, som materialen, designens ursprung eller passformen)
- Taggar och samlingsinformation
Den mest nervpirrande delen för de flesta butiksägare är oftast att ordna leveransen, men det behöver inte vara utmattande. När du har anslutit Shopify och Gelato, kommer din POD-app automatiskt att lägga till leveransprofiler i din administratörspanel. Du hittar dem i "Inställningar > Leverans och frakt" i Shopify.
Detta är det enklaste alternativet för de flesta företag, eftersom det tillåter Shopify att hämta exakta fraktkostnader från Gelato i realtid. Den enda nackdelen är att du behöver en Shopify Avancerad plan för att aktivera det.
Om du inte kan använda realtidspriser ännu är det oftast en bra idé att hålla sig till fasta priser baserade på dina genomsnittliga kostnader. Gelato kommer att visa dig vad du kan förvänta dig att betala, så att du kan utgå från det.

Steg 6: Aktivera personalisering (om du vill)
Vissa butiker behöver inte detta alls. Andra får det mesta av sina intäkter från det. Om du rör vid presenter, evenemang eller inredning är det värt att prova. GelatoMed Personalization Studio kan kunder i din butik anpassa delar av en produkt, med namn, datum och andra extrafunktioner.
Allt du behöver göra är:
- Välj en produkt som passar till egna namn eller datum.
- Lägg till personaliseringsfälten.
- Sätt upp regler så att det utskrivna resultatet blir rent.
- Publicera.
Gelato hanterar allt det hårda arbetet med att generera tryckfiler åt dig, så du öppnar bara upp en ny intäktsström med minimal ansträngning. Det tillkommer en extra kostnad för personalisering, men ärligt talat kommer du vanligtvis att tjäna mer på specialanpassade varor ändå.
Steg 7: Lägg en testbeställning
Du kan lita på mitt ord för det GelatoProduktkvaliteten är utmärkt och hoppa över det här steget, men jag skulle inte rekommendera det. Att lägga en testbeställning och faktiskt beställa en provvara är verkligen hjälpsamt. Det ger dig en inblick i hur allt flyter genom systemet och ger dig en genuin känsla för vad du kommer att få.
Dessutom är det ganska prisvärt också. När du först registrerar dig på Gelato, kan du få 50 % rabatt på kostnaden för din första provprodukt.
När du har testat allt är allt som återstår att lansera ditt nya produktsortiment. Det är där din marknadsföringsstrategi kommer in i bilden.
Steg 8: Optimera din butik för försäljning
När din butik är live, Shopify och Gelato gör det tunga tekniska arbetet, men de kan inte få folk till din dörr. Den delen faller på dig. Den goda nyheten: de flesta nya säljare tror att marknadsföring är svårare än det är. Mitt råd:
- Börja med produktsidor: Uppdatera dina beskrivningar (se till att de är tydliga och fördelaktiga), svara på eventuella frågor som dina kunder kan ha och dra full nytta av Gelatos exceptionella mockup-verktyg.
- Tänk på vem du säljer till: Det är frestande att "sälja till alla". Det är oftast kod för att inte sälja till någon. Välj en del av världen du förstår väl och håll dig till den, åtminstone till en början.
- Använd sociala plattformar: Marknadsför dina produkter på visuellt fokuserade plattformar som Instagram, Pinterest och TikTok. Överväg att samarbeta med en eller två influencers om du har råd.
- Bygg förtroende: Designa innehåll som hjälper dina kunder, som shoppingguider eller tips om hur de kan anpassa sina produkter. Bjud in köpare att gå med i din e-postlista i utbyte mot en rabattkod (som gör det lättare att nå dem senare).
- Kontrollera uppgifterna: Både Shopify och Gelato ge dig bra insikter. Använd dessa verktyg för att lära dig mer om dina kunder, försäljningstrender och de designer som folk faktiskt gillar.
Därifrån, expandera gradvis. Bygg ut samlingar med Gelatos funktion "Direktkollektioner", testa nya designer och fortsätt lära dig. Det är det fina med print on demand; du kan experimentera praktiskt taget utan någon initial risk.
Skalning med Shopify och Gelato+
Nu, som jag sa ovan, kan du hålla dig till Basic-versionen av Shopifyoch gratisversionen av Gelato så länge du vill. Vissa företag gör detta i åratal. Efter ett tag är det dock klokt att börja fundera på att uppgradera.
En högre nivå Shopify Planen ger dig djupare analyser, fler personalkonton, starkare verktyg för lagerhantering och naturligtvis den där realtidsleveranslösningen jag nämnde tidigare.
En betald Gelato planen (Gelato+) ger dig
- Snabbare produktskapande. Med Magic Mockups och produktbyggaren kan du snabbt publicera kollektioner. När din butik börjar expandera är den hastigheten viktig.
- Renare produktbilder. De bättre mockuperna gör att hela din butiksfasad ser mer professionell ut, vilket påverkar konverteringarna mer än de flesta förväntar sig.
- Lägre produktkostnader. Rabatterna förändrar dina marginaler tillräckligt mycket för att du ska kunna experimentera med prissättning eller köra kampanjer utan att känna dig pressad.
- Tillgång till bättre kreativa verktyg. Detta är bra när du bygger säsongsbetonade releaser eller nischkollektioner och behöver nya tillgångar som inte ser ut som alla andras.
- Varumärkeselement. Saker som förpackningsbilagor och etiketter får din butik att kännas som din egen butik. Det är svårt att nog betona vilken effekt det har på återkommande kunder.
- Obegränsat antal butiker och användare. Om du snurrar upp flera Shopify webbplatser (vissa säljare gör detta snabbare än de förväntar sig) kommer du inte att stöta på en vägg.
Så småningom kanske du till och med överväger Gelato Platinum. Om du hanterar flera butiker, ett stort antal beställningar eller har tillräckligt med volym för att en kontoansvarig och större rabatter ska vara viktiga, är Platinum verkligen vettigt.
Om det inte beskriver dig än, oroa dig inte. Du kommer att märka det när det är nära.
Att bygga ett företag med Shopify och Gelato
Det fantastiska med att använda Shopify och Gelato Att bygga upp sitt företag är så enkelt. Det svåraste är helt enkelt att bestämma sig för att släppa ut sina första produkter i världen. Efter det blir allting en rytm: publicera, testa, förbättra, upprepa.
Shopify ger dig butiksfasaden. Gelato ger dig produktion och fraktDu kommer med idéerna.
Det är hela ekvationen. Resten (tillväxten, finslipningen, uppgraderingarna) sker gradvis allt eftersom du lär dig vad din publik vill ha och hur ditt arbetsflöde passar in i ditt liv.
Om du behandlar detta som ett pågående projekt istället för ett enda "lanseringsögonblick" kommer du att hitta din takt, din nisch och din röst. Shopify och Gelato är bara verktygen som gör det möjligt. Det du bygger med dem är den intressanta delen.
Vanliga frågor
Här är hur Shopify ansluter med Gelato: du installerar Gelato appen, logga in och godkänn synkroniseringen. Orderflödet blir då automatiskt. Shopify skickar varje köp till Gelatooch Gelato startar distributionen utan extra steg. Det är den enklaste delen av installationen.
Nej, du behöver inte Gelato+ för att börja sälja. Gratisplanen ger dig hela katalogen och normal leverans. Gelato+ hjälper när du publicerar många produkter eftersom det erbjuder bättre mockups, rabatter och snabbare verktyg för att skapa. Uppgraderingen blir användbar när ditt arbetsflöde blir stressigt.
Shopify skickar varje beställning till Gelato, Gelato Den skrivs ut via den närmaste partnern, och spårningen visas automatiskt. Du behöver inte packa eller skicka någonting. Det här arbetsflödet låter dig växa utan att hyra lagerutrymme eller röra lagerutrymme.
Ja, du kan använda personalisering med GelatoDu lägger till namn, datum eller textfält i Gelatos redaktör, och Shopify visar dem på produktsidan. Gelato genererar utskriftsfilen när beställningen anländer. Den här funktionen fungerar bra för presentnischer.
Så här prissätter du med Shopify och GelatoTitta på baskostnaden, lägg till din marginal och ta med frakten i beräkningen. Håll det slutliga beloppet enkelt. Om du använder Gelato+, den lägre produktkostnaden ger dig mer marginalutrymme. Justera prissättningen allt eftersom du lär dig vad köpare accepterar.


Kommentarer 0 Responses