
Si estás en usando Printful Para impresión bajo demandaEs imprescindible incluir las plantillas de productos en la tienda, pero aquí está el problema:Printful No se limita a "mover" las plantillas automáticamente, sino que debe enviarlas como productos a su tienda.
He pasado por este proceso y sé que puede resultar un poco confuso. Por eso, lo voy a desglosar paso a paso para que sea muy sencillo, sin importar si estás usando ShopifyEtsy WooCommerce, Wix, u otra plataforma.
Sigue estos pasos y tus productos estarán disponibles en poco tiempo.
1. Iniciar sesión Printful
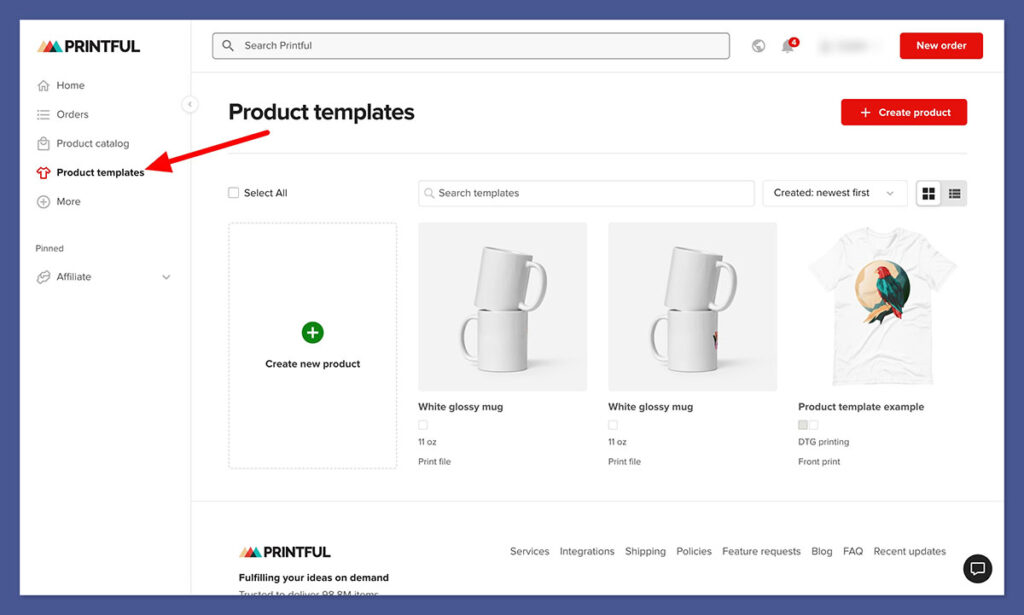
Lo primero es lo primero, yo Iniciar sesión en mi Printful ,Aquí es donde están todos mis guardados. plantillas de productos vivir.
Aquí está cómo llegar allí:
- Pásate por el Printful .
- Busque el elemento “Plantillas de productos” sección en el menú.
- Haz clic en él y verás todos los diseños que has creado.
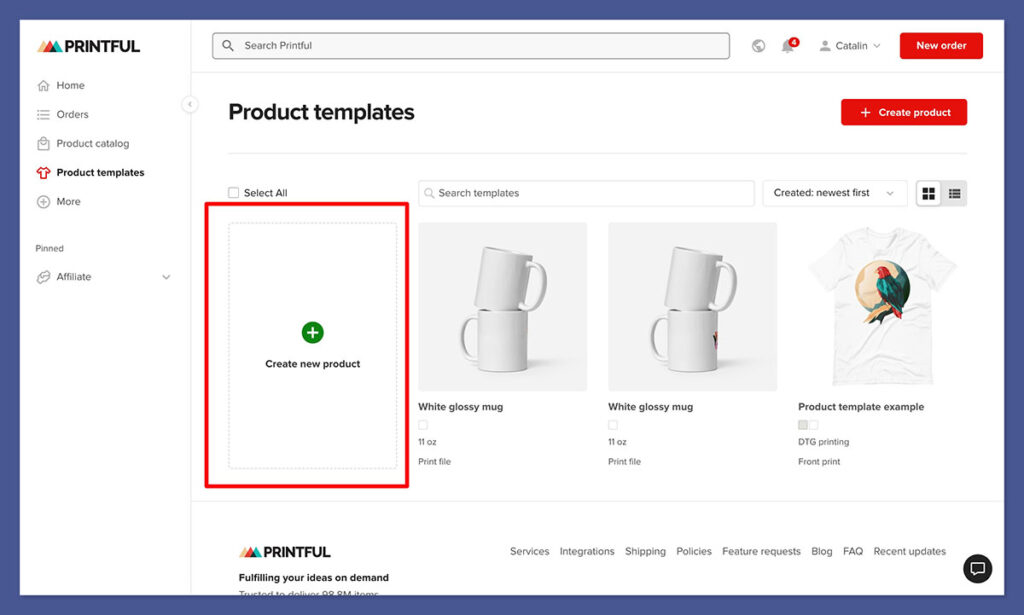
Si aún no tienes ninguna plantilla, necesitarás crea uno primero haciendo click “Crear plantilla.” Aquí es donde eliges un producto, agregas tu diseño y configuras configuraciones básicas como tamaño, colores y ubicación.
Una vez que tengas tu plantilla lista, es hora de moverla a tu tienda.
2. Elige la plantilla que deseas mover
Ahora que estoy en el Plantillas de productos En esta sección puedo buscar la plantilla específica que quiero mover. Este es un paso importante porque Printful No te permitirá mover plantillas en masa: tienes que Empujarlos uno por uno como productos.
Esto es lo que hago:
- Desplácese por mis plantillas guardadas.
- Haga clic en el que quiero agregar a mi tienda.
- Haga clic en el botón “Añadir a la tienda” .
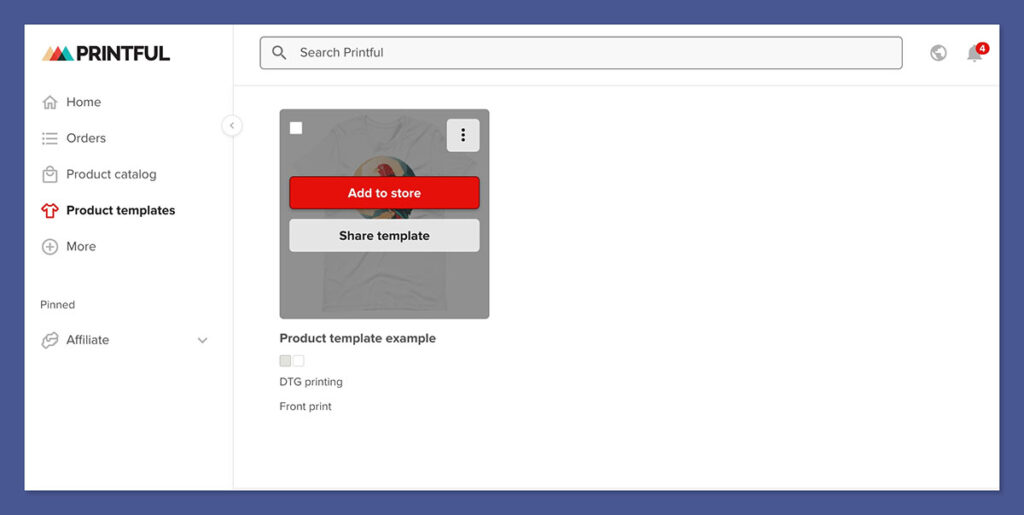
En este punto, Printful me preguntará A qué tienda quiero agregarlo.
3. Seleccione su tienda
Printful Se integra con múltiples plataformas de comercio electrónico, por lo que elijo la correcta de la lista. Las opciones más comunes son:

- Shopify (Perfecto para tiendas de marca)
- Etsy (Ideal para vendedores de productos hechos a mano o bajo demanda)
- WooCommerce (para tiendas basadas en WordPress)
- Wix (para principiantes y pequeñas empresas)
- BigCommerce, eBay, Amazon y más

Una vez que selecciono mi tienda, Printful se sincroniza automáticamente con mi cuenta. Si aún no he conectado mi tienda, Printful will Incitame a hacerlo antes de seguir adelante.
4. Personalizar los detalles del producto
Antes de lanzar mi producto, necesito ajustar algunos detalles importantes. Printful Déjame editar:
- Titulo del producto – Me aseguro de que sea claro e incluya palabras clave relevantes.
- Mareas Ideales para Lecciones – Agrego detalles atractivos del producto y palabras clave de SEO.
- Precios – Establezco mi margen de beneficio en función de PrintfulPrecio base de
- Imágenes de maqueta – Printful Proporciona maquetas, pero también puedo cargar las mías propias.
Este paso es crucial porque una vez que el producto esté en mi tienda, quiero que esté totalmente optimizado para las ventas.
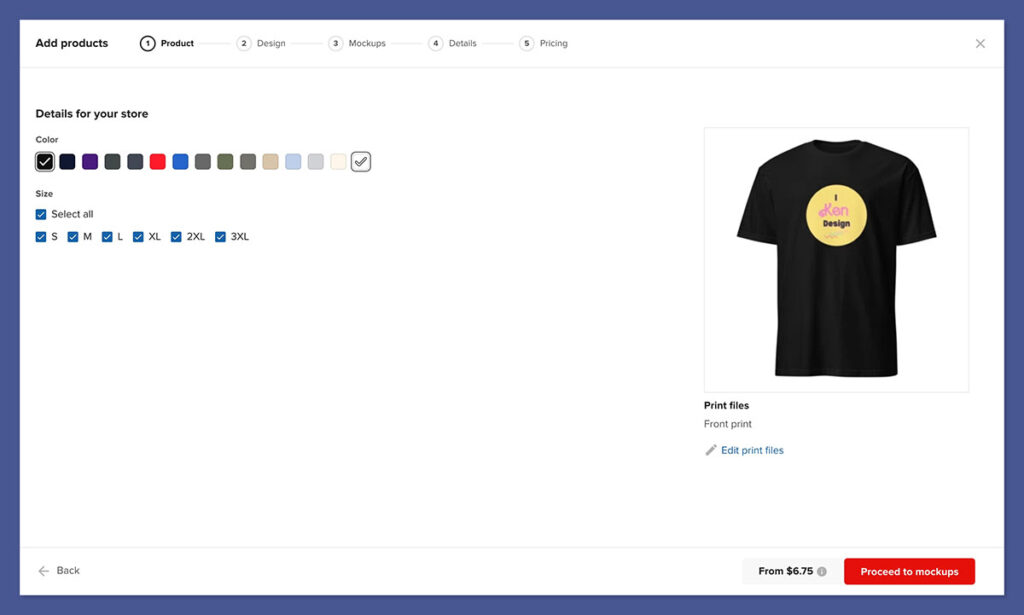
Consejo: Siempre reescribo la descripción en lugar de usar PrintfulEl predeterminado de 's. Ayuda con el SEO y hace que mi producto se destaque.
5. Publicar el producto
Una vez que todo se ve bien, golpeo “Enviar a la tienda”.
Printful entonces:
- Sincroniza el producto con mi tienda.
- Sube todas las imágenes de maqueta.
- Enumera el producto como un borrador o activo (dependiendo de la configuración de mi tienda).
En este punto, reviso dos veces mi tienda para asegurarme de que todo se ve bien.
6. Comprobación final y optimización SEO
Ahora que mi producto está activo, tomo algunos pasos adicionales para asegurarme de que esté completamente optimizado para las ventas:
- Verificar el diseño de la página del producto – Me aseguro de que las imágenes y la descripción se vean correctas.
- Ajustar la configuración de SEO – Actualizo el meta título, la descripción y el slug de la URL para una mejor visibilidad en las búsquedas.
- Pruebe el proceso de compra – Añado el producto a mi carrito para ver si todo funciona correctamente.
Una vez hecho esto, mi Printful ¡La plantilla se trasladó oficialmente a mi tienda y está lista para que los clientes la compren!
Conclusión
Emocionante Printful Agregar plantillas a tu tienda no es difícil, pero debes hacerlo paso a paso. La clave es asegurarte de que los detalles de tus productos estén optimizados antes de publicarlos.
Siguiendo este proceso, puedo convertir rápidamente mi Printful Plantillas en productos en vivo y comience a realizar ventas.


Comentarios Comentarios 0