Having said that, you should know that any site migration to Shopify (whether it’s from BigCommerce, WooCommerce/WordPress, Wix, or Squarespace) mainly focuses on transferring the site data: things like products, customers, and orders. Much of the design of your old site must be recreated inside Shopify.
With that said, keep reading to learn all about how to migrate to Shopify from another ecommerce platform.
In this article:
- Why you should migrate to Shopify from another platform
- How much does it cost to migrate to Shopify?
- How to transfer a website to Shopify (in 14 easy steps)
- Step 1: Backup and export all data from your current website
- Step 2: Sign up for a Shopify account
- Step 3: Configure basic admin settings in Shopify
- Step 4: Import all data into Shopify
- Step 6: Install a theme for your site
- Step 7: Move over your domain name
- Step 8: Configure shipping
- Step 9: Set up taxes
- Step 10: Configure a payment processor
- Step 11: Run test orders after you migrate to Shopify
- Step 12: Handle URL redirects
- Step 13: Make sure all images are transferred
- Step 14: Disable the old website
- Next steps after you migrate to Shopify
The top resources for a smooth migration to Shopify
Migrate from Wix to Shopify
Migrate from BigCommerce to Shopify
Migrate from Woocommerce to Shopify
Migrate from Magento to Shopify
Migrate from Volusion to Shopify
Why you should migrate to Shopify from another platform
Your decision to migrate to Shopify will vary based on your current ecommerce platform.
We find, however, the following reasons are typically why brands/individuals want to complete a data migration from platforms like WordPress and Wix:
- Shopify gives you everything you need to sell: it’s an all-in-one ecommerce platform, consolidating everything you need for an online store into one beautiful dashboard. That makes it more focused on ecommerce than Wix and Squarespace, and less complicated than WordPress or Magento, since all features are included.
- It’s affordable: pricing for a new Shopify store starts at $29 per year. You can even opt for the $5 per month Starter plan if you’re an influencer or content creator. Other plans include the $79 per month Shopify plan, $299 per month Advanced plan, and $2,000 per month Shopify Plus plan. The best part is that everything from hosting to domain name management is included.
- Get more features: Shopify releases new ecommerce features on a regular basis, and they listen to user requests. Some features unique to Shopify include custom report building, built-in dropshipping, streamlined checkout and shopping cart, built-in product fulfillment, industry-leading processing rates with Shopify Payments, and international commerce features like duties, import taxes, product pricing by market, and local payment methods.
- Gain access to more apps and integrations: with over 8,000 apps, Shopify offers the highest concentration of ecommerce-related apps in the business. And when compared to WordPress, Squarespace, and Wix, you don’t have to sift through apps that don’t have anything to do with ecommerce. The Shopify App Store is focused mainly on ecommerce.
- Receive industry-leading designs: themes from other platforms are generally high-quality, but Shopify is known for its beautiful themes made for specific industries. If you feel the selection of themes is lacking from your platform, or they’re too generic, consider Shopify.
- You can scale quickly: Shopify plans are designed to grow with your business. If you need more international business tools, staff accounts, or cheaper payment processing, it’s only a button click away.
Learn more about the benefits of Shopify, and reasons to migrate over, in our in-depth Shopify review.
How much does it cost to migrate to Shopify?
It shouldn’t cost you anything to migrate to Shopify, besides the monthly platform fees. But when it comes to monthly fees, you most likely spent a similar amount on Bigcommerce, Squarespace, or WooCommerce—perhaps even more.
Here are the fees to keep in mind when migrating to Shopify:
- An app to complete the migration: Free, but you can upgrade to transfer more data; plans start at $20 per month for the app we recommend.
- Platform (Shopify) subscription fee: Ranging from $29 to $399 per month for the standard ecommerce store plans.
- Payment processing: You should save money in this area. Shopify Payments starts at 2.9% + $0.30 per credit card payment, and the fees decrease for higher plans. You can get as low as 2.4% + $0.30 per credit card transaction.
- Apps: There are plenty of free Shopify apps, but many charge a monthly fee.
- Themes: You can pick from free themes, or the premium ones that cost around $100—$500 (one-time fee).
- Hosting: included with your subscription.
- Security: included with subscription.
- Optimization: included.
- Domains: domain management is included, but you still have to acquire a domain.
In addition, you may have to spend money on a redesign of your ecommerce website. Whether that means spending your time customizing a theme or hiring someone for the job (see Shopify Experts), there’s the possibility you need extra money or time to replicate or improve upon the previous website’s design.
How to transfer a website to Shopify (in 14 easy steps)
The process will vary depending on which commerce platform you’d like to migrate to Shopify. For instance, Wix has some excellent exporting tools for moving just about every piece of store data to Shopify. On the other hand, WordPress/WooCommerce allows you to export all data in one batch, cutting down on the time moving data to Shopify.
Regardless of your platform, we’ll go over the general steps required to successfully migrate to Shopify from another website builder or ecommerce platform.
Step 1: Backup and export all data from your current website
Before anything, you want to make sure that all of your data and content assets are saved from the previous website.
Most website builders and ecommerce platforms offer backup tools and export functionality. We recommend doing both. Here’s the difference:
- Backups: often save site data on the platform itself, allowing the user to reinstall an older iteration of the site.
- Exports: these send site data to external locations, like your computer, a third-party cloud service, or another server. Exports are the main files you’ll use to migrate data into Shopify. It’s best to save your exports as CSV files.
Backing up your site ensures that if anything goes wrong, you still have a version of the old site to fall back on. Exports, on the other hand, contain the data you need to migrate to Shopify.
Go to your current ecommerce platform or website builder (Wix, Squarespace, WordPress, etc.). Then:
- Complete a backup of your entire website.
- Run exports of all data you’d like to send to Shopify.
Examples of data you might want to migrate:
- Products
- Orders
- Customers
- Collections and product categories
- Blog content
- Pages
- Discounts
- Images and other assets
Save these exports into separate files on your computer. You’ll use them later to import data into Shopify.
Step 2: Sign up for a Shopify account
Go to Shopify.com and sign up for a free trial. This gives you the foundation needed to import product and customer data into Shopify. It’s also the main hub for customizing the new site.
Create a Shopify ID. This serves as your login credential. Shopify sends you to its dashboard for managing everything from orders to products, and customers to content.
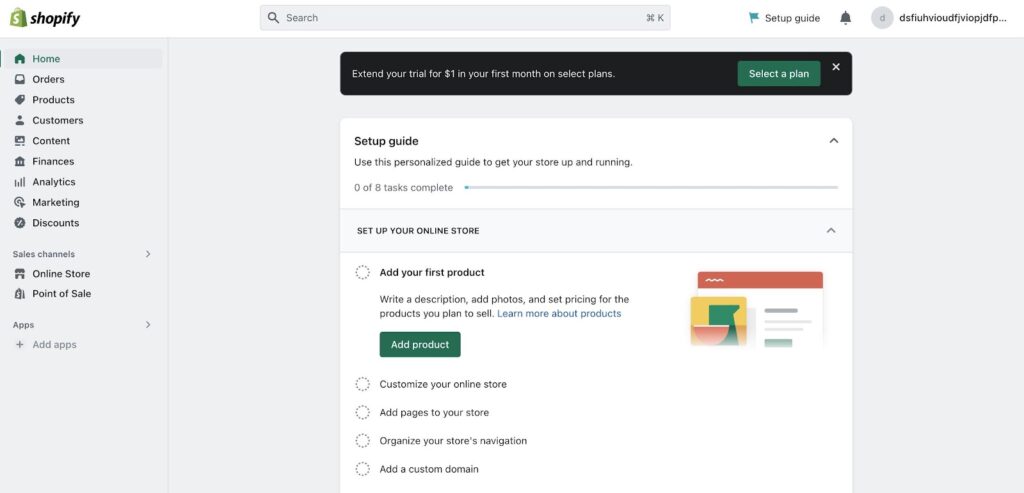
This is also where you add a theme and customize the entire layout of your online store.
Step 3: Configure basic admin settings in Shopify
Click on the Settings button in the lower-left corner of the Shopify dashboard. It’s important to set up your admin settings to ensure that your website looks and operates properly before, during, and after the migration.
Walk through these panels:
- Store details: set a store name, store email, currency, and other details like billing address and time zones.
- Plan: pick a plan to publish your website.
- Billing: add a payment method to pay for your Shopify subscription (not required during your free trial).
We also recommend getting familiar with the dashboard itself. Click around the interface to understand how Shopify works. This way, you’ll feel more comfortable after all data gets migrated to Shopify.
Most features are available on the left side menu:
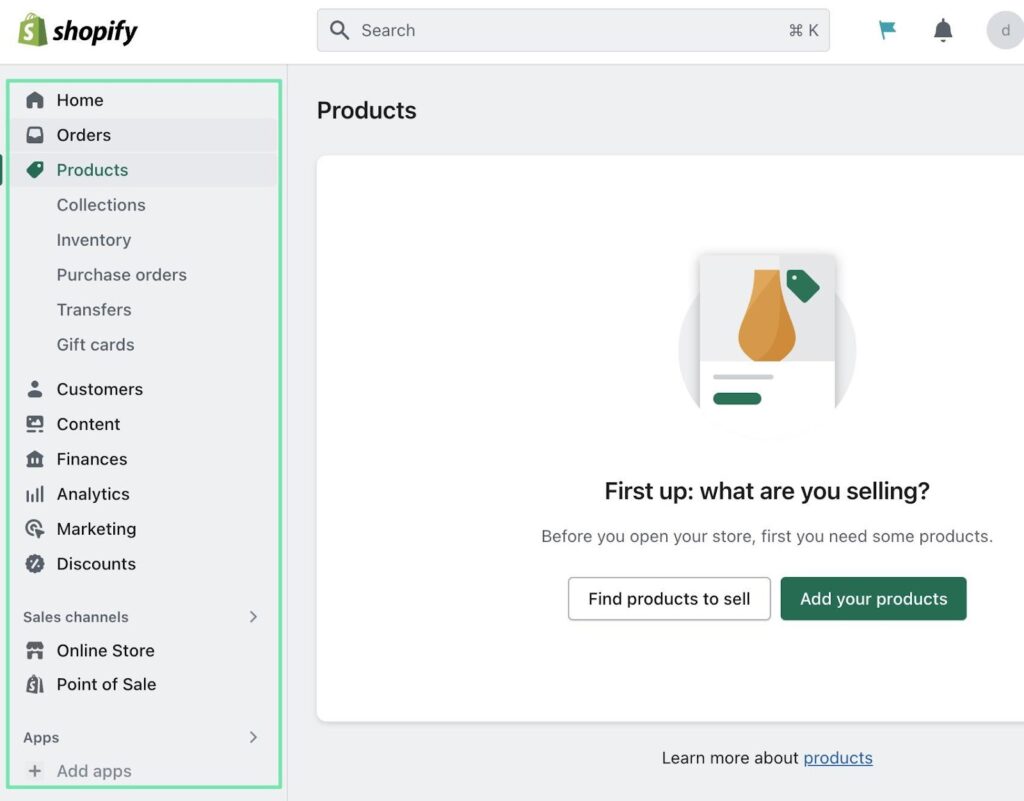
You can access:
- Orders
- Products
- Customers
- Content
- Finances
- Analytics
- Marketing
- Discounts
- Sales Channels
- Apps
Step 4: Import all data into Shopify
To migrate to Shopify, you must mark down all the data and content you’d like to move from the other platform.
Notable data includes:
- Products
- Customers
- Orders
- Blog Content
- Collections
- Pages
Go to the section of your current website to export every piece of specific data. For instance, Wix and WooCommerce both allow you to export your inventory list by going to the Products page.
Once you export the data, open the file to understand how it’s formatted from the previous platform.
Shopify has a specific format for importing data. We recommend downloading the sample import template for products to get started.
Here’s what it looks like:

With the export file also open, copy over column data to the corresponding columns. Yet, don’t change any of the column titles from the Shopify sample CSV. These must remain the same for Shopify to properly import the data.
Save that finished CSV to your computer.
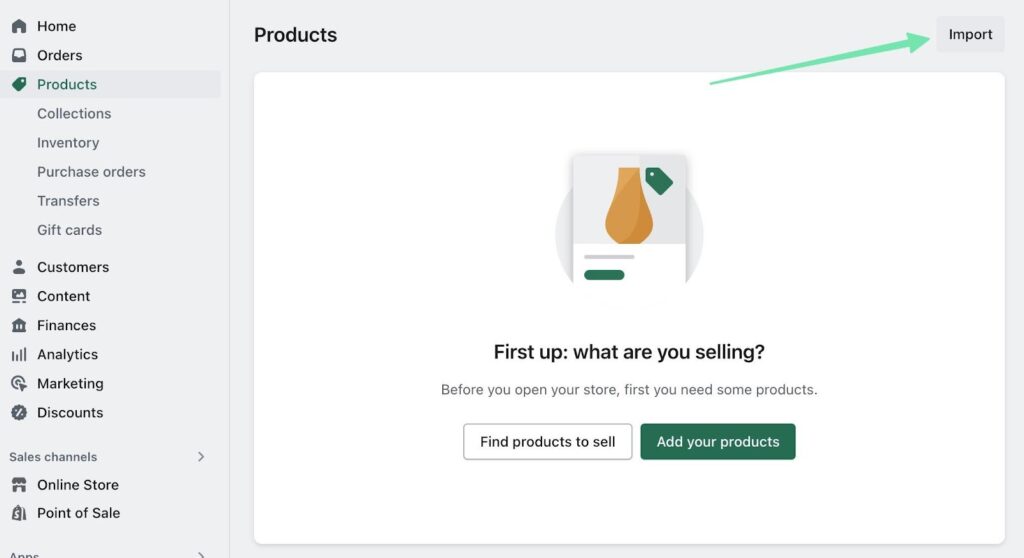
To import data into Shopify, go to the page related to what you’re trying to import. This might be the Products, Pages, or Collections pages.
For this example, we’ll import product data into the Shopify Products page.
Click the Import button.
Click Add File and find the file you just saved to your computer. You can choose to save products to all sales channels.
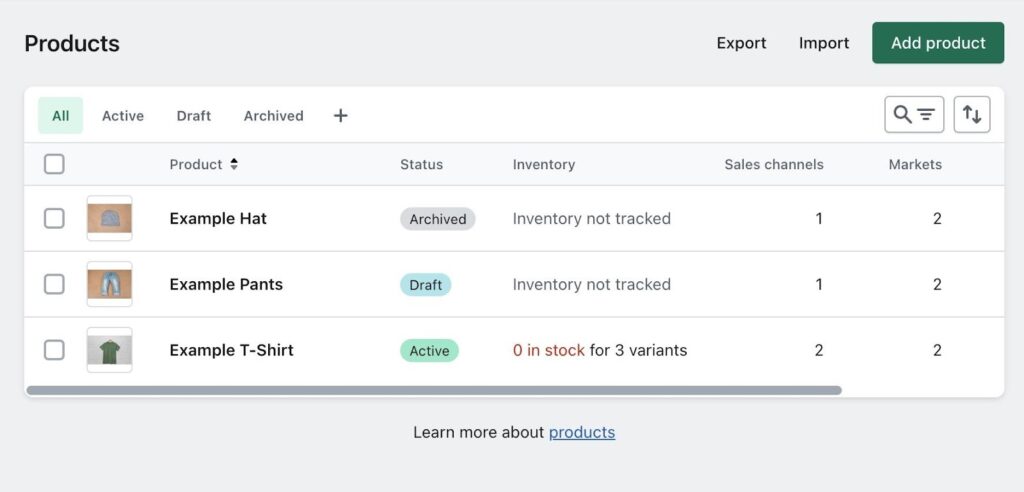
You’ll see a preview of the products. If the fields look good, click on the Import Products button.
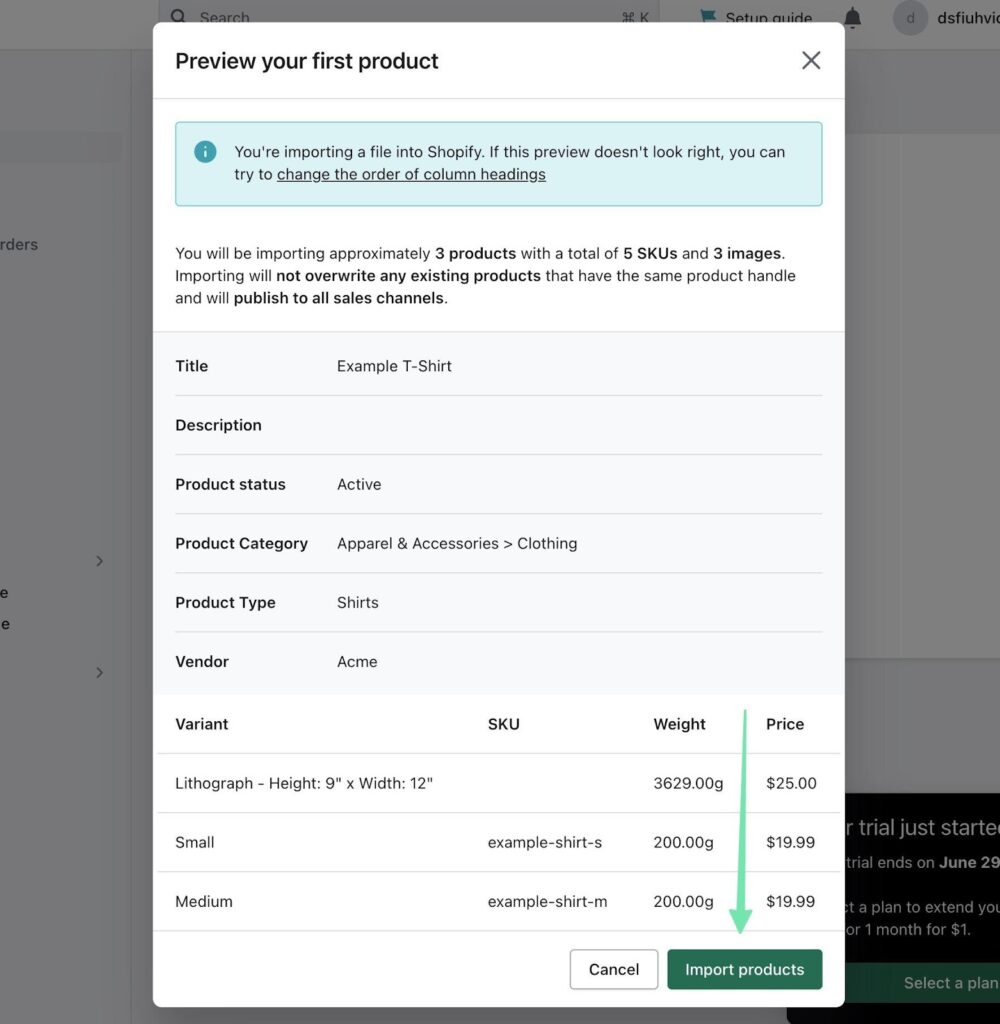
As a result, you can find the newly imported products on the Products page.
The process is the same (with slightly different formatting for the import files) when handling imports for customers, orders, and other entities. Simply complete this process for each one.
Another option to migrate to Shopify is with an app.
This automates much of the process and provides a wider range of data you can import.
Some of our favorite Shopify migration services and apps include:
Simply install these on Shopify then walk through the steps to complete the migration.
Step 5: Organize products, customers, and more
There’s a chance that not everything was migrated perfectly when importing data from another platform to Shopify.
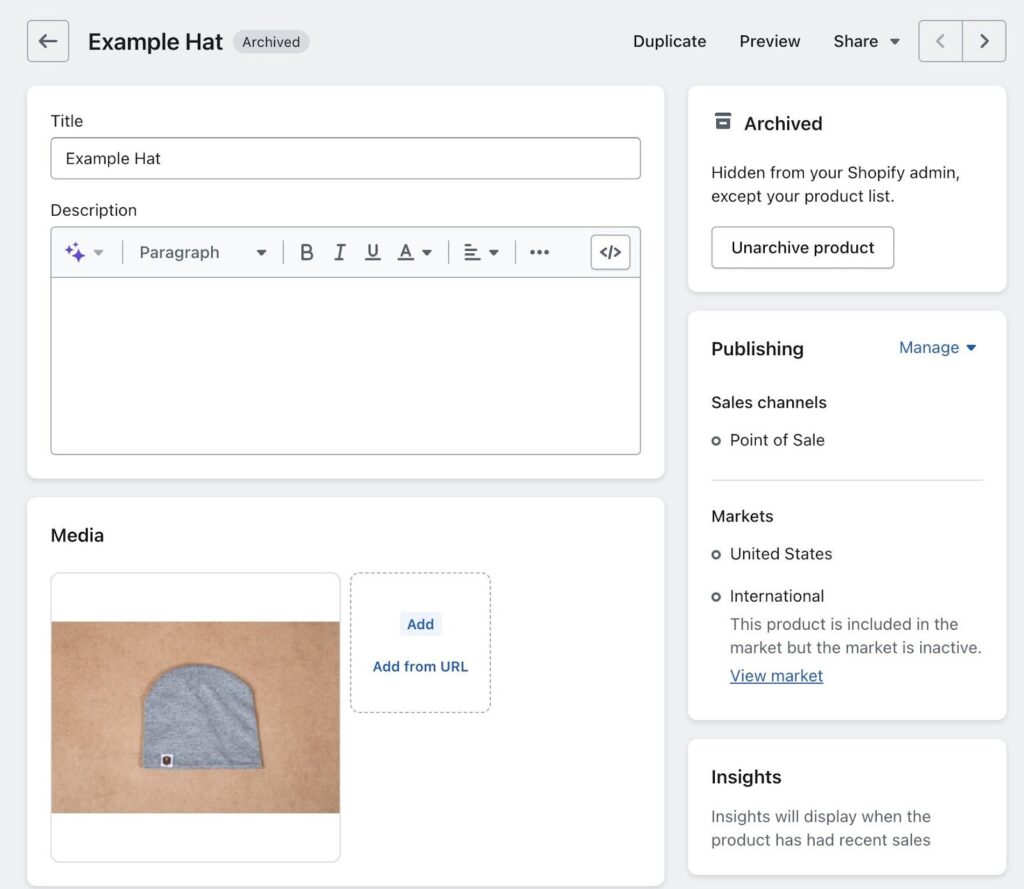
The only way to fix and solve errors is to click through the imported items. For instance, we recommend opening every product you’ve imported to ensure all data has transferred.
Make sure each product has a title, product description, sales channel, and media.
Other areas to check include the variants, categories, and collections. Many stores, for instance, want to add imported products to specific collections, like a homepage collection. If your import didn’t handle that, you can do it manually.
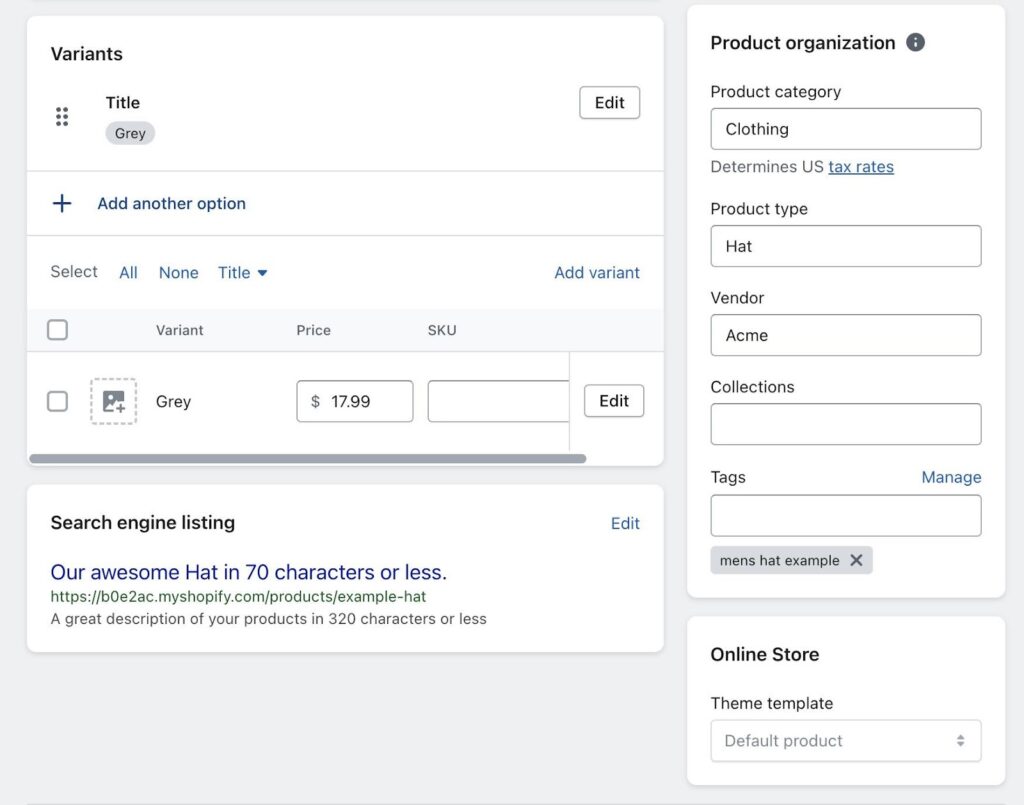
It’s also possible that the previous platform simply didn’t have the data filled in, so use this opportunity to finish customizing or creating things like blog posts and product pages.
Step 6: Install a theme for your site
One more tedious part of moving from another platform to Shopify (or vice versa) is that the design won’t automatically transfer to the new system.
You can, however, make a similar design in a matter of minutes.
To achieve that, go to Sales Channel > Online Store > Themes in Shopify. Under Theme Library, click Add Theme > Visit Theme Store.
Browse through Shopify’s themes to locate one that either improves upon your previous design or gets close to replicating it. You won’t ever be able to make an exact duplicate of a design from another platform.
Keep in mind that you can change the images, colors, and styles in any Shopify theme, so don’t spend too much time worrying about a theme not having the exact color you want.
Pick a free or paid theme and click Try Theme to install it on your Shopify site.
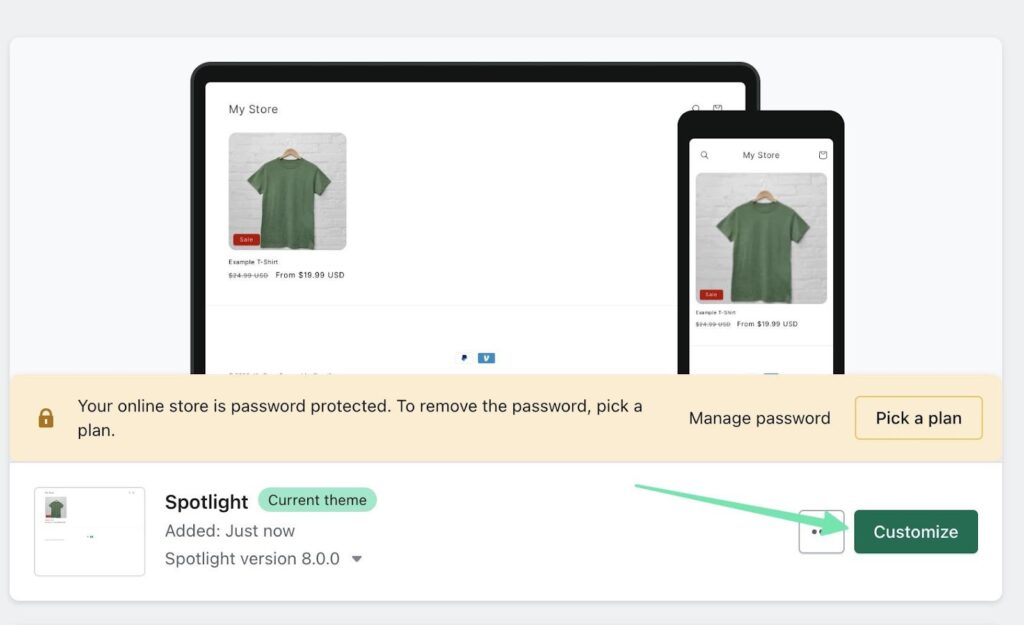
Back in the Shopify admin, find the new theme under Theme Library. Click to Publish the theme as your primary theme.

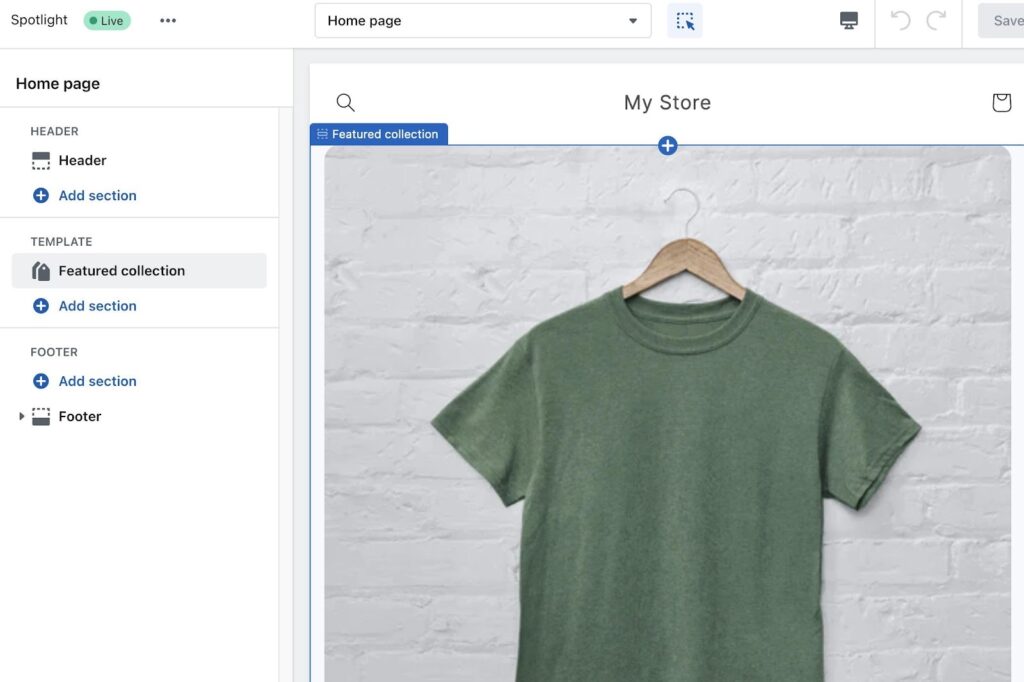
Thereafter, select the Customize button to modify everything from colors to styles, and logos to homepage content.
The Shopify page builder is where you’ll work to either replicate or improve upon the design from your previous platform. It offers buttons to add content blocks, modify theme settings, customize typography, adjust colors, and even embed apps.
Step 7: Move over your domain name
In order to publish the new Shopify site on your previous domain name, you must either point its DNS settings to the Shopify site or move it over to host the domain on Shopify itself.
The best route to take is to go to Settings > Domains in Shopify.
Here, you can either:
- Buy new domain
- Connect existing domain
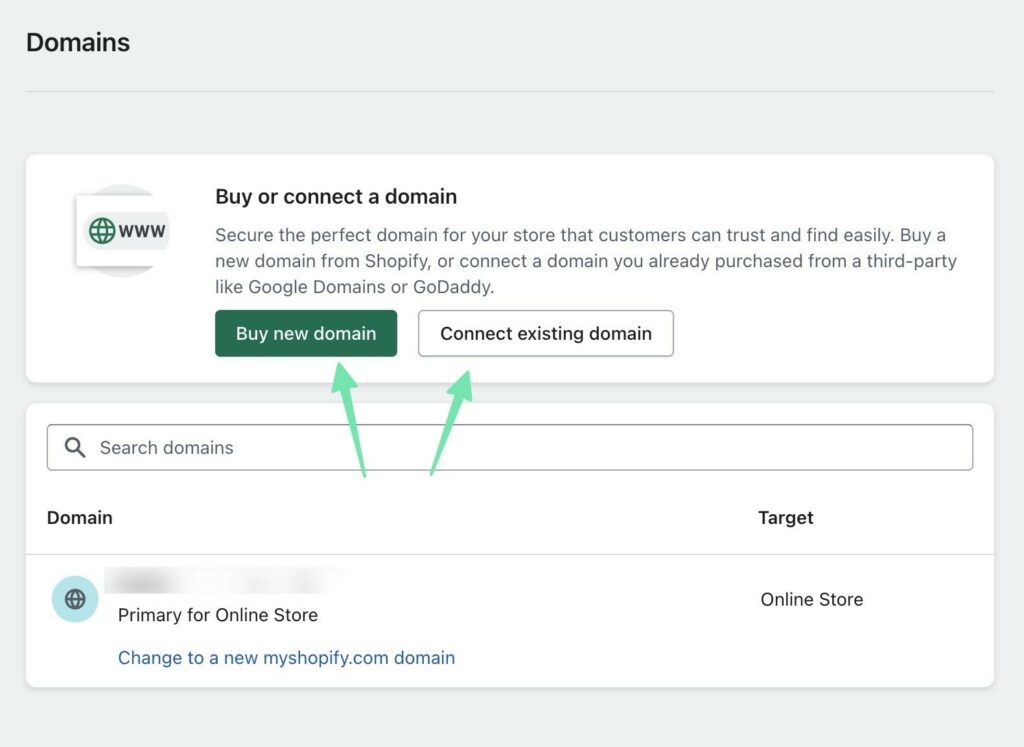
To buy an entirely new domain, you simply walk through that process and pay directly in Shopify. That’s the easiest route, especially if you intended to switch to a new domain in the first place.
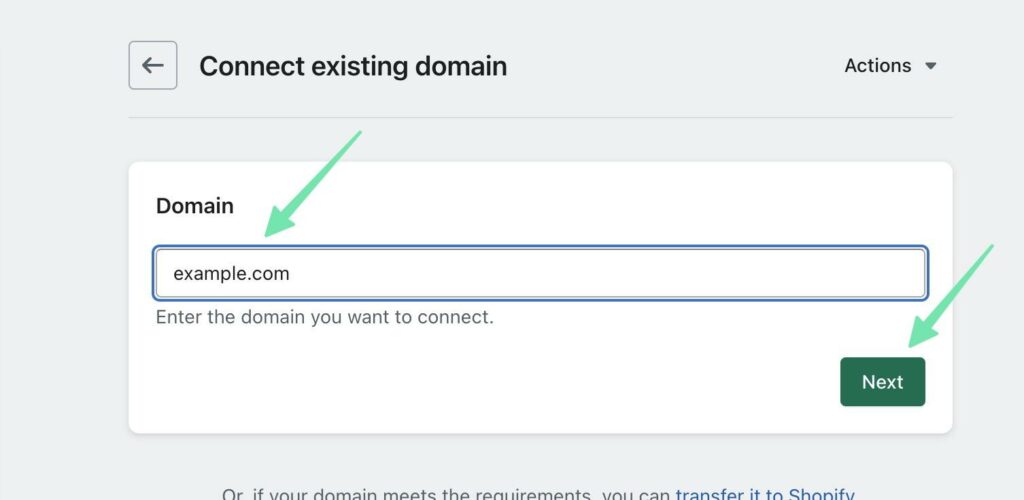
To connect an existing domain as you migrate to Shopify, choose that option, then type the domain into the Domain field. Select Next.
If it’s available to move over to Shopify, you’ll see instructions on how to verify ownership of that domain and release it to be moved to Shopify. Click on the Follow settings instructions button and walk through those steps.
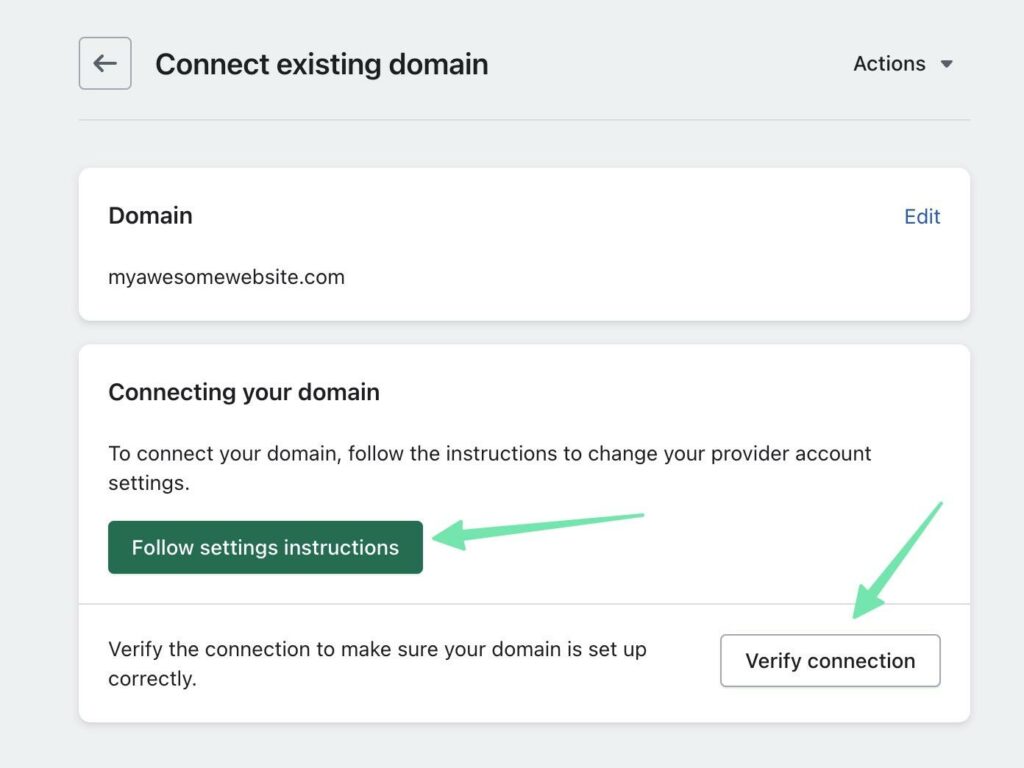
After completing the steps from those instructions, click the Verify connection button to see that the domain is now connected to your Shopify site.
Step 8: Configure shipping
On your previous ecommerce platform, you most likely had shipping configurations set for local, international, or regional shipment zones.
If that’s the case, a migration to Shopify can’t transfer these settings over. You must instead configure shipping settings manually.
To make that happen, go to Settings > Shipping and Delivery in the Shopify dashboard.

Set general shipping rates for domestic and international shipments, along with custom rates based on destination restrictions or groups.
You’ll also find settings for local delivery, processing times, local pickup, delivery customizations, shipping package sizes, and more.
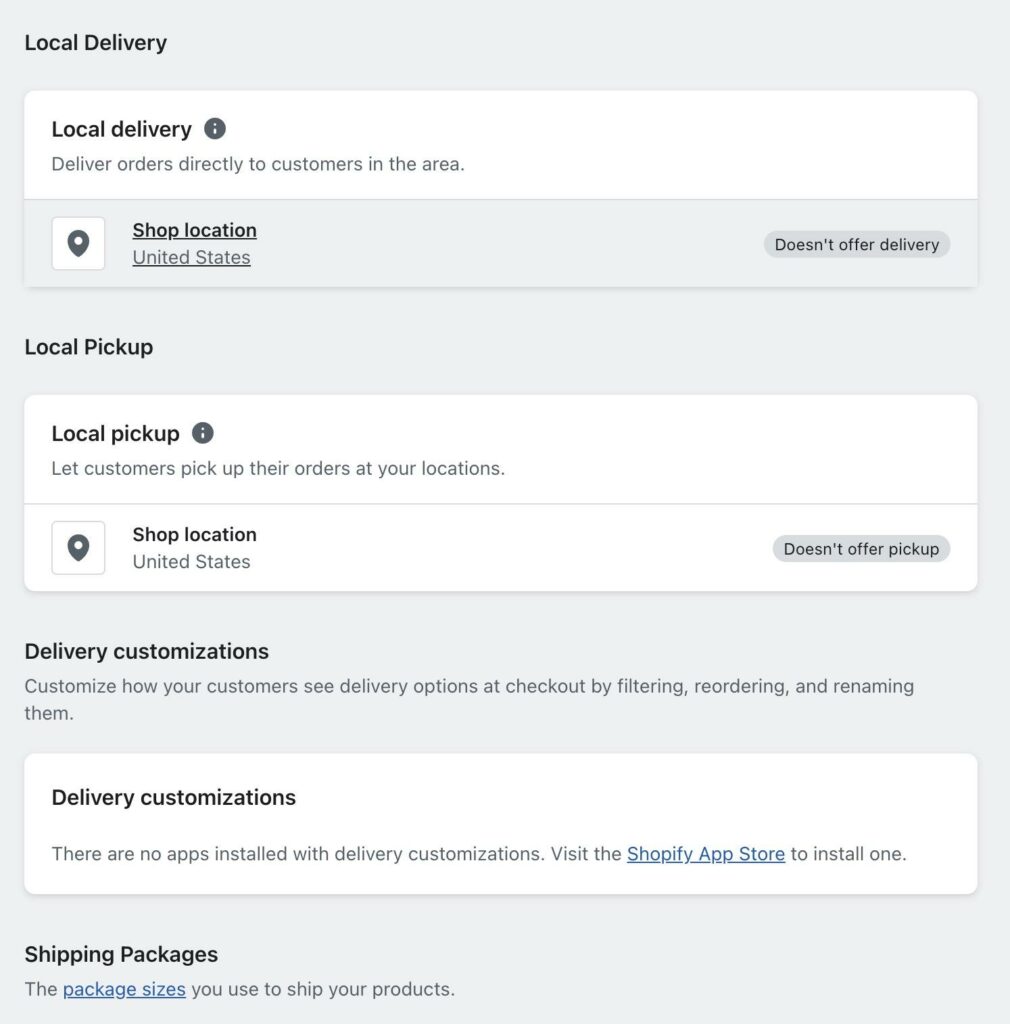
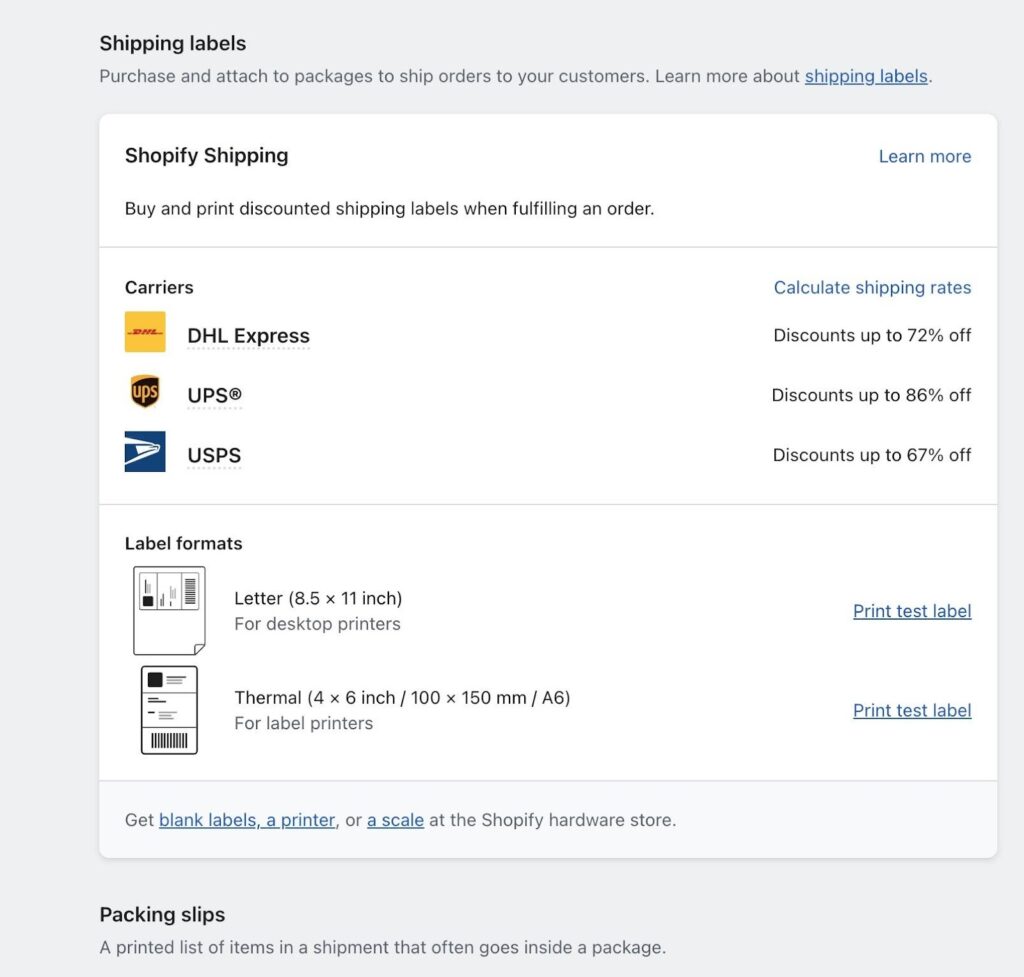
We highly recommend going to the bottom of the page to set up shipping labels and packing slips, while also connecting any custom fulfillment or carrier accounts you may have.
Step 9: Set up taxes
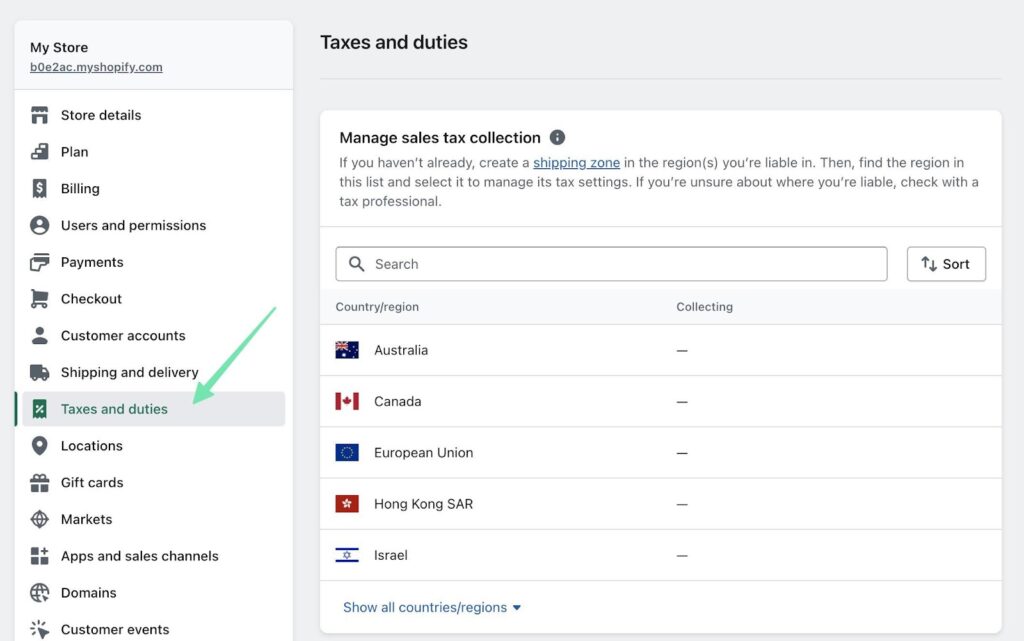
You must also set up taxes manually during a Shopify migration. That’s done by going to Settings > Taxes and Duties in Shopify.
On this page, you can manage how sales taxes are collected, filtering by country.
There’s a section for Duties and Import Taxes, along with options to decide how tax is charged. For example, you may want to include tax in prices, or charge tax on shipping rates.
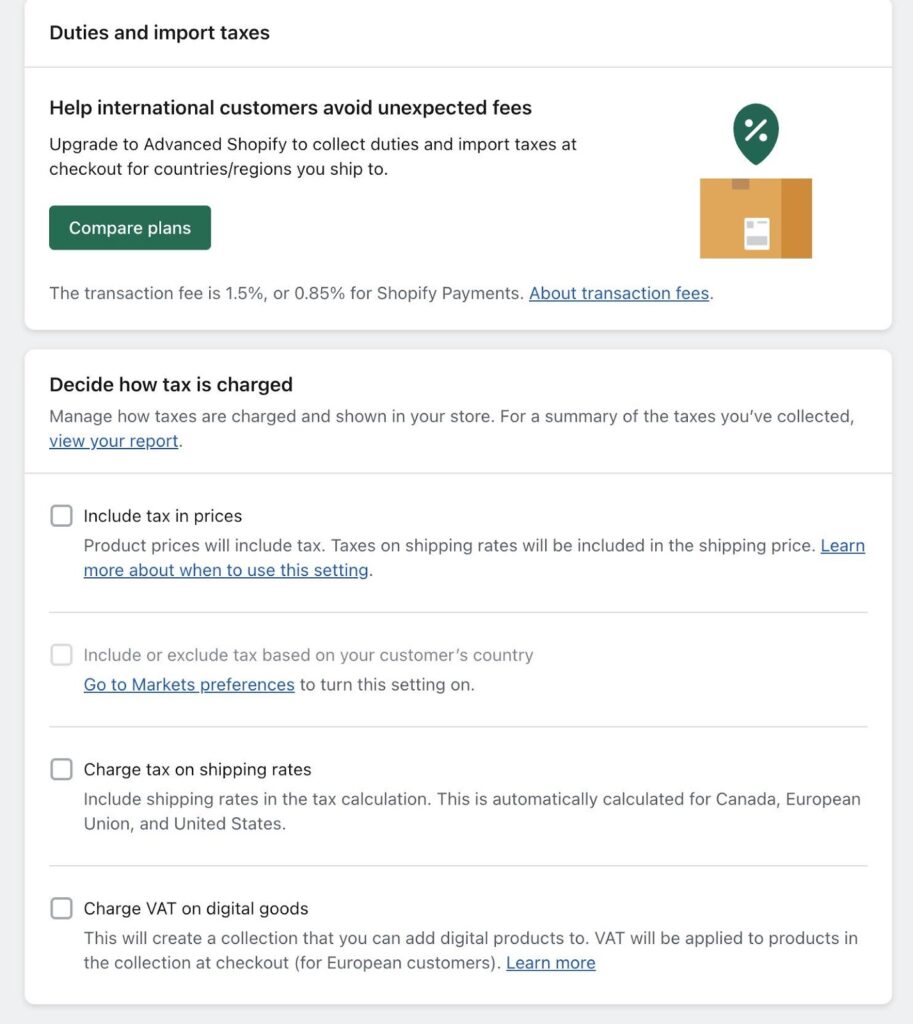
Once you’re done, be sure to save your tax setting to move onto the next step.
Step 10: Configure a payment processor
You can use the same payment processor from your previous website, but it needs to be linked manually in the Shopify dashboard.
On the other hand, you might want to consider the Shopify Payments option, since the rates are usually much lower than what you can get elsewhere.
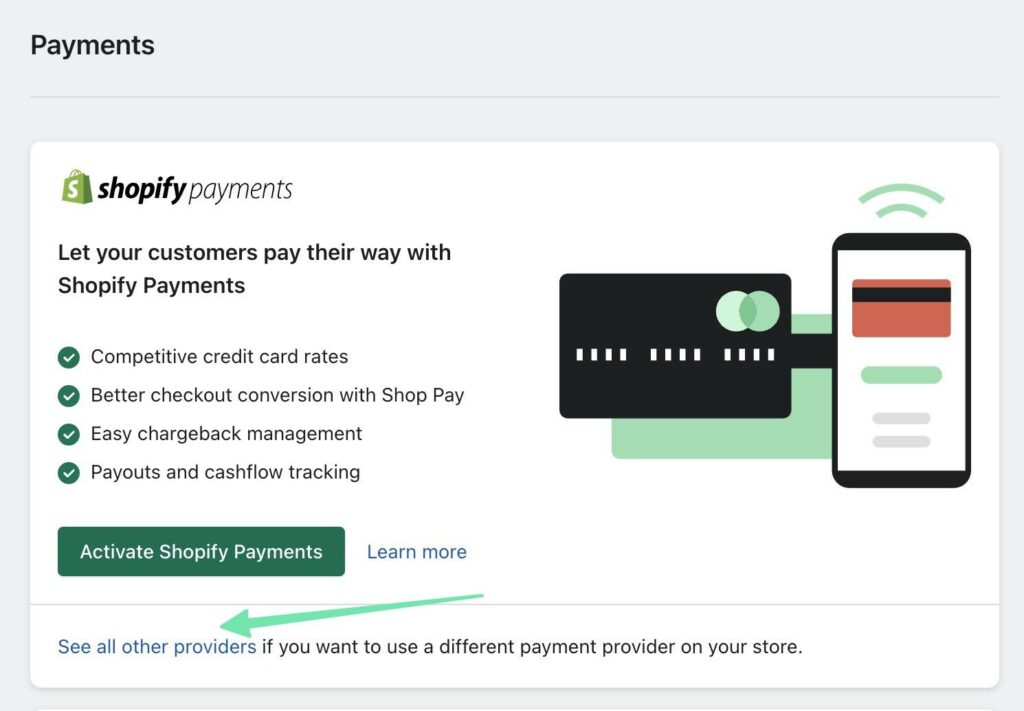
Regardless, to establish your payment processor, go to Settings > Payments in Shopify.
Click to Activate Shopify Payments, then walk through the steps to add a bank account and fill in all ecommerce business information.

Click on the See all other providers link if you’d rather connect a previously used payment gateway with your Shopify store.
Pick your desired third-party payment processor, and walk through the steps required to link it to your Shopify account.
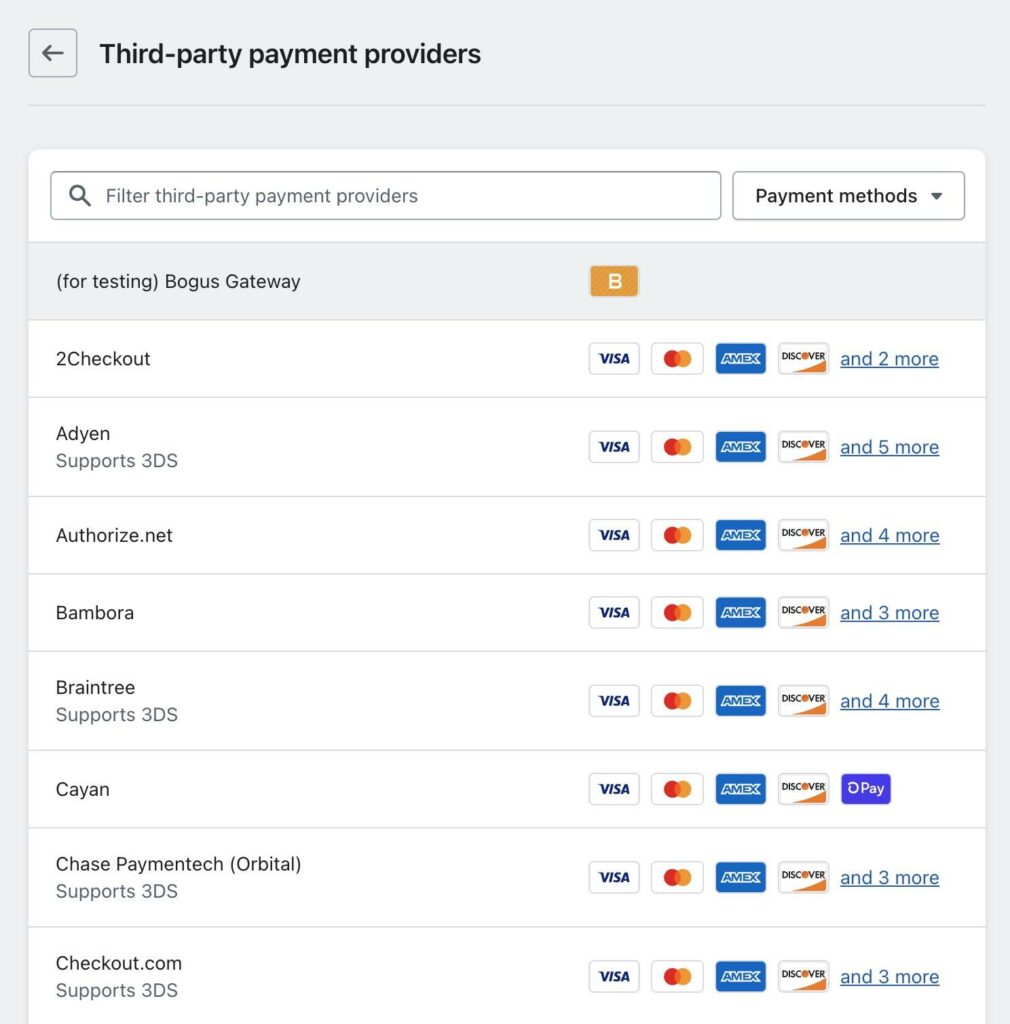
Keep in mind that although Shopify supports hundreds of payment gateways, there’s an added transaction fee for using them. The only gateway with no extra fees is Shopify Payments.
Step 11: Run test orders after you migrate to Shopify
With a payment gateway and taxes configured, you should have all the elements necessary to see if a test transaction can go through Shopify. In order for a test transaction to work, you must activate a Shopify plan. This also allows you to publish the website and manage other aspects of the site.
Switch your payment gateway to Test Mode to run a transaction without charging any of your cards. A test helps with viewing the order process, and to understand the entire flow of transactions inside Shopify.
Step 12: Handle URL redirects
Some customers will still go to the same URLs you had before. It’s also possible that some blogs and websites have linked to old URLs from the previous site. There’s almost no avoiding it.
Luckily, you have a solution in URL redirects. Essentially, URL redirects let you send any traffic from your old site to a relevant webpage on the new Shopify website.
You generally handle URL redirects on the old platform, or through your domain’s DNS settings.
Step 13: Make sure all images are transferred
With Shopify, many of the images and media assets get transferred from the product migration process. However, you must still upload things like homepage images and logos. Some apps allow you to transfer over image data from pages, but it’s not always a guarantee.
We recommend downloading all images and videos from the previous website to a dedicated folder for media assets.
When you test out the new Shopify site, mark down areas that usually had images, then upload them from your computer. You might also find some broken images on things like blog posts, product pages, and webpages. If that’s the case, be sure to replace them with newly uploaded images.
Step 14: Disable the old website
The last step of the process is to go to your old platform and disable the website. We generally recommend you keep the old site for a few months just in case you need to grab any media assets left behind, or if you need to remember how a page was designed. It can also help with URL redirects.
Otherwise, there’s no reason to have two websites for the same business (since that can damage SEO, and it costs you money). As such, go ahead and deactivate the website that previously held all your ecommerce content. For a SaaS platform like Wix or Squarespace, this means cancelling your subscription. For a self-hosted solution like WordPress/Wix, you simply have to cancel your hosting plan.
Next steps after you migrate to Shopify
Moving forward, your job as a new Shopify site owner is to make as many sales as possible!
With Shopify, you can run marketing campaigns, tap into the API, create advertisements, and even source products directly from the suppliers. We recommend running tests on your site from time to time, and exploring the many features available through Shopify that may have not been provided through your other platform.
Are you planning to migrate to Shopify from another platform? If so, how’s it going?

