
선택 전자 상거래 플랫폼 쉬운 결정과는 거리가 멀어요 그들 중 일부는 더 나은 가격을 제공하는 반면 다른 것들은 아름다운 템플릿으로 유명합니다. 에서 Shopify 에 WooCommerce 과 Squarespace 에 BigCommerce, 그들은 모두 장단점이 있습니다.
그러나 매끄러운 인터페이스를 보장하고 놀라운 테마를 얻고 싶다면 잘못 갈 수 없는 것 같습니다. BigCommerce. 가격은 상당히 경쟁력이 있으며 BigCommerce 더 큰 회사로 성장하는 데 도움이되는 것으로 알려져 있습니다.
이번에 BigCommerce 튜토리얼, 우리는 온라인 상점을 시작하는 방법에 대해 이야기 할 것이다 BigCommerce제품 추가 및 상점 테스트에 대한 팁과 함께
궁극적 인 BigCommerce 온라인 상점 시작에 대한 학습서
BigCommerce 신용 카드없이 14 일 무료 평가판을 사용합니다. 따라서 BigCommerce 귀하의 비즈니스에 적합한 플랫폼인지 확인하십시오.
우리의 1 단계 BigCommerce 튜토리얼 : 계정 만들기 Bigcommerce
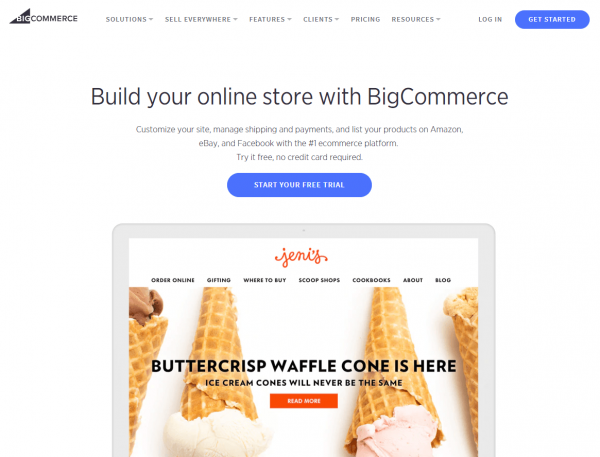
로 이동하여 프로세스를 시작하십시오. BigCommerce website. Feel free to look at the wide range of resources and support documents provided on the site.
You can also check out things like pricing and features, guiding you to make an informed decision on whether or not BigCommerce 당신에게 맞습니다. 당신이 결정한 후에 Bigcommerce, 이제 우리를 걸을 시간이다 BigCommerce 길을 따라 실수하지 않도록 튜토리얼.
일단 당신이에 BigCommerce 홈페이지에서 시작하기 버튼을 클릭하십시오. 동일한 기능을하는 다른 버튼이 몇 개 있습니다. 예를 들어 무료 평가판 시작 버튼을 선택하면 동일한 페이지로 연결됩니다.
이제는 BigCommerce 계정. 첫 번째 창은 이메일 주소를 묻습니다. 주소가 정확한지 확인하십시오.formation (like your login details and website link) is sent to that particular email address.
Keep in mind, you can change this email later in your profile. Now, click on the Continue to Store Details button.

좋은 점 BigCommerce 신용 카드를 요구하지 않는다는 것입니다.format계정을 시작합니다. 이렇게 하면 기본 기능을 테스트한 다음 준비가 되면 스토어를 게시할 수 있습니다.
다음 창에서 원하는 상점 이름을 입력하십시오. 온라인 상점을 무엇으로 불러야할지 잘 모르겠다면 최종 결과에 가까운 것을 생각해보십시오. 이름이 웹 사이트의 일부 영역에 표시되므로 실제로 이름을 생각할 때이 이름을 조정하는 것을 잊지 마십시오.
계정 비밀번호를 만드십시오. 당신은에 로그인합니다 BigCommerce 이메일 주소와 비밀번호가 포함 된 대시 보드.
요청하는 필드에 성과 이름을 입력하십시오. BigCommerce also requests that you type in your phone number.
In my experience, this usually means that you might get a call from a salesperson or someone from the technical support team that wants to help make sure that your site is launched properly. Finally, BigCommerce asks about the size of your online business.
This doesn't really affect how your account works, so you can say that you have no sales or specify how much in sales you've had on an old site. After that, click on the Create Your Store button to proceed.

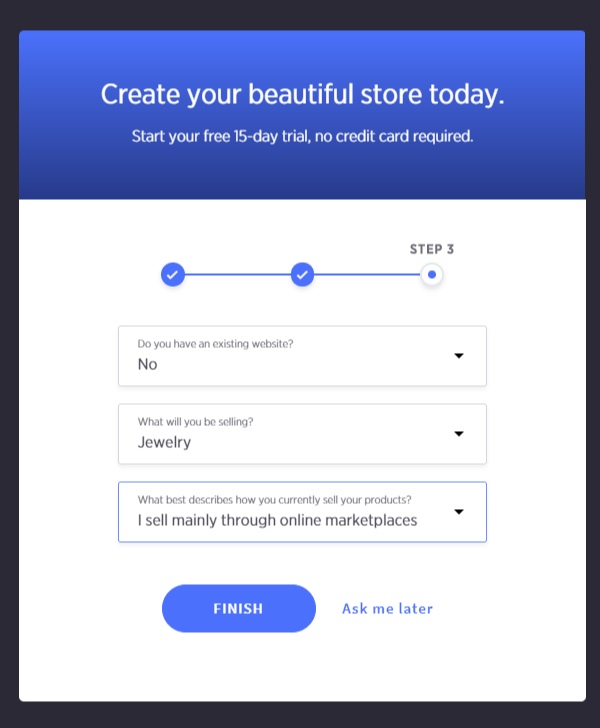
원하는 경우 다음 상자를 건너 뛸 수 있지만이 경우 BigCommerce tutorial, we're going to walk through all of the steps just so you know exactly what might be worth filling in. The first drop-down menu asks if you already have an existing website or not.
The reason this might be valuable is because the BigCommerce 기술 지원팀에서 실제로 전화를 걸어 귀하의 웹 사이트를 BigCommerce 플랫폼. 기존 웹 사이트가없는 경우 "아니오"옵션을 선택하면 계속 진행할 수 있습니다.
You can also select what you'll be selling on your website. For example, you may select jewelry or clothing or anything else from the long list of industries.
마지막으로, BigCommerce asks what best describes how you currently sell your products. If you primarily sell through online marketplaces like Amazon and Etsy, feel free to specify that.
If you've never sold anything online in your life, you can mark that down as well. After that, click on the Finish button to get started building your store.
2 단계 : 테마 추가
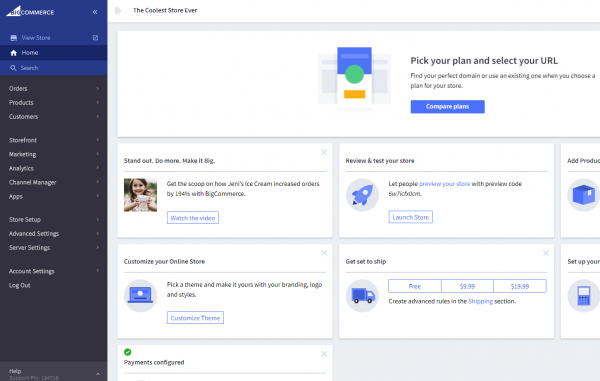
당신이에 착륙하면 몇 가지를 알 수 있습니다 BigCommerce 계기반. 예를 들어, BigCommerce 사이트를 온라인으로 게시하기위한 URL을 계획하고 선택하십시오. 우선, 지불을 시작하기 전에 사이트를 구성하고 설정에 익숙해지는 것이 좋습니다. Bigcommerce. 대시 보드의 장점은 상점에 필요한 모든 요구 사항이 기본 페이지에 요약되어 있다는 것입니다. 따라서 단추를 클릭하여 테마를 사용자 정의하거나 제품을 추가하여 시작할 수 있습니다. 유용한 지원 문서 및 사례 연구도 있습니다.
이번에 BigCommerce tutorial, we'll begin by adding a theme and customizing that theme to make it look suitable for your own business and industry.
Navigate over to the sidebar menu and click on the Storefront option. Then, choose the My Themes tab. This brings you to an area that allows you to select from a wide range of prebuilt themes.
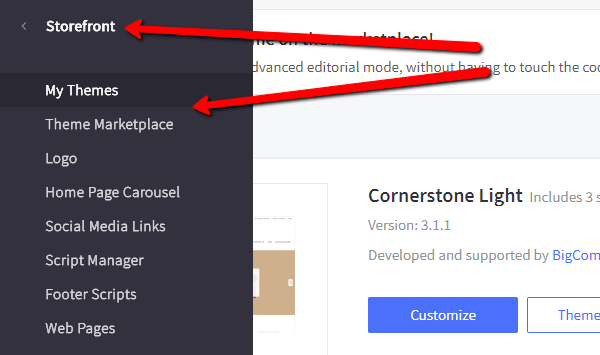
BigCommerce offers dozens of free and paid themes to choose from. Feel free to change the filter bar so that you can only see free themes or certain themes that are from specific industries. In my opinion, it's best to look at the paid themes, since they are better designed and they seem to have more options that are more suitable for a modern online store.

That being said, some of the free themes are still pretty nice looking and can be helpful for a small startup 제한된 예산으로.
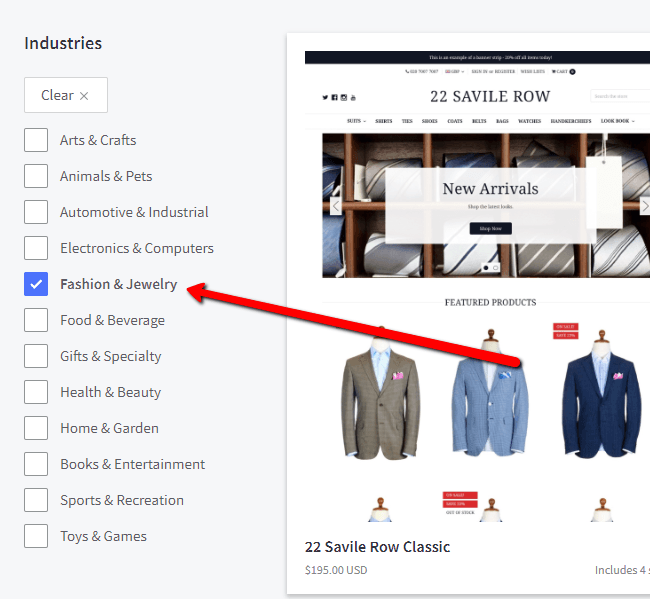
이 튜토리얼에서는 패션 및 주얼리 카테고리를 선택하고 무료 테마에 대한 필터를 선택합니다. 이것은 내가 원하는 산업에만 맞는 괜찮은 템플릿으로 좁 힙니다.
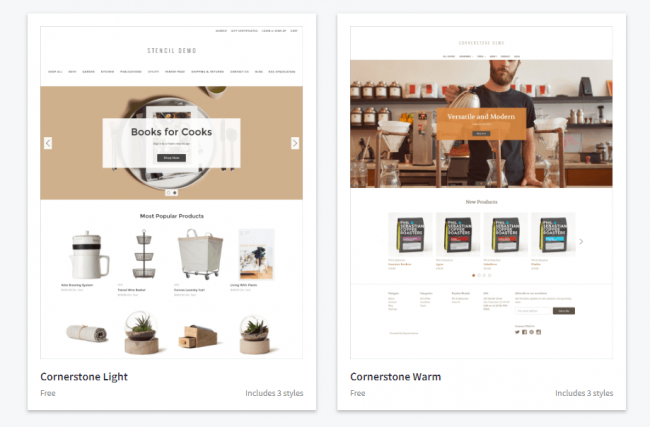
What's also interesting is that you don't necessarily need to choose a theme that is built for your industry. If you enjoy designs from a different industry, it's still possible to customize the theme and add all of your products so that it suits your own business.
For example, I noticed one theme that seems to be for selling furniture and another that has coffee products.
Both of them are minimalistic and modern, with plenty of white space–which is exactly what I'm looking for. The only thing I would have to do is swap out the example products for items that I plan on selling.
올바른 테마를 찾으면 내 테마에서보기 단추를 클릭하십시오.
3 단계 : BigCommerce 테마
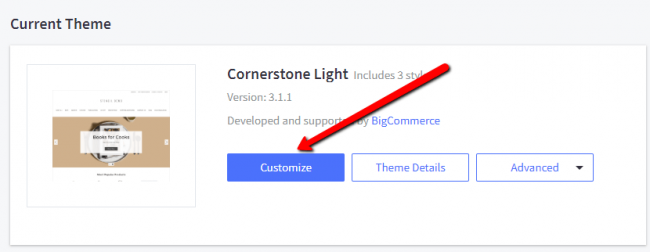
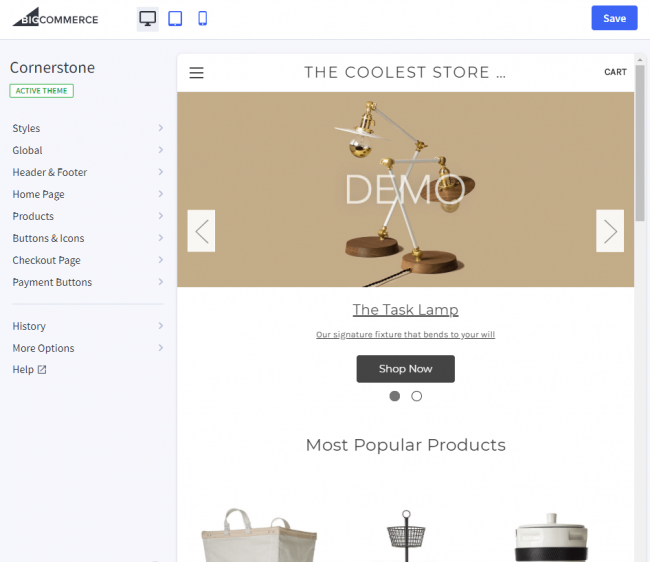
대시 보드로 돌아 오면 방금 사이트의 현재 테마로 선택한 테마가 표시됩니다. 테마 편집을 시작하려면 사용자 정의 단추를 클릭하십시오.
사용자 정의 영역에는 스타일, 글로벌, 홈페이지 및 제품과 같은 몇 가지 메뉴 탭이 있습니다. 우리는 이것들을 모두 다루지는 않겠지 만 온라인 상점을 시작하기 전에 적어도 이것들을 클릭하고 어떤 커스터마이징 옵션을 이해하는 것이 중요합니다.
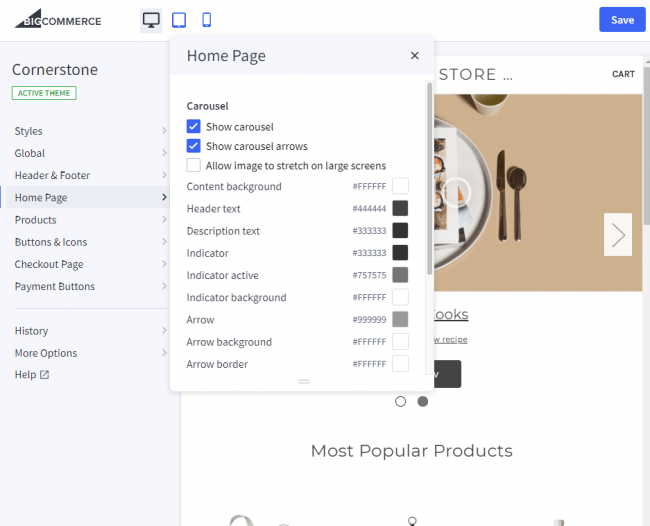
예를 들어 홈페이지 메뉴 탭을 클릭하면 BigCommerce reveals several checkboxes and color settings that are applied directly to my homepage. So, if I wanted to remove the carousel, it would only take the click of a button.
There are also several options for editing colors for items like text, indicators, and arrows. As mentioned before, these colors apply to your branding and should be adjusted as needed.
4 단계 : 로고 추가
여러 가지 브랜딩 설정이 필요하지만 로고 삽입은 가장 먼저해야 할 일 중 하나입니다. 상점 첫 화면 메뉴에서 로고 단추를 클릭하십시오.
This page asks if you would like to enter text to display as your logo or if you would rather upload a custom image to use as your logo.
As you can see, I uploaded the Ecommerce Platforms logo and decided that I would like to optimize the logo to fit my theme. You also have the option to adjust the position of your logo by launching the theme editor.
5 단계 : 제품 생성 및보기
첫 번째 제품을 만들려면 제품 메뉴 항목으로 이동 한 다음 추가를 클릭하십시오.
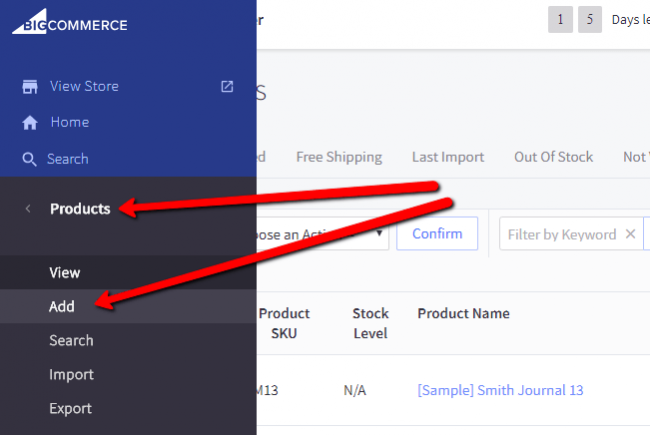
여기서 테마에 추가 된 모든 샘플 제품을 볼 수 있습니다. 그러나 자체 제품을 업로드하려면 상단의 추가 버튼을 클릭하십시오.

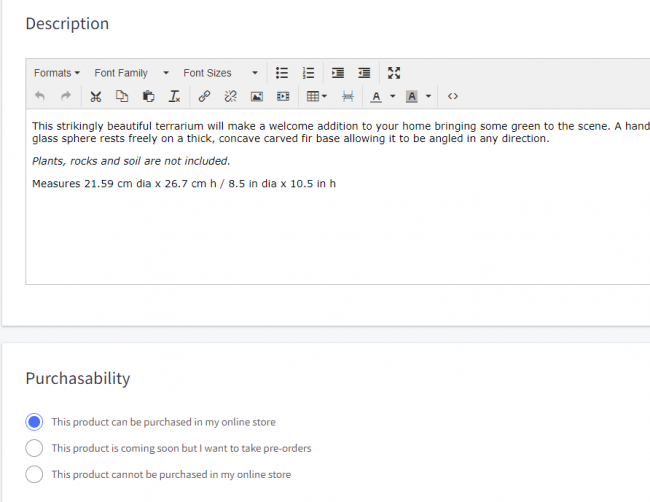
여기에서 제품 정보를 추가하기 시작합니다. 제품 이름, 기본 가격을 입력 한 다음 제품을 넣을 카테고리를 선택하십시오.
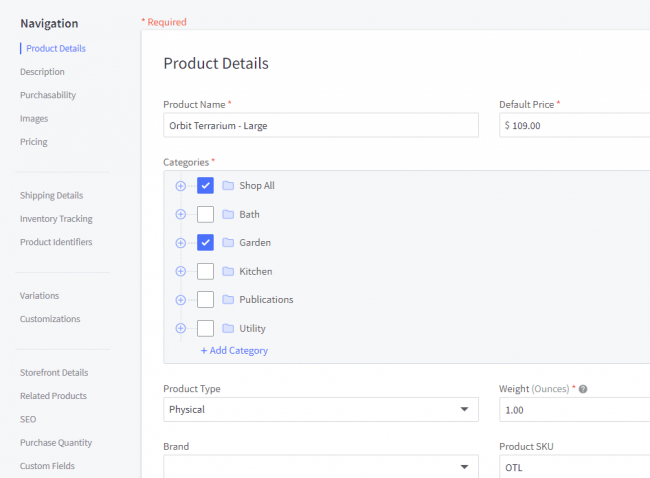
페이지를 아래로 스크롤하여 설명을 입력하고 온라인 상점에 제품을 표시할지 여부를 선택하십시오.
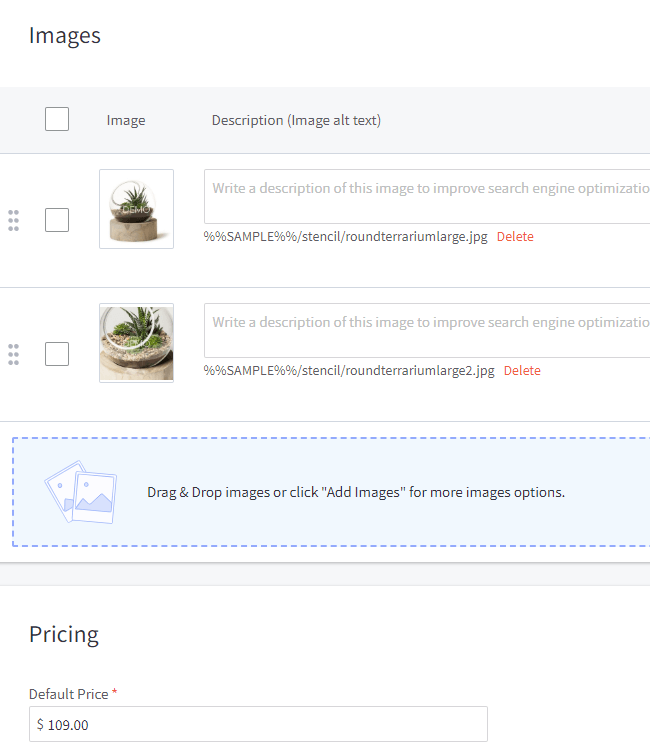
또한 상품에 대한 여러 가지보기를 고객에게 제공하려면 상품 이미지를 업로드하는 것이 중요합니다.
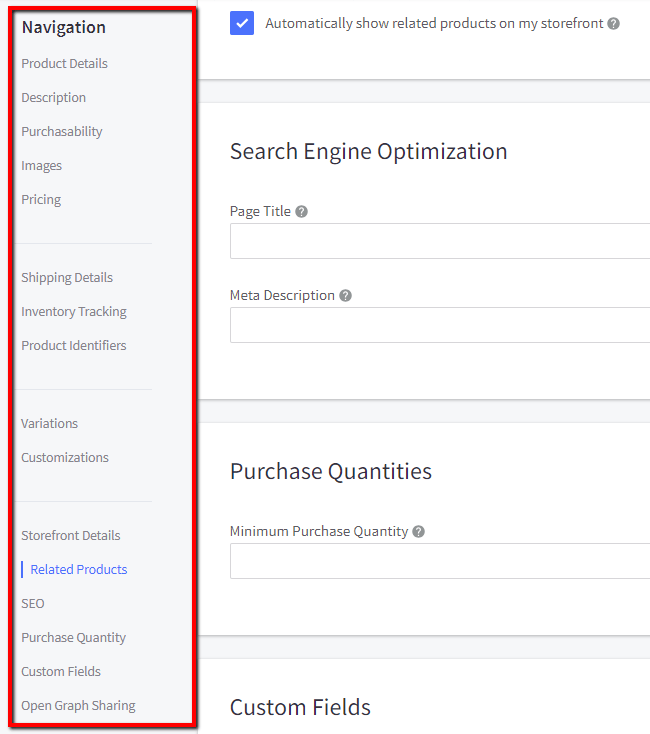
우리는 이것에 대한 모든 제품 설정을 거치지 않을 것입니다 BigCommerce 자습서, 유사 콘텐츠, SEO 및 구매 수량과 같은 모든 메뉴 항목을 클릭하는 것이 좋습니다. 완료되면 제품을 저장하십시오.
6 단계 : 프런트 엔드 테스트 BigCommerce 스토어
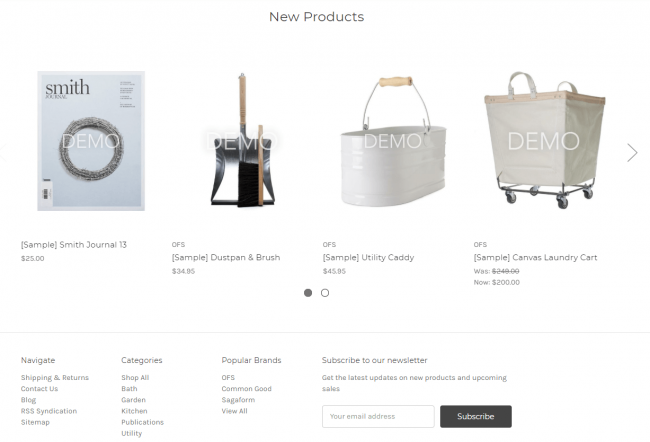
대시 보드에는 프런트 엔드에서 제품을 미리 볼 수있는 버튼이 있습니다.

전체 웹 사이트를보고 어떤 요소가 좋아 보이는지 결정할 수 있습니다.
우리의 마지막 단계 BigCommerce 튜토리얼
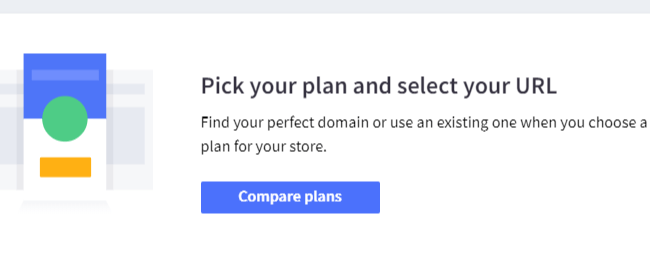
마지막 단계는 계획을 비교하고 URL을 선택하는 것입니다. 그런 다음 호스팅 및 웹 사이트 구축 도구에 대한 월별 요금을 지불하기 시작합니다. 또한 상점을 시작하고 판매를 시작하십시오.
사이트를 시작할 준비가 되셨습니까?
이번에 BigCommerce 튜토리얼에서는 계정 생성에서 제품 추가에 이르기까지 모든 것을 다루었습니다. 질문이 있으시면 아래 의견에 알려주십시오!
그리고 우리를 확인하는 것을 잊지 마십시오 BigCommerce 리뷰 플랫폼에 대한 자세한 내용은


코멘트 0 응답